Blackmagic Design
https://support.cyanview.com/docs/Integrations/Blackmagic/blackmagiccameracontrol
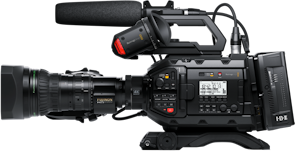
Blackmagic cameras can be controlled in three ways:
- IP: directly to the camera using the REST API
- SDI: metadata sent through the camera's program (PGM) input
- IP to an ATEM: the ATEM then controls the camera via the SDI return feed (in this setup, camera control is still SDI-based)
What each method needs
| Method | Cyanview equipment | Camera-side requirements / preparation | Configured on |
|---|---|---|---|
| IP | RCP (or RIO) | A model that supports IP control (REST API) with firmware that supports it. A USB-C to Ethernet adapter for models without an RJ45 port. Network setup in Blackmagic Camera Setup | RCP / RIO |
| SDI | RCP + RSBM + CI0 or RIO, or RCP + CI0BM | A model that supports SDI control. An SDI signal fed into the camera's PGM (return) input | RCP (RIO when using a RIO) |
| Via ATEM | RCP + an existing ATEM switcher | The ATEM's SDI program output is connected to the camera's PGM input | RCP |
Which methods are available depends on the model. Check under "Supported Models" below whether your camera supports "IP", "SDI", or both. Note that SDI control is one-way (the camera's state is not reported back to the RCP); see the note under "Supported Controls" below.
Supported Models
IP Only
- Blackmagic PYXIS 6K
IP & SDI Camera Control
- Blackmagic URSA Cine 17K 65
- URSA Cine 12K LF
- Blackmagic URSA Cine Immersive
- Cinema Camera 6K
- URSA G2 Broadcast
- Micro Studio Camera 4K G2
- Studio Camera 4K Plus
- Studio Camera 4K Pro
- Studio Camera 6K Pro
- Studio Camera 4K Plus G2
- Studio Camera 4K Pro G2
SDI Only
- Micro Studio 4K
- Ursa Mini 12K
- Ursa Mini Pro 12K
HDMI to SDI via Micro Converter
Pocket Cinema cameras can be controlled with the SDI protocol, but require a Blackmagic Micro Converter to convert the camera's HDMI output to SDI. The converter also takes the return SDI signal, so camera control commands can be sent back to the camera over the HDMI return data link.
:::caution Update your firmware It is highly recommended to update the camera and the Cyanview equipment to the latest software version.
- Blackmagic introduced IP control via the REST API in 2024. Older firmware versions do not support it.
- SDI return video control is unchanged, but new gain commands were added to URSA cameras in 2024. Cyanview has adapted its system to work with both newer and older cameras. If gain control does not work correctly, an update is probably required. :::
:::info Tally now partly available over IP As of December 2025, tally was not available in the REST API, but it has since been added for the URSA G2 Broadcast and PYXIS cameras. It is available from RCP/RIO release 25.12.1-rc2. Other camera models are expected to gain tally support in future firmware updates. :::
Supported Controls
| Control | Details / Notes |
|---|---|
| Iris | Manual and auto iris |
| Gain | Gain in dB or ISO |
| Shutter | Manual, auto, ECS |
| White balance | R/G/B gains, color temperature and tint |
| Black balance | R/G/B/master black level |
| Gamma | R/G/B and master gamma |
| Saturation/Hue | Saturation and hue |
| Record | ON/OFF, status and TC |
| Tally | Red/green tally. Available over SDI or ATEM on all models except the URSA Cine; over IP only on the URSA G2 Broadcast and PYXIS |
| Lens | Zoom and focus |
Control through SDI, whether sent directly from the RCP or through the ATEM and the program video path, is unidirectional. The camera does not report its current state to the RCP or ATEM, so values on the camera may differ from those displayed on the RCP, which can cause jumps when adjustments are made.
Workflows
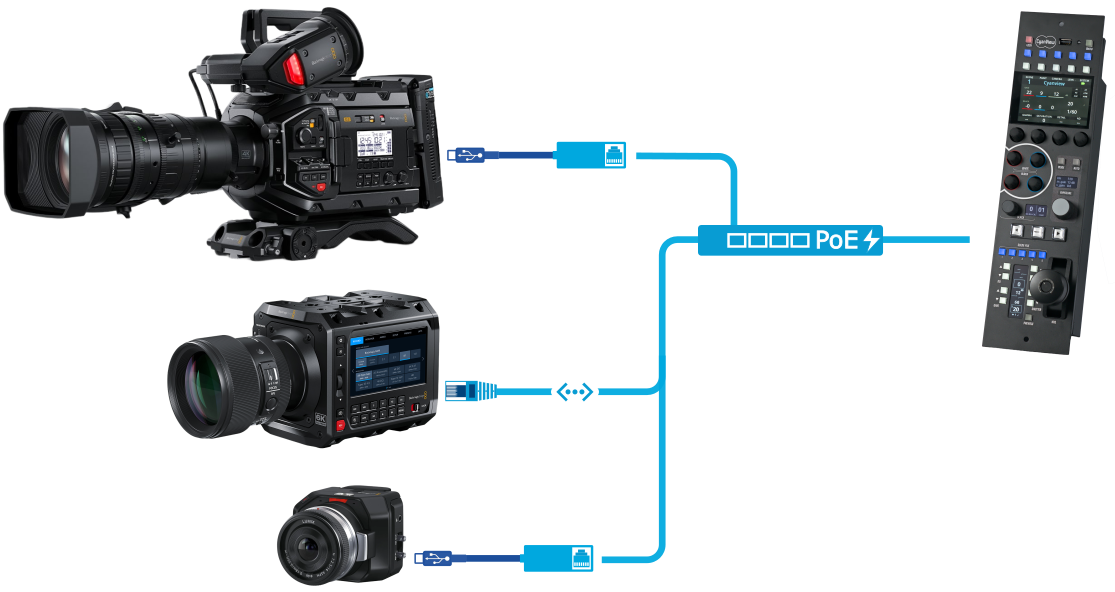
Camera Control via IP
Some cameras don't have an RJ45 port and require a USB-C to Ethernet adapter. Most adapters work, but Blackmagic's manuals recommend the Belkin USB-C to Gigabit Ethernet Adapter, noting that while other adapters may work, the Belkin's chipset has proven the most reliable for RTMP streaming workflows.
SDI Workflow
SDI camera control is done by combining a Blackmagic SDI control injection board with a standard CI0 or RIO. There are two approaches: a dedicated all-in-one box, or a converter added to existing CI0 or RIO equipment.
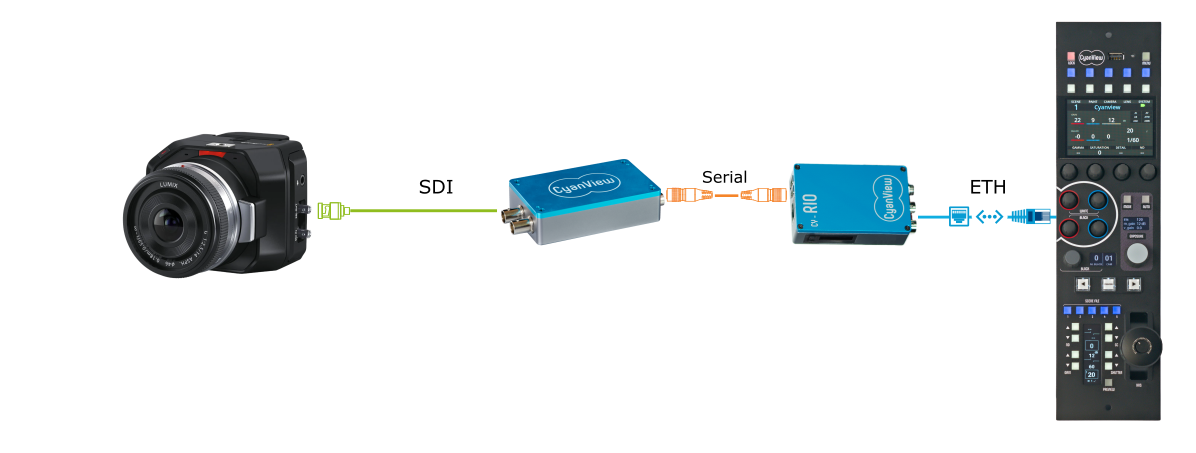
RSBM
The RSBM combines the SDI control board with power and signal conditioning converters, creating an interface that connects to any standard CI0 or RIO via one of its two serial ports.
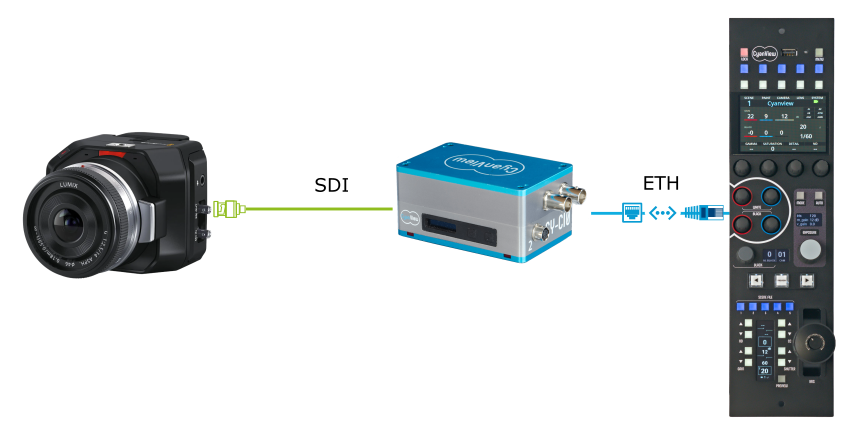
CI0BM
For a streamlined setup, the SDI control board is also available as an integrated layer inside the CI0, making an all-in-one device. It offers the same functionality as the RSBM but routes SDI control through an internal port, leaving both CI0 serial ports free for other camera or lens control.
ATEM Workflow
Use caution with this integration in large-scale setups. Blackmagic ATEM switchers can be sensitive to both the number of connected devices and the volume of control commands. Managing many cameras, especially with group commands, can generate a high command throughput that overwhelms the ATEM and may cause instability.
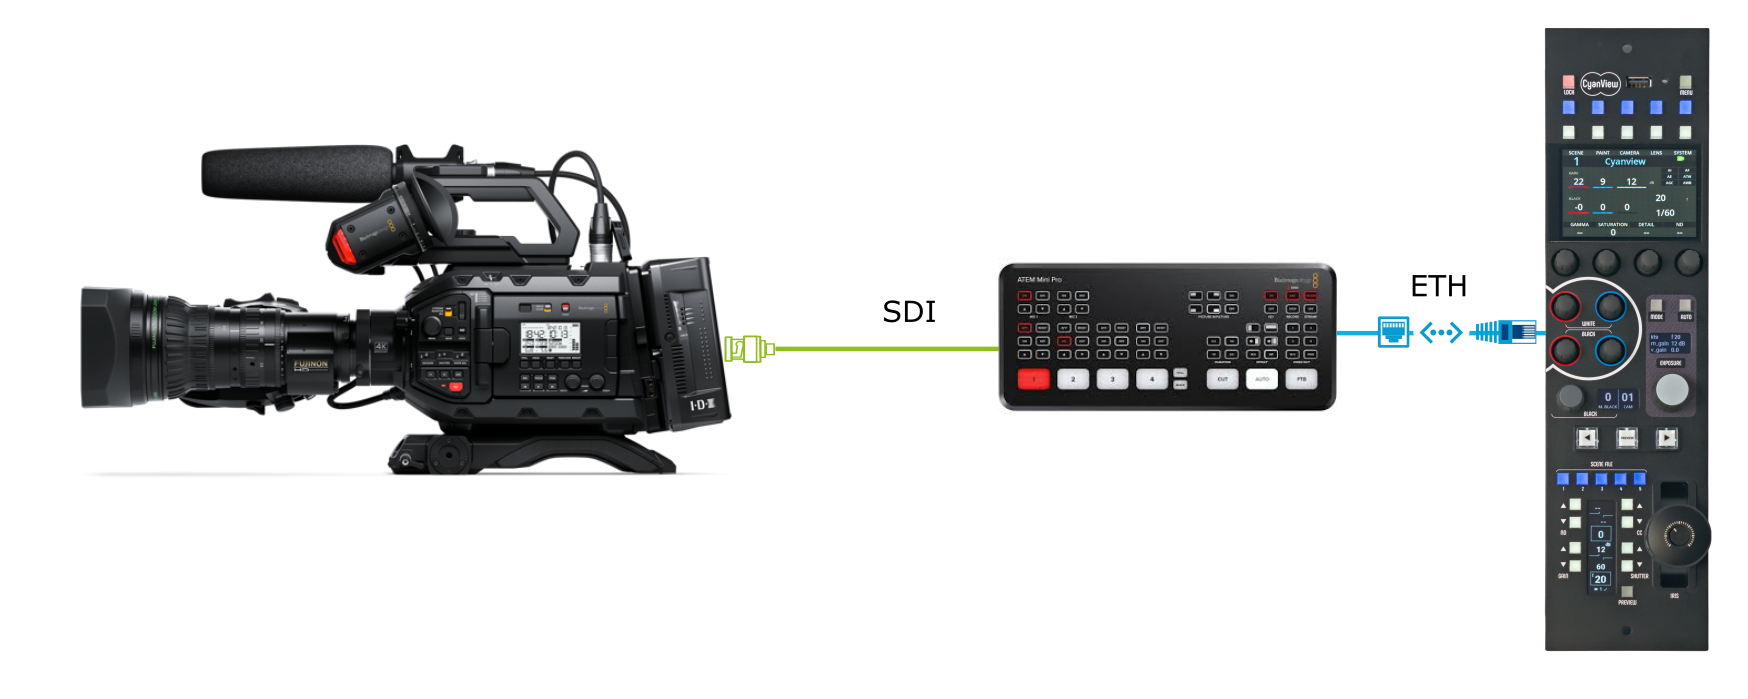
This workflow is most common when you already have an ATEM switcher whose SDI program output feeds your cameras' PGM inputs, and you want to use control panels other than Blackmagic's own. Communication between the RCP and the ATEM is bidirectional, so adjustments made on the RCP or in the RCP tab of the ATEM software stay in sync in real time. However, control from the ATEM to the cameras remains unidirectional, as in a standard Blackmagic workflow.
Configuration
Camera Control via IP
Camera Setup
-
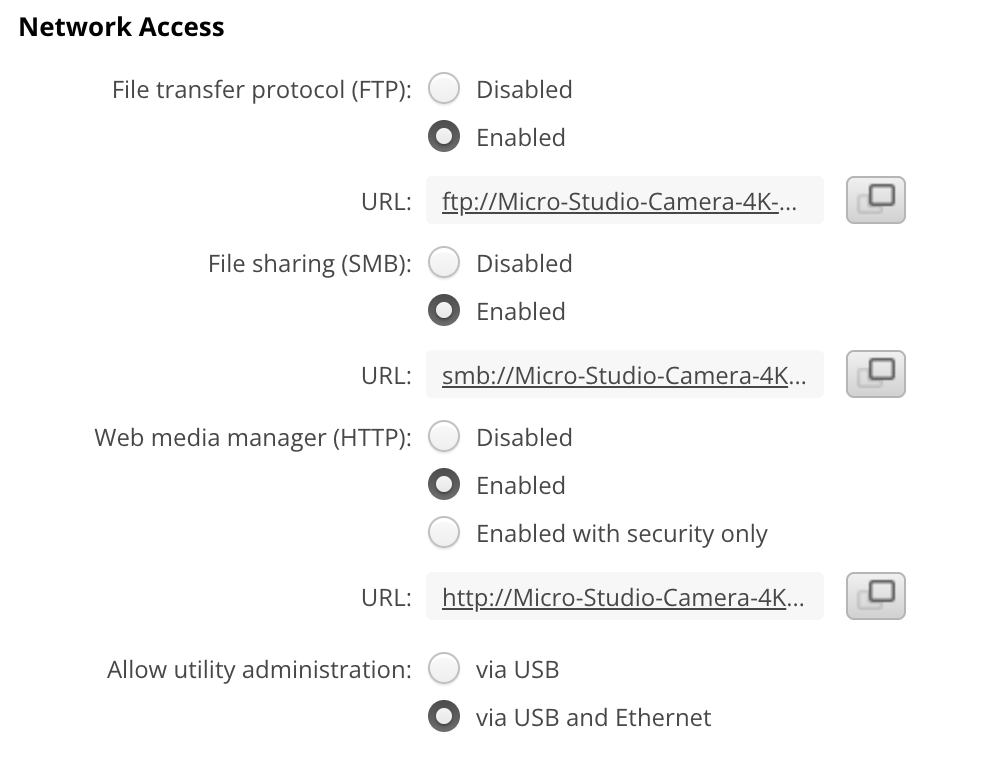
Launch Blackmagic Camera Setup and select your camera from the detected devices. For the initial setup, connect the camera with a USB cable unless control over Ethernet is already enabled.
-
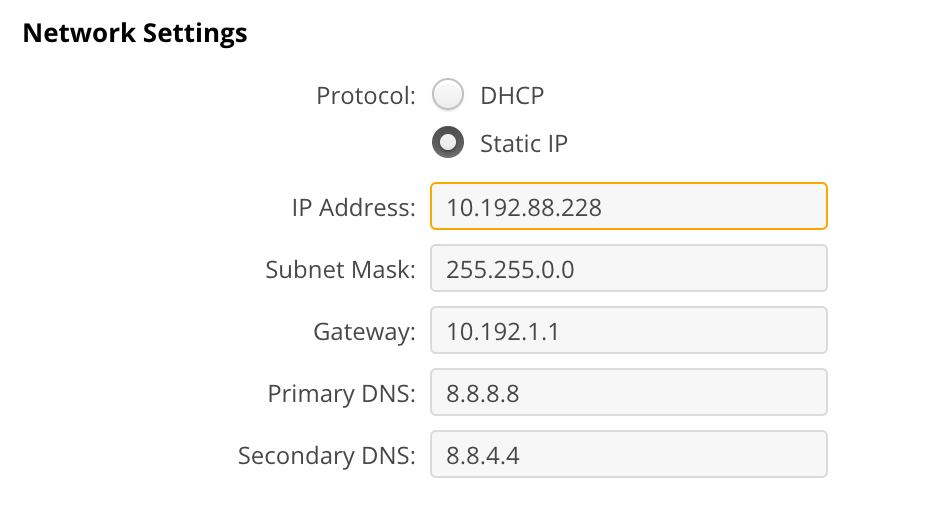
In the software, configure the camera's IP address. Make sure it is a valid IP for your network, whether using DHCP or a static address.
-
Enable Web media manager (HTTP), which provides the remote control REST protocol.
RCP/RIO Setup
-
Open the Web UI of the RCP (or RIO) (see Getting Started for how)
-
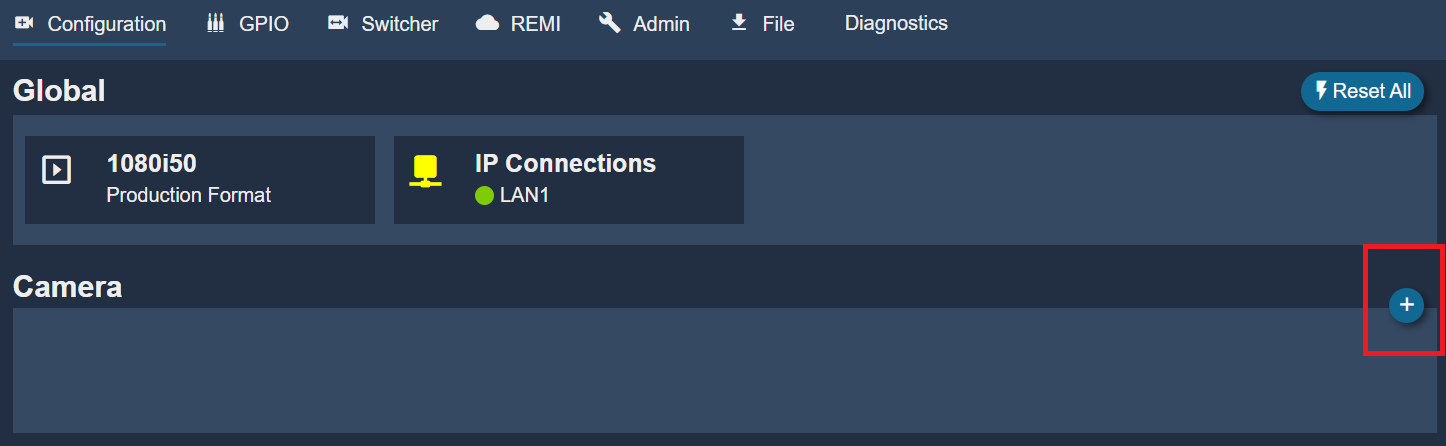
In the Camera section, click "+" to add a new camera
-
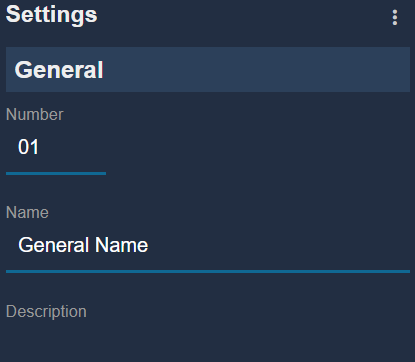
Under "General", enter a camera number and name (anything that fits your workflow)
-
Select brand: Blackmagic
-
Select model: IP
-
Enter the camera's IP address (this example uses
10.192.88.228)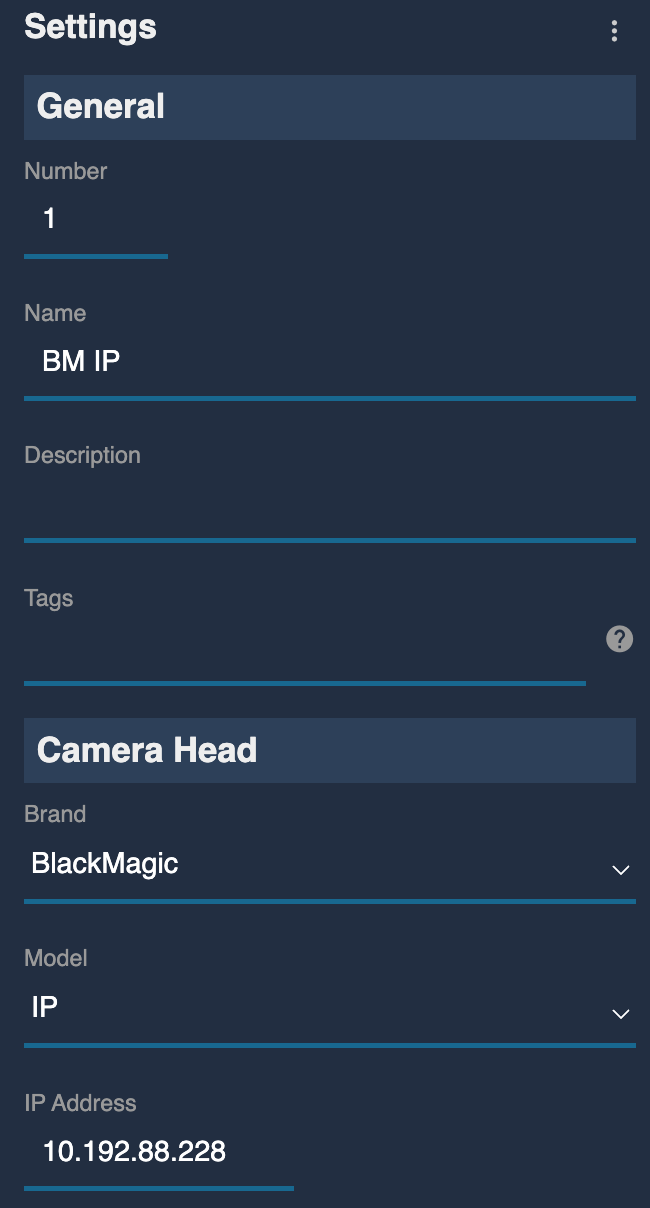
If configured correctly, the status turns green.
Camera Control via SDI
-
Open the Web UI of the RCP (or RIO) (see Getting Started for how)
-
In the Camera section, click "+" to add a new camera
-
Under "General", enter a camera number and name
-
Select brand: Blackmagic
-
Select model: SDI
-
Select the port:
- With a CI0BM: CI0 port 3
- With an RSBM on a RIO: the port the RSBM is plugged into
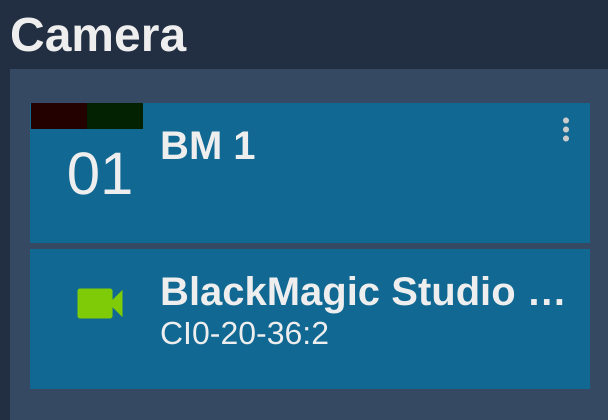
If configured correctly, the status turns green. This only indicates that the CI0 or RIO is communicating with the RSBM; it does not confirm that the camera itself is connected. Because control is unidirectional, there is no way to verify the camera connection from this interface.
The RCP uses camera ID 1 for control. If you need a different ID or want to control multiple cameras, see "Controlling Multiple Cameras over a Single SDI Signal" below. Otherwise, make sure all your cameras are set to control ID 1.
Controlling Multiple Cameras over a Single SDI Signal
Controlling multiple cameras over a single SDI signal works like using the ATEM program return to send control commands to all your cameras. With the RSBM or CI0BM, you can manage several cameras on what is called a "bus".
Configure the Cameras
Assign each camera a unique Camera Number in its settings. This is the same approach as when controlling multiple cameras from an ATEM, where each camera gets the number of its ATEM input. In this workflow, the camera number must match the number assigned on the RCP (1 to 255).
Create a Blackmagic SDI Control Bus
Once the cameras have numbers, the rest of the configuration is done on the RCP (or RIO):
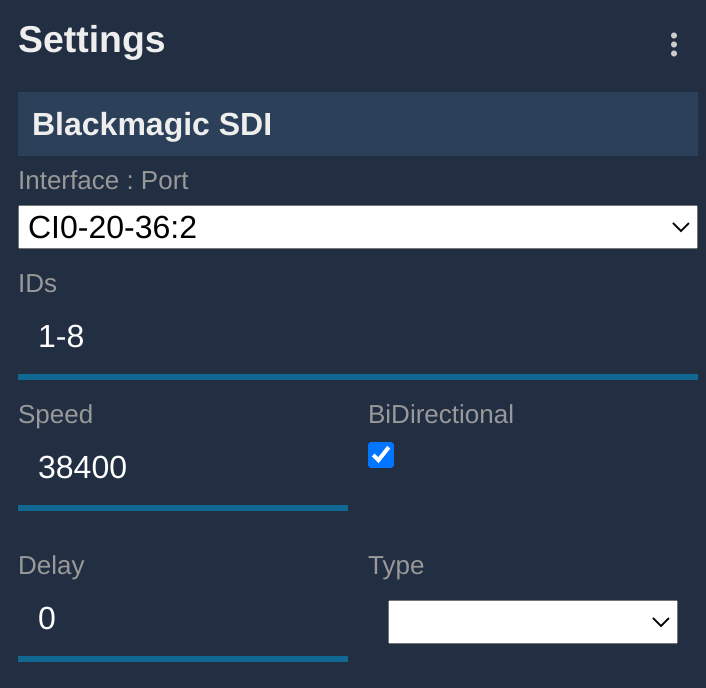
- In the RCP/RIO web UI, click "+" in the Features section
- Select Blackmagic : SDI Bus
- In the new block, select your CI0 (port 3 for a CI0BM, or 1 or 2 for a CI0/RIO + RSBM)
- Adjust the ID range to the minimum and maximum numbers you need to control (here, cameras with IDs 1 to 8)
- Leave the other settings unchanged
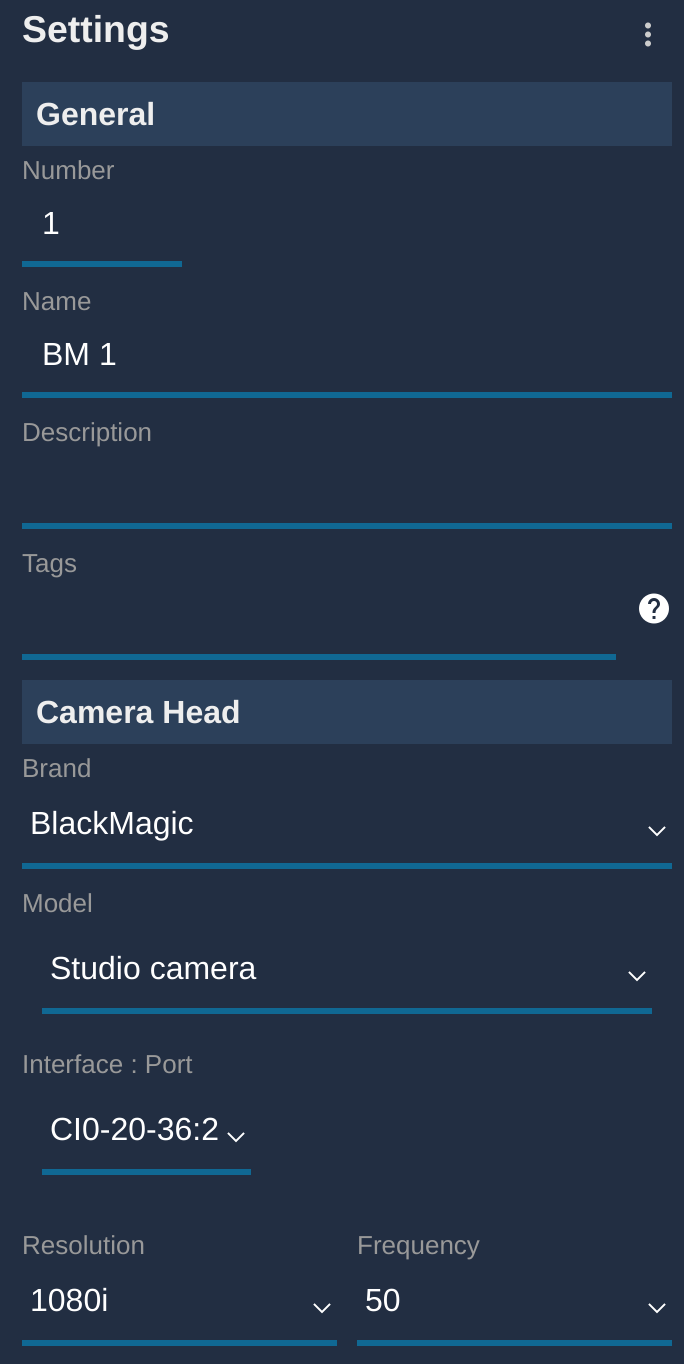
Assign a Bus Channel to Each Camera on the RCP
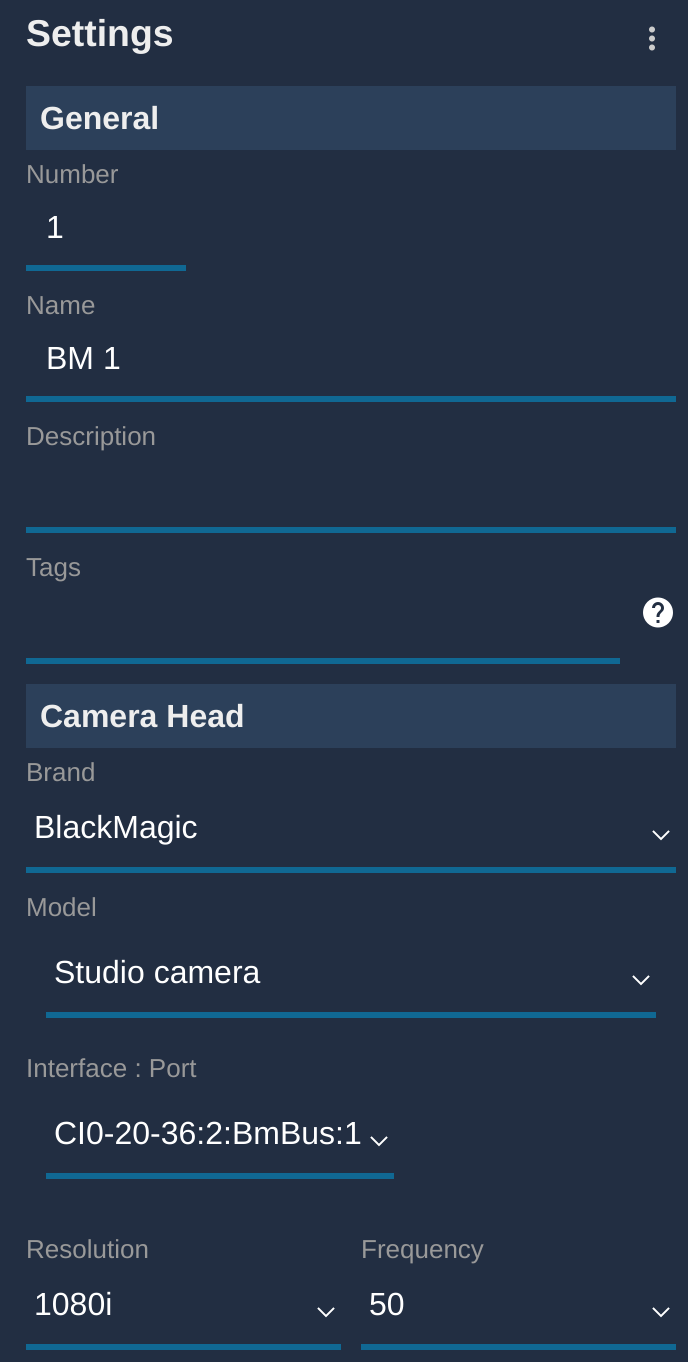
- Click "+" in the camera block (a new panel appears on the right)
- Under "General", set a number and a name
- Select brand: Blackmagic and model: Studio camera
- In the interface drop-down list, select your CI0 serial port and camera ID
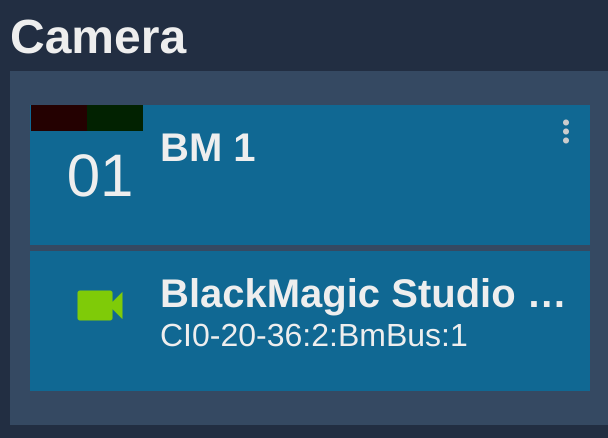
In the official example, the CI0 is CI0-20-36 with an RSBM on port 2, and the camera has ID 1 on the bus:
Your camera should be green and working:
Camera Control via ATEM
-
Open the Web UI of the RCP (or RIO) (see Getting Started for how)
-
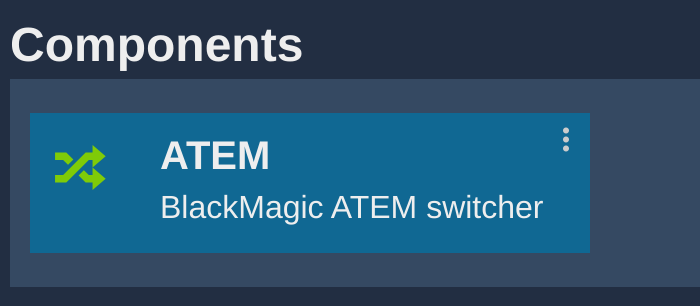
First add your ATEM to the configuration (see the ATEM configuration guide on the official site). The ATEM block must be configured and green:
-
In the Camera section, click "+" to add a new camera
-
Under "General", enter a camera number and name
-
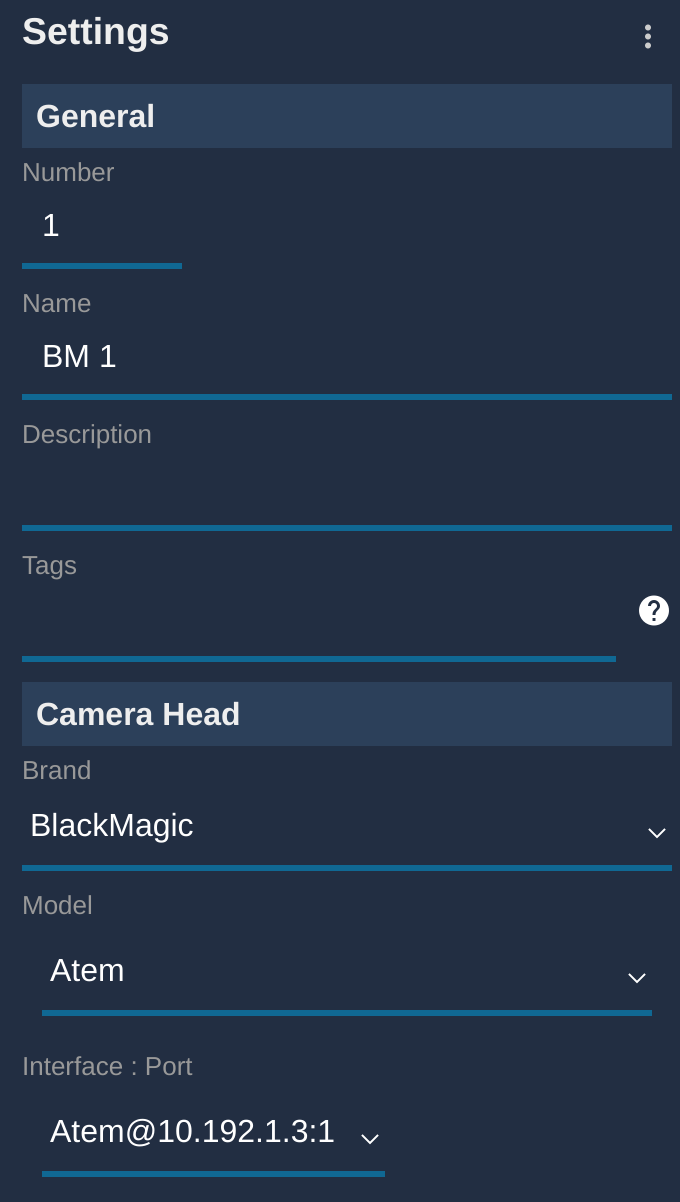
Select brand: Blackmagic and model: Atem
-
In the interface drop-down list, select your ATEM and the camera ID
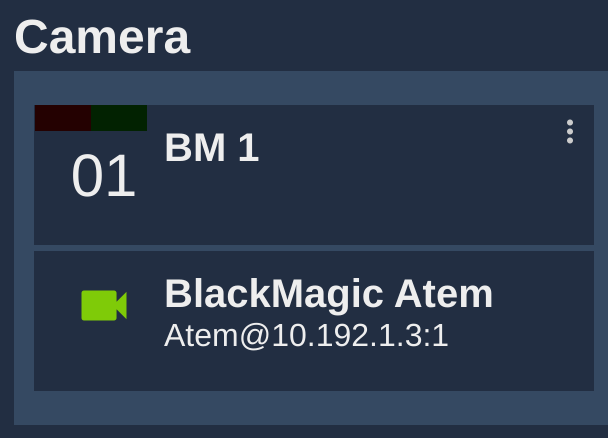
Example with an ATEM at 10.192.1.3 and camera ID 1:
Camera setup:
Camera block: