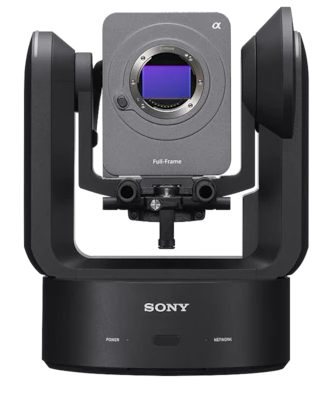
Sony FR7
https://support.cyanview.com/docs/Integrations/Sony/SonyFR7
Supported Controls
The FR7 integration combines settings available from the camera's Web app GUI with the RCP functions available through the s700 IP protocol.
| Control | FR7 |
|---|---|
| White balance (R/B and color temperature) | ✓ |
| Exposure (Iris, Gain, Base ISO, EI, Shutter, Variable ND filter) | ✓ |
| Master black and black balance | ✓ |
| Detail level and crispening | ✓ |
| User Matrix | ✓ |
| Multi Matrix | ✓ |
| Knee | ✓ |
| Green and red tally | ✓ |
| Camera menu navigation | ✓ |
| Lens (zoom, focus) | ✓ |
| Pan/Tilt (from the RCP touchscreen or a USB joystick) | ✓ |
| Presets/positions save/recall | ✓ |
When the camera is set to S-Log3 or CineEI, most paint controls are disabled by the camera.
Wiring
With a Sony PTZ Panel
The Sony PTZ panel is a wired remote control panel used to control the camera's pan, tilt and zoom. The Cyanview RCP can control shading in parallel with the PTZ panel, and a tablet can control autofocus in parallel.
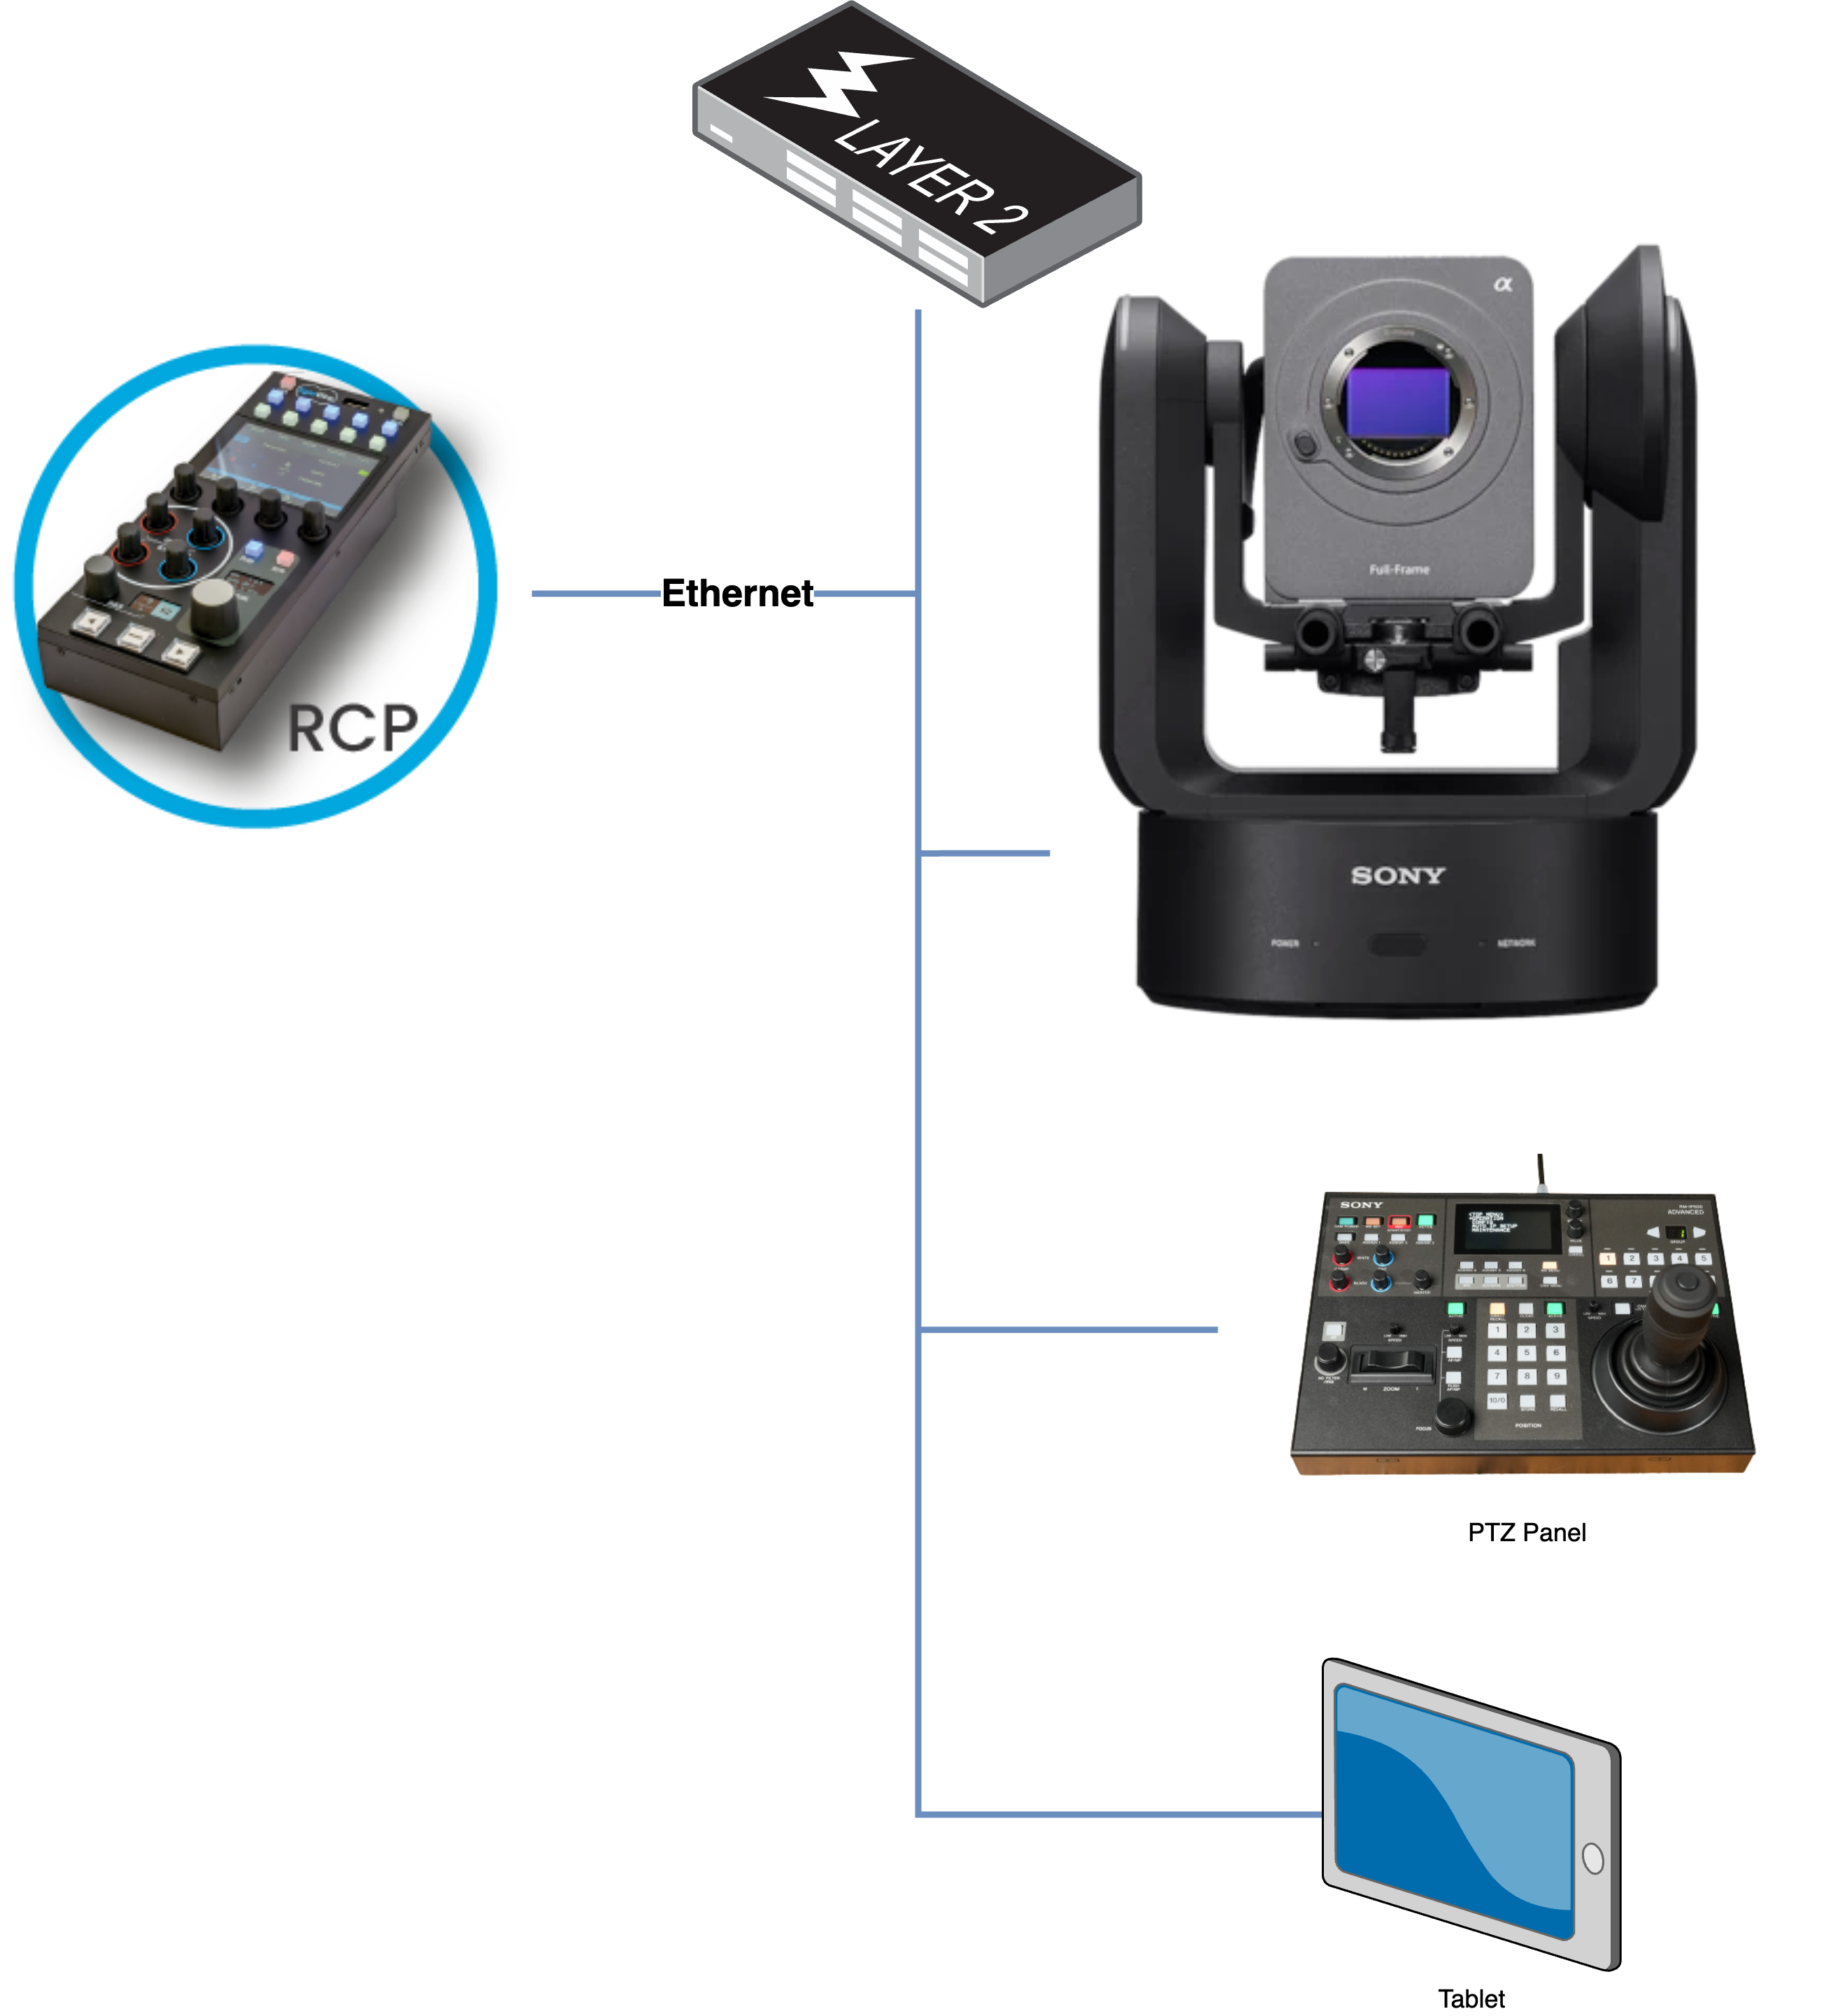
- RCP: shading, tally, camera menu control
- PTZ panel: pan, tilt and zoom
- Tablet (optional): autofocus
With a USB Joystick
The USB joystick is a wired controller used to control the camera's pan, tilt and zoom. The Cyanview RCP can control both shading and PTZ using the USB joystick. With multiple cameras, the joystick and RCP stay in sync, so you can navigate through all the cameras and shade/PTZ them all. A tablet can control autofocus in parallel.
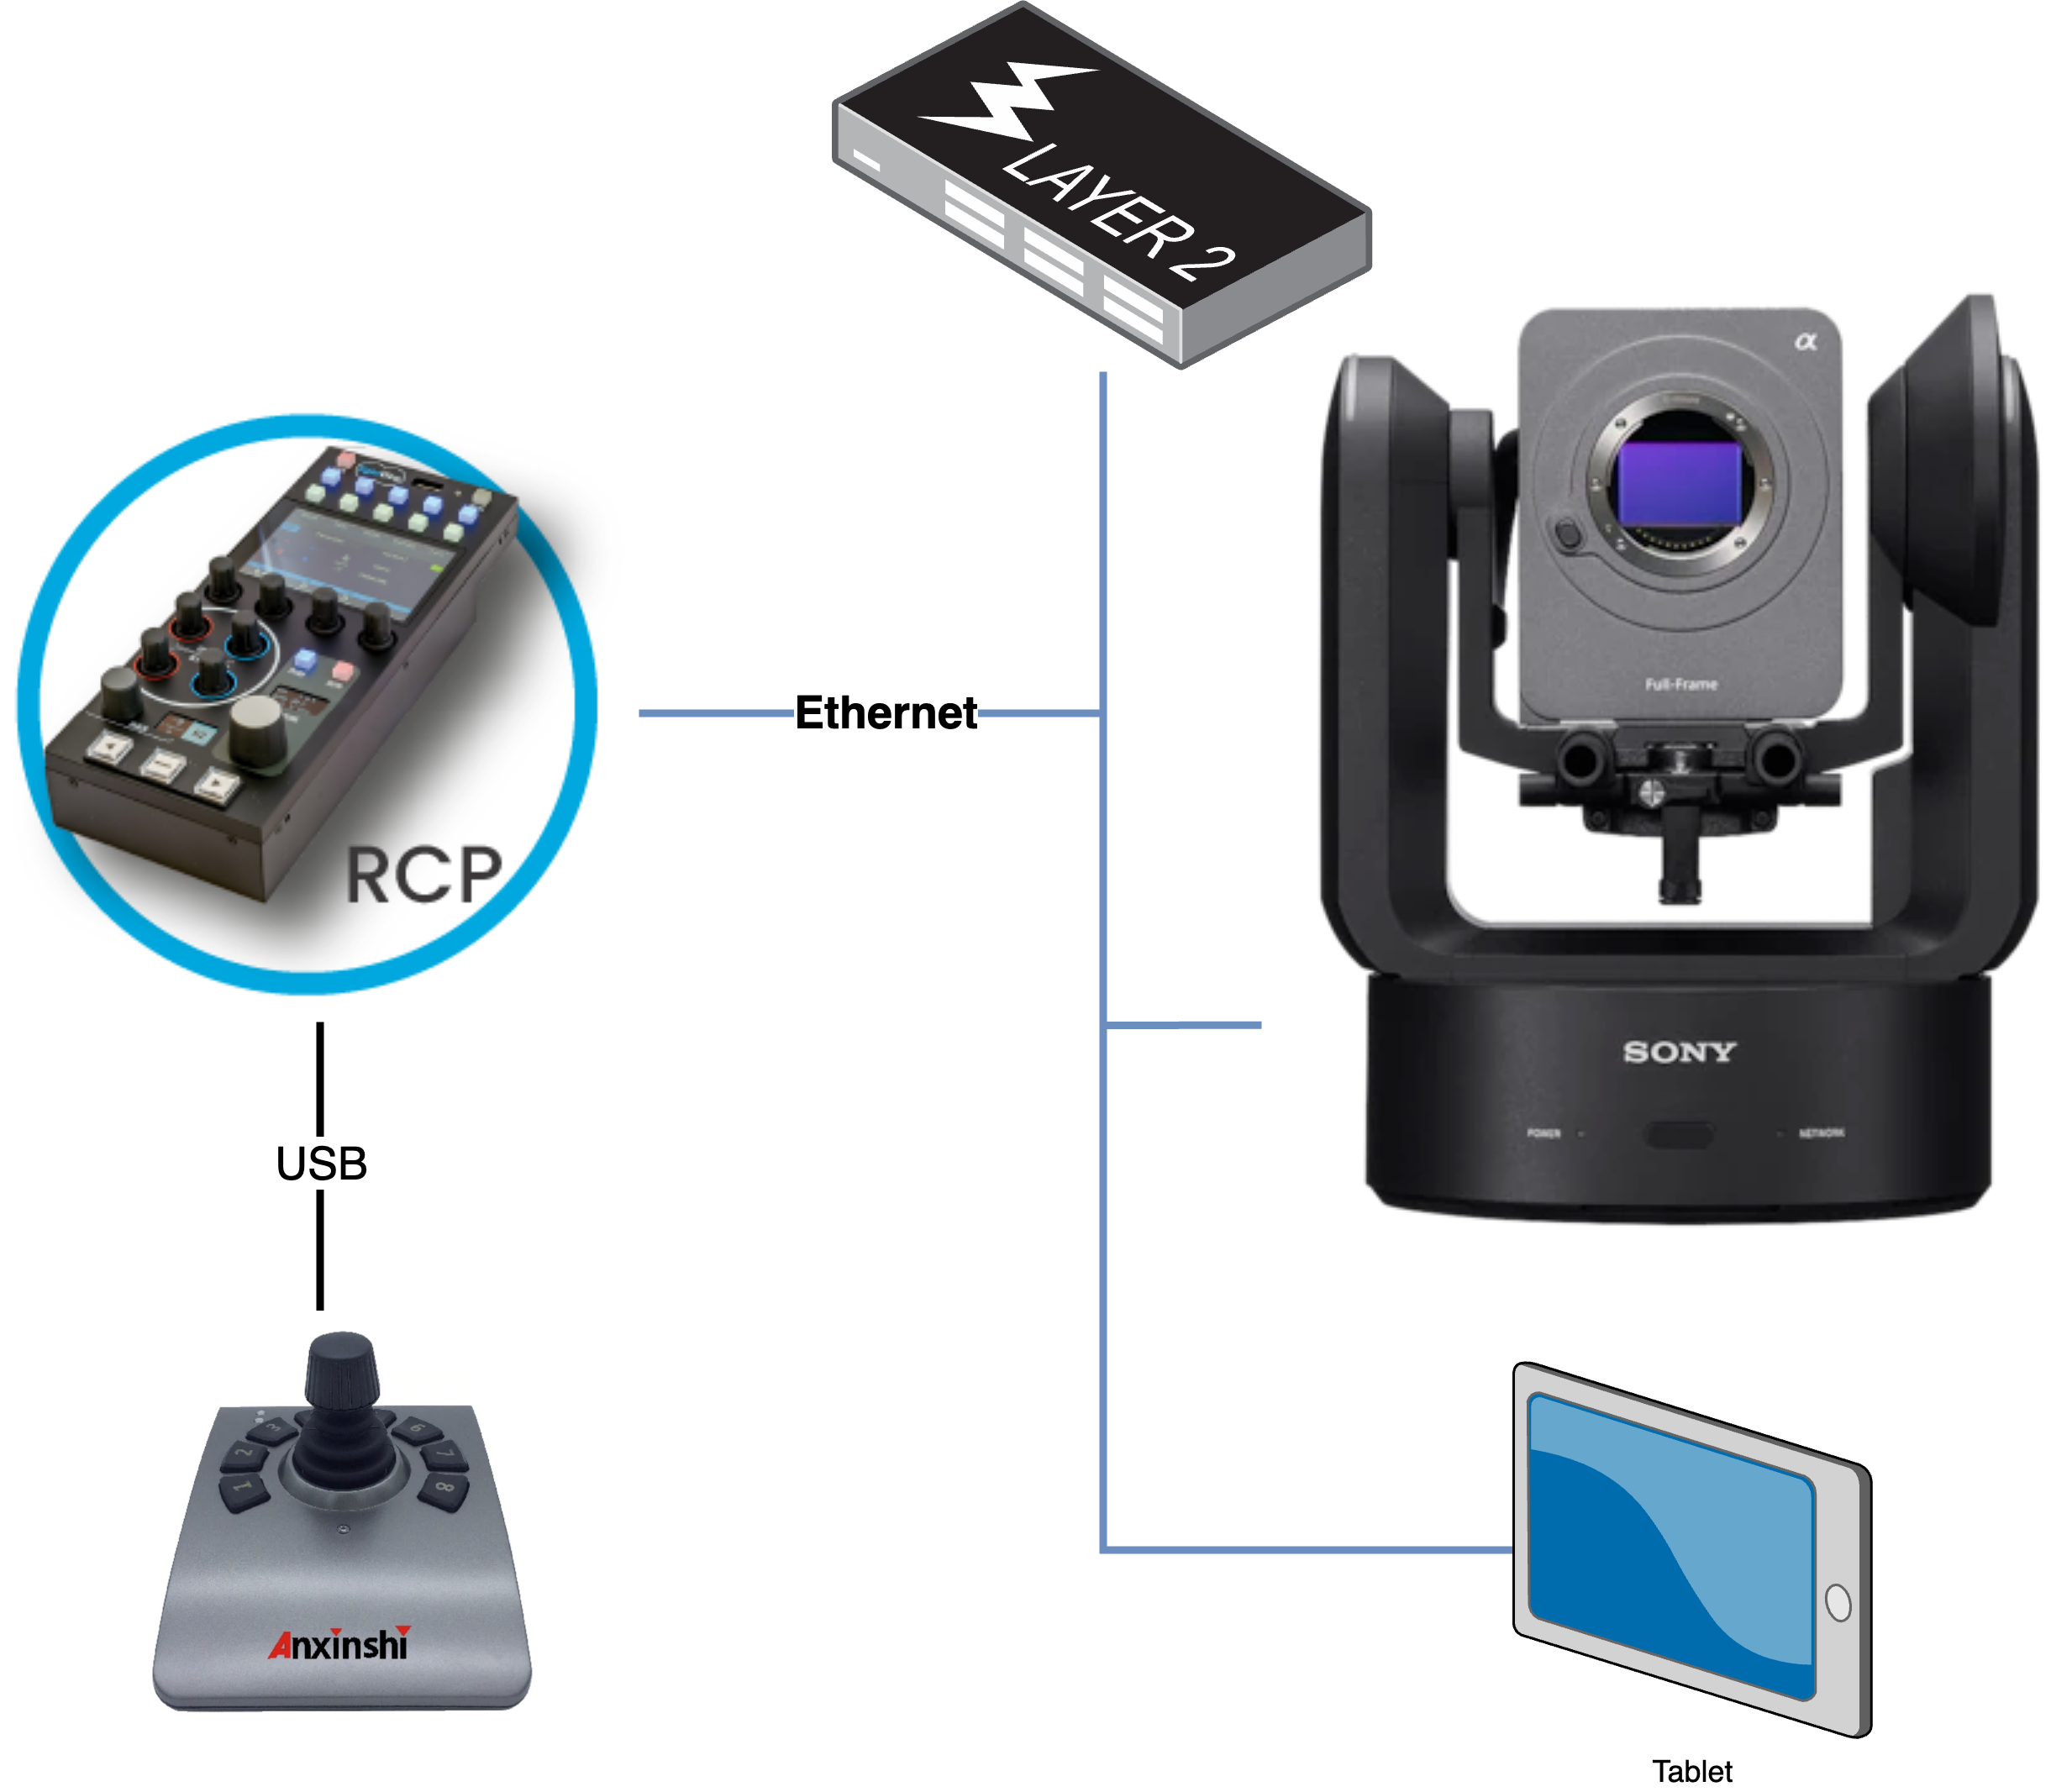
- RCP: shading, tally, camera menu control
- USB joystick: pan, tilt and zoom
- Tablet (optional): autofocus
Camera Configuration
This is based on RCP release 23.8.1. Your Sony FR7 must be on firmware 1.10 or later to be controlled by the RCP.
-
Make sure your FR7 is connected to your network and powered on
-
Make sure the camera has a static IP address, that your computer can open the camera's web interface, and that you know the login/password
-
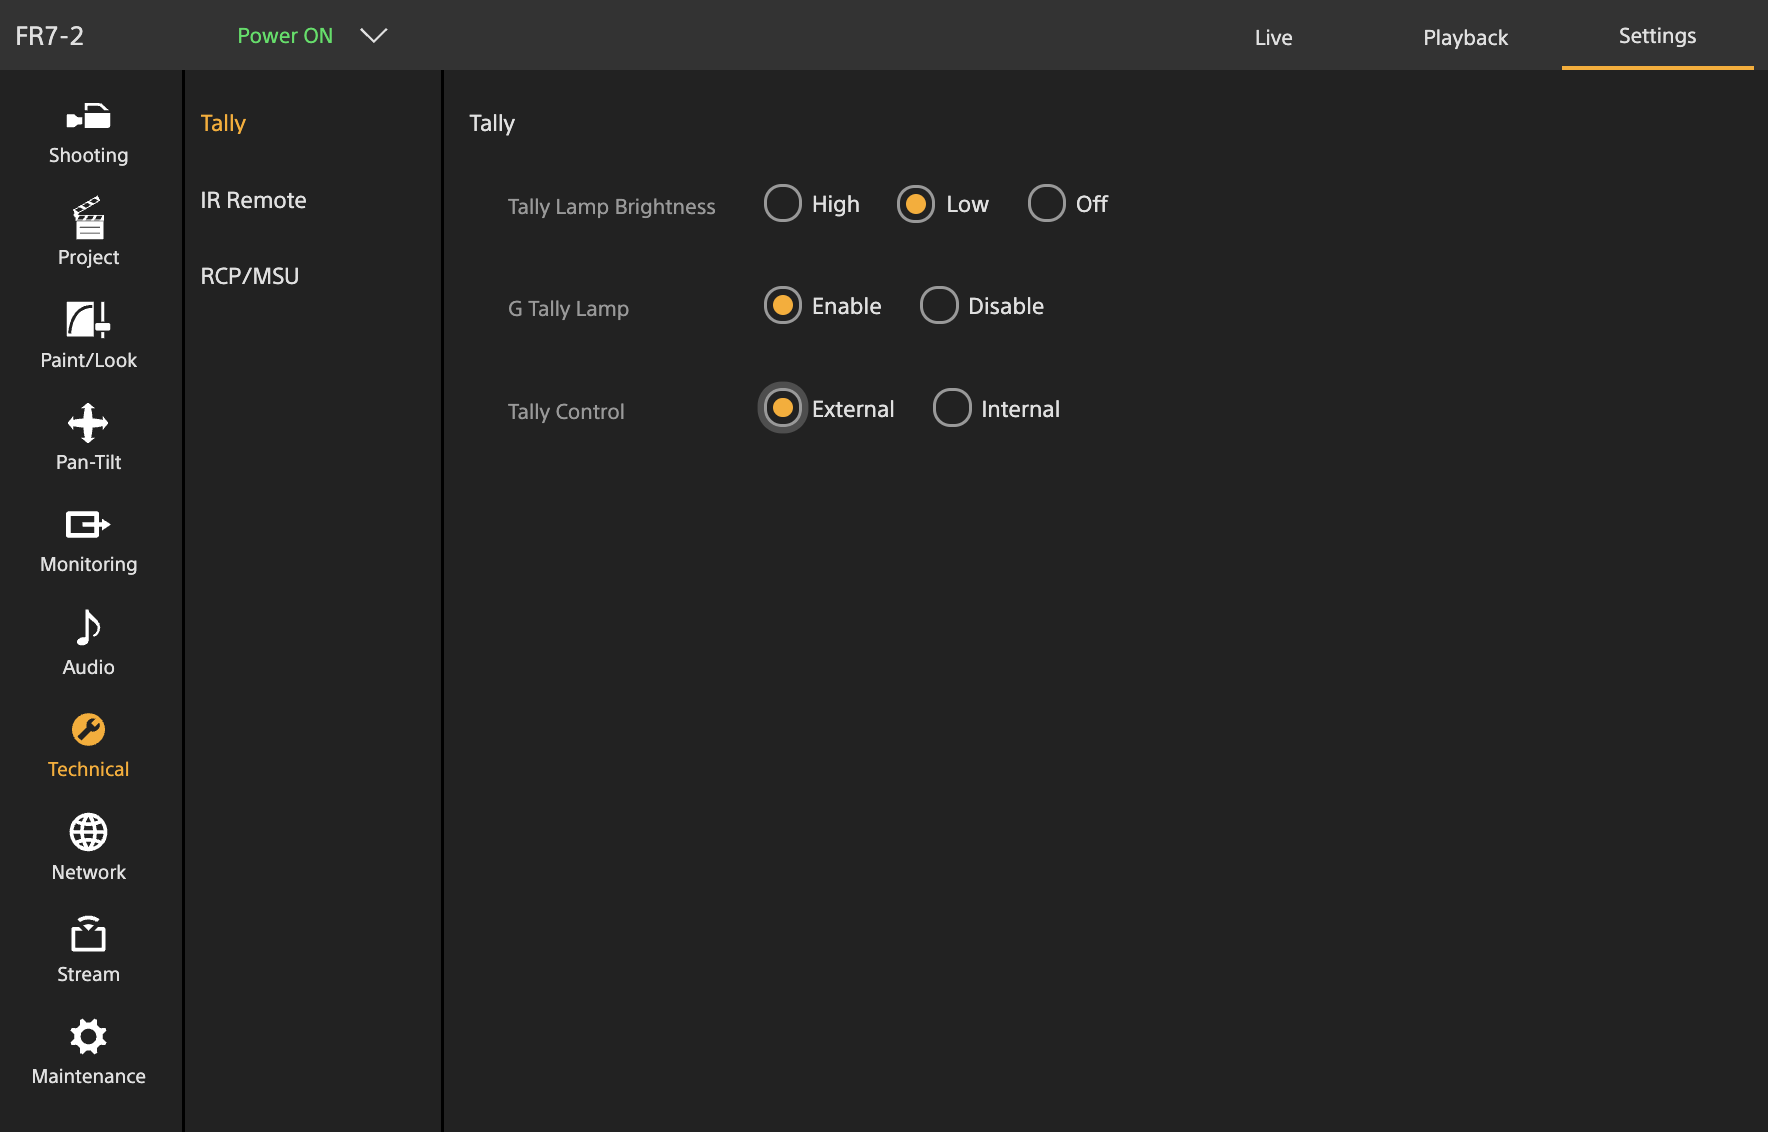
Under
Settings > Technical > Tally, set:- Tally Lamp Brightness: as you like
- G Tally Lamp: Enable
- Tally Control: External
-
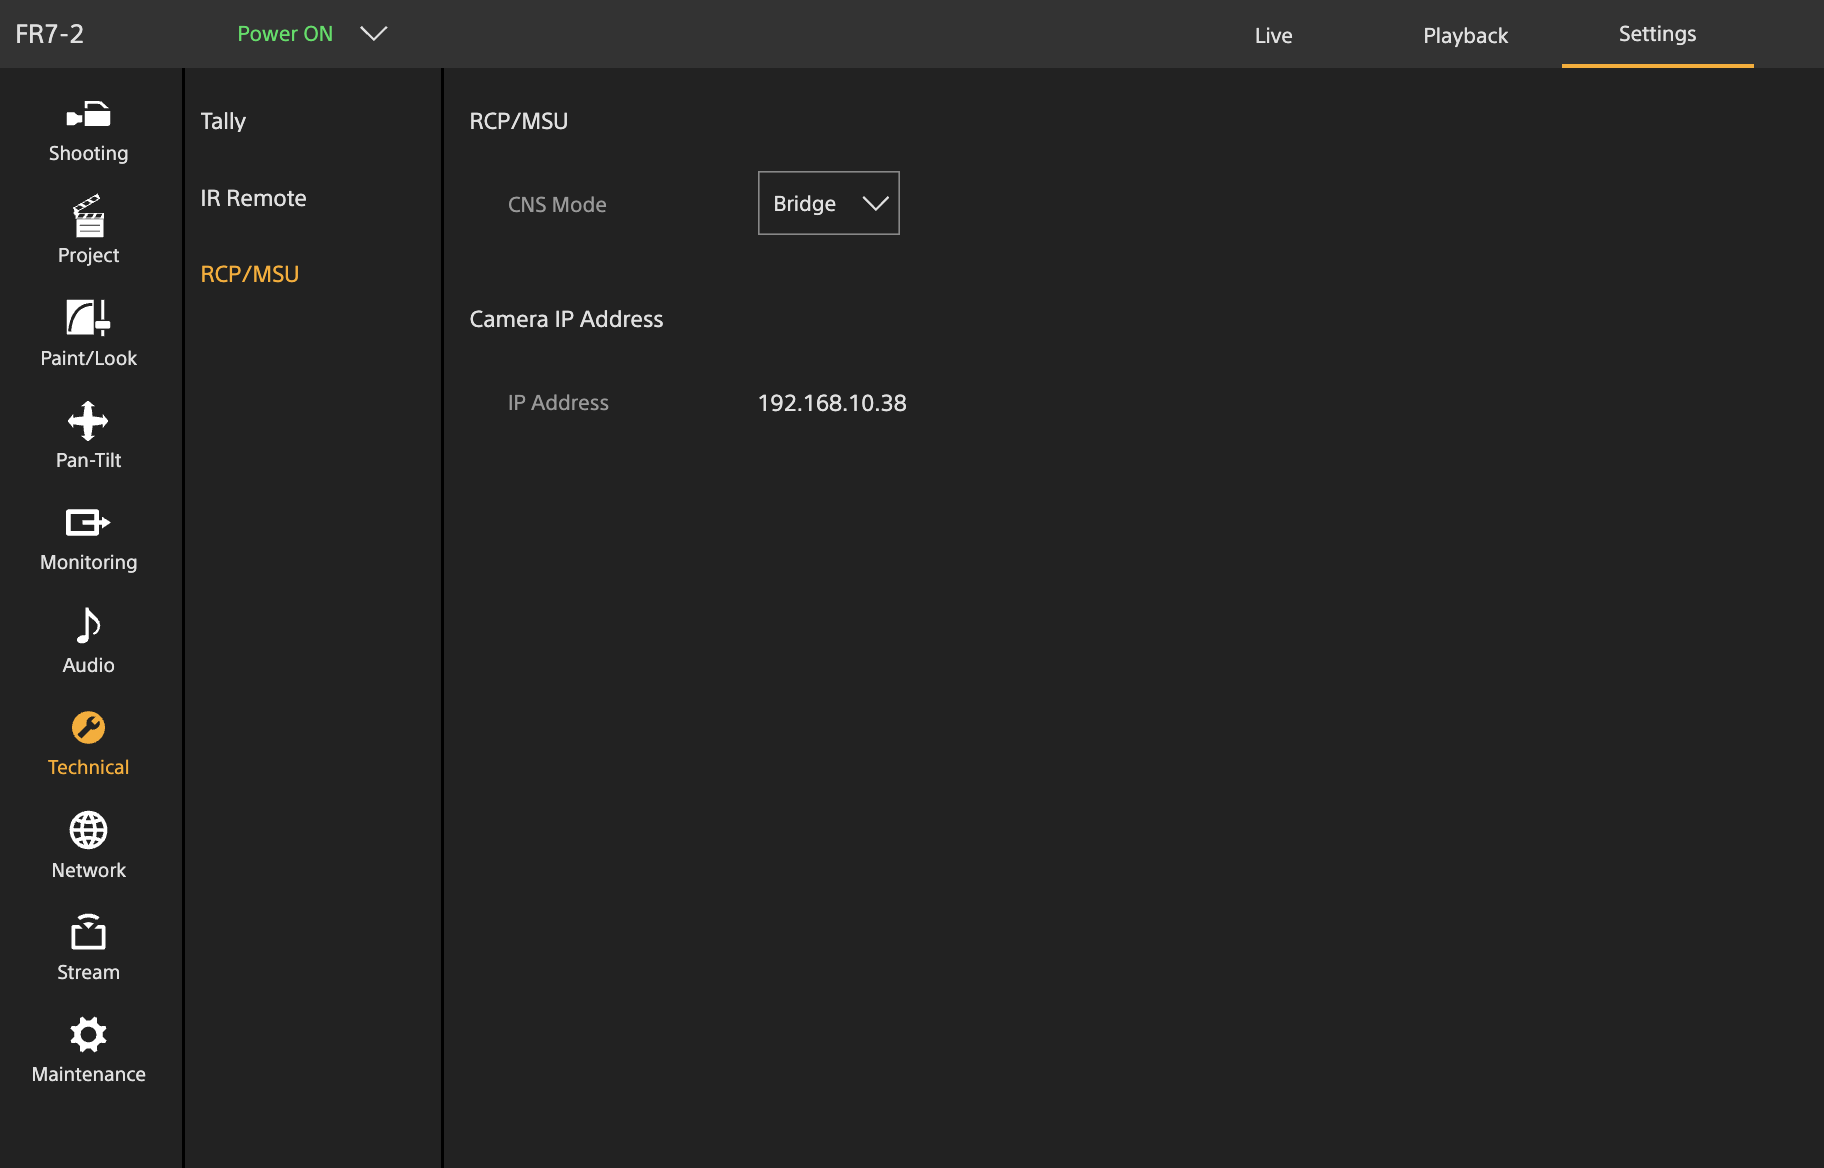
Under
Settings > Technical > RCP/MSU, set:- CNS Mode: Bridge
-
Under
Settings > Network > Brute Force Attack Protection, set:- Setting: disabled
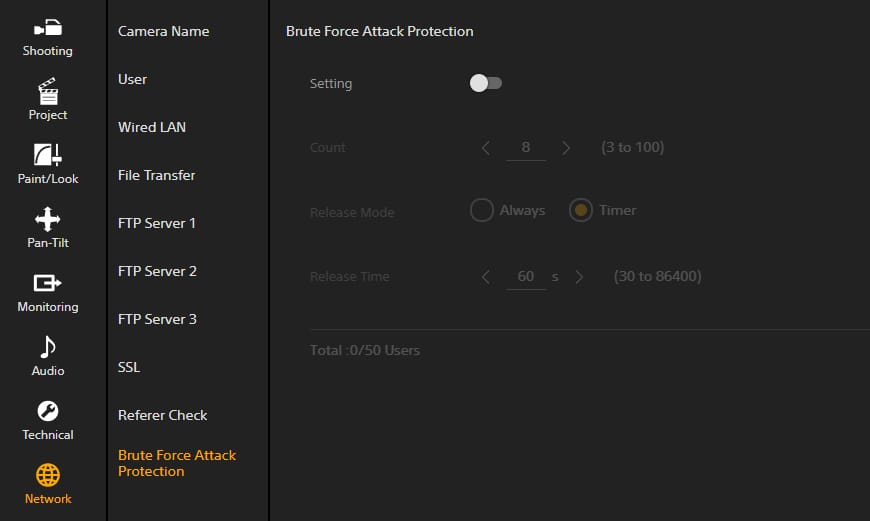
If Brute Force Attack Protection was active and you just disabled it, power cycle the camera to make sure the setting is properly applied.
RCP Configuration
- Add a new camera in the RCP configuration UI
- Enter a custom number, name, etc.
- Select brand: Sony
- Select model: Sony FR7
- Enter the camera's IP address
- Enter your login/password
If your camera is in a different range than your RCP (i.e. not 10.192.0.0/16), see IP Configuration to add a new IP address to the RCP.
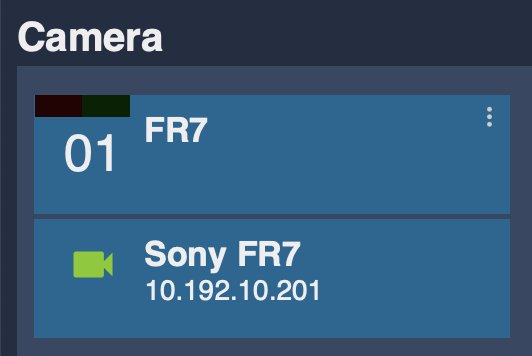
The setup should look like this:
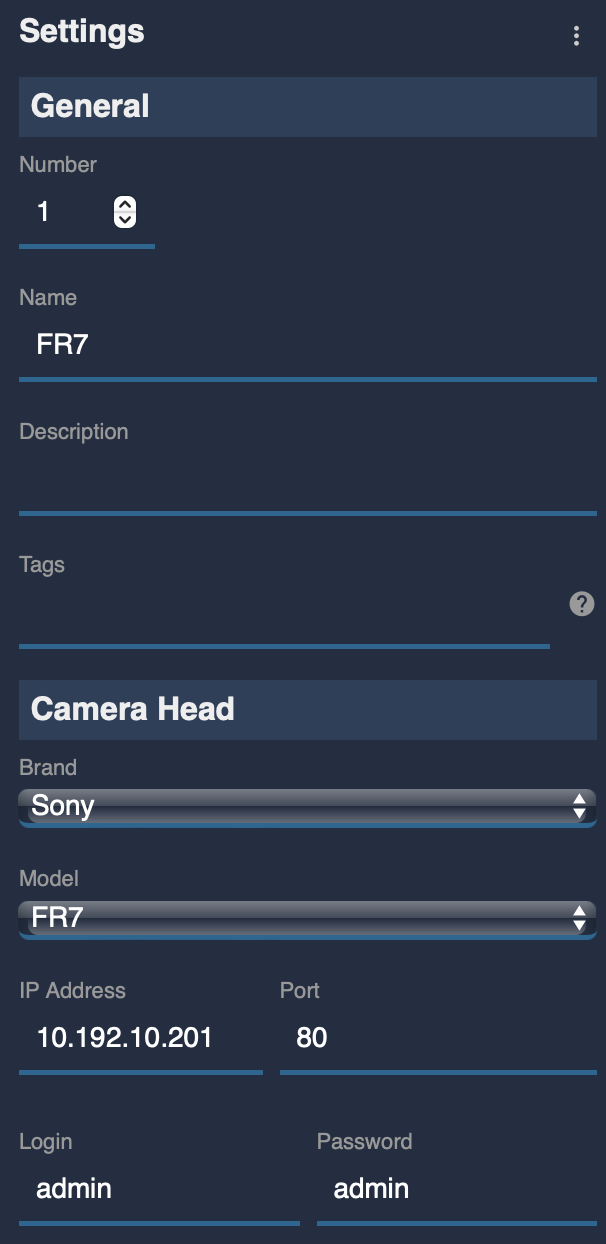
Once correctly connected, it turns green.