IP Configuration
https://support.cyanview.com/docs/Configuration/ConfIP
Communication with Cyanview devices relies on an IP network.
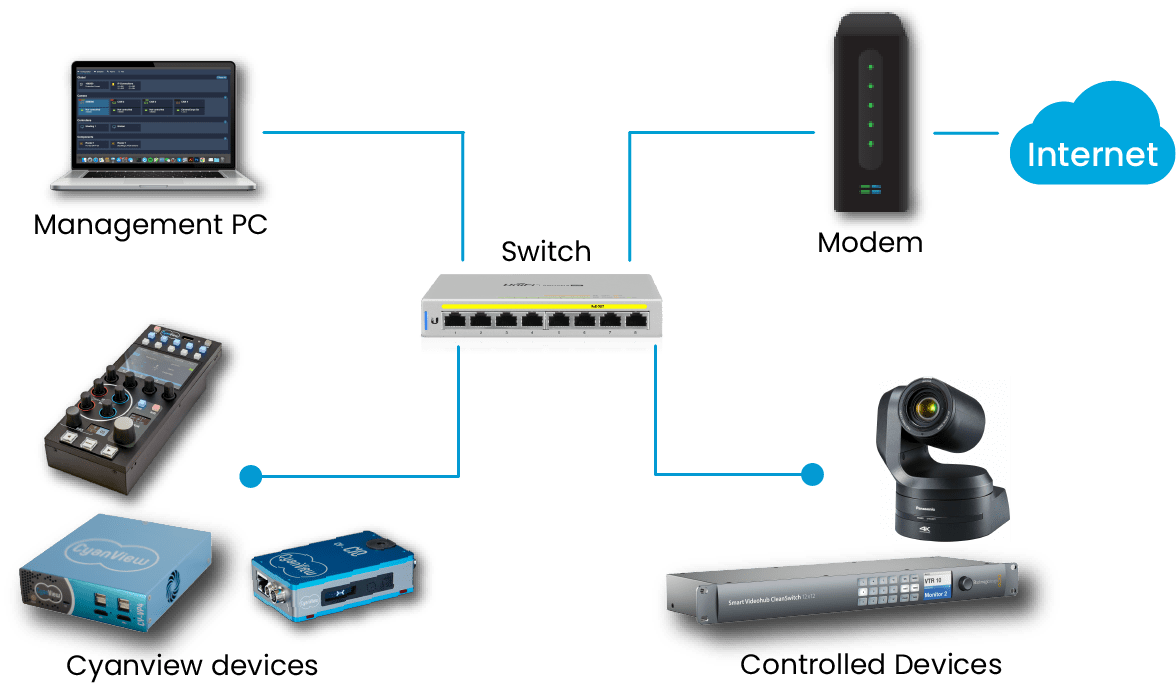
Finding your device's IP address
Deriving it from the serial number
The factory default IP is in the form 10.192.x.y, with subnet mask 255.255.0.0 (/16), where x and y correspond to the last two numbers of the serial number.
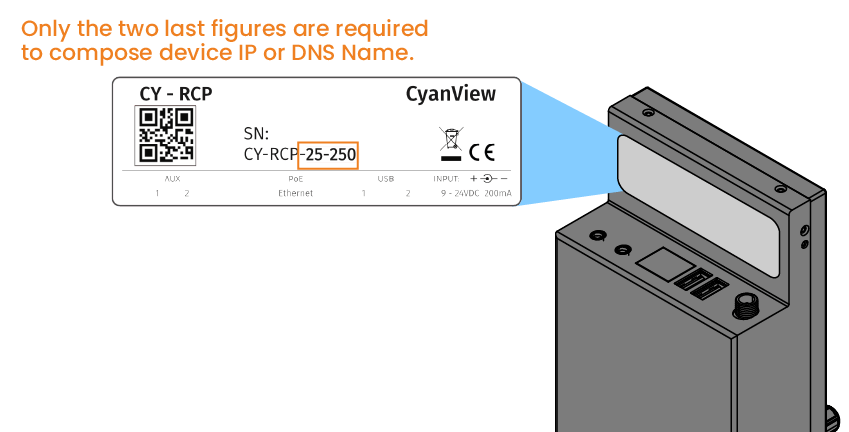
Example:
| Item | Value |
|---|---|
| Serial number | CY-RCP-25-250 |
| IP | 10.192.25.250 |
| Subnet mask | 255.255.0.0 |
| mDNS | http://cy-rcp-25-250.local |
To use mDNS (Multicast DNS), your DHCP server needs to support mDNS. If Bonjour is running, mDNS will also work.
LAN configuration
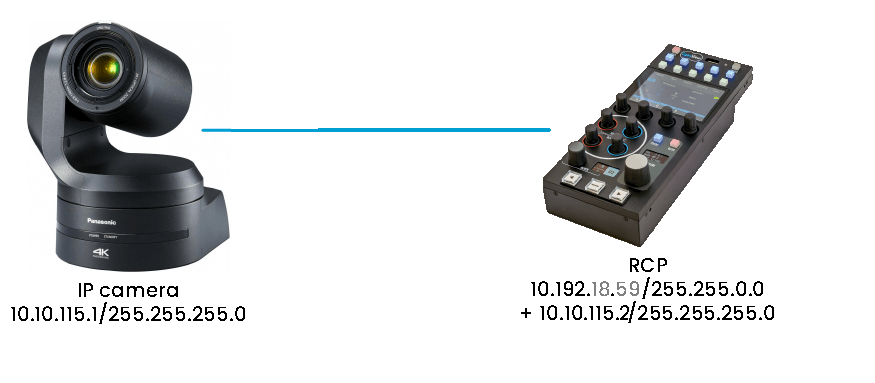
Typical use case: The RCP needs to communicate with an IP camera or router, but you don't want to change the IP on the camera/router side.
Steps:
- Open the "Configuration" tab
- Click "IP Connections"
- Click "+" in the LAN Connections block
- Select "LAN1"
- Enter the new IP and mask
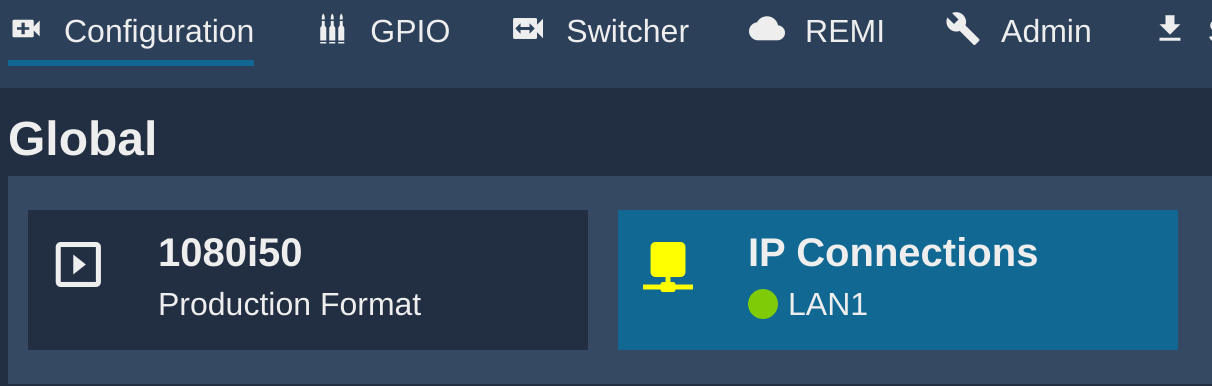
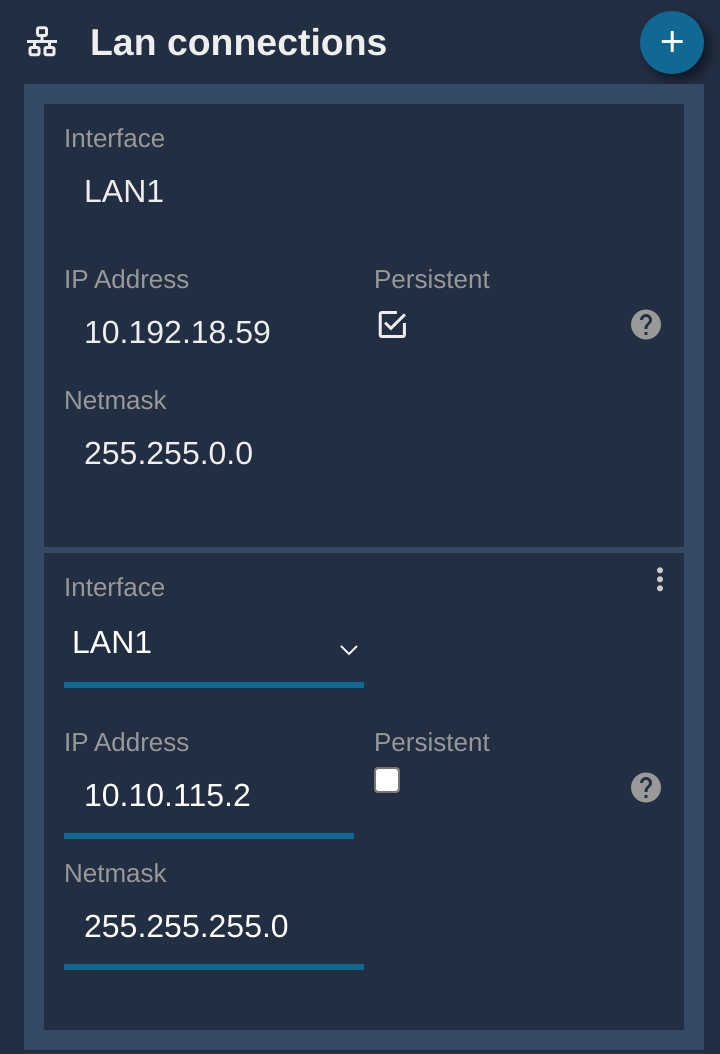
Result: The RCP becomes reachable at 10.10.115.2 and can communicate with devices within 10.10.115.0/24.
Accessing the Web UI over the LAN
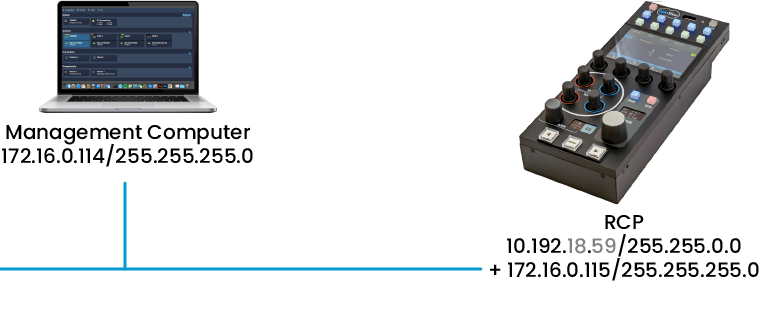
Typical use case: You want to access the RCP's Web UI from your corporate network instead of using the factory default IP.
The steps are the same as for LAN configuration, but you additionally need to "persist" the setting so it survives a reset or OS upgrade.
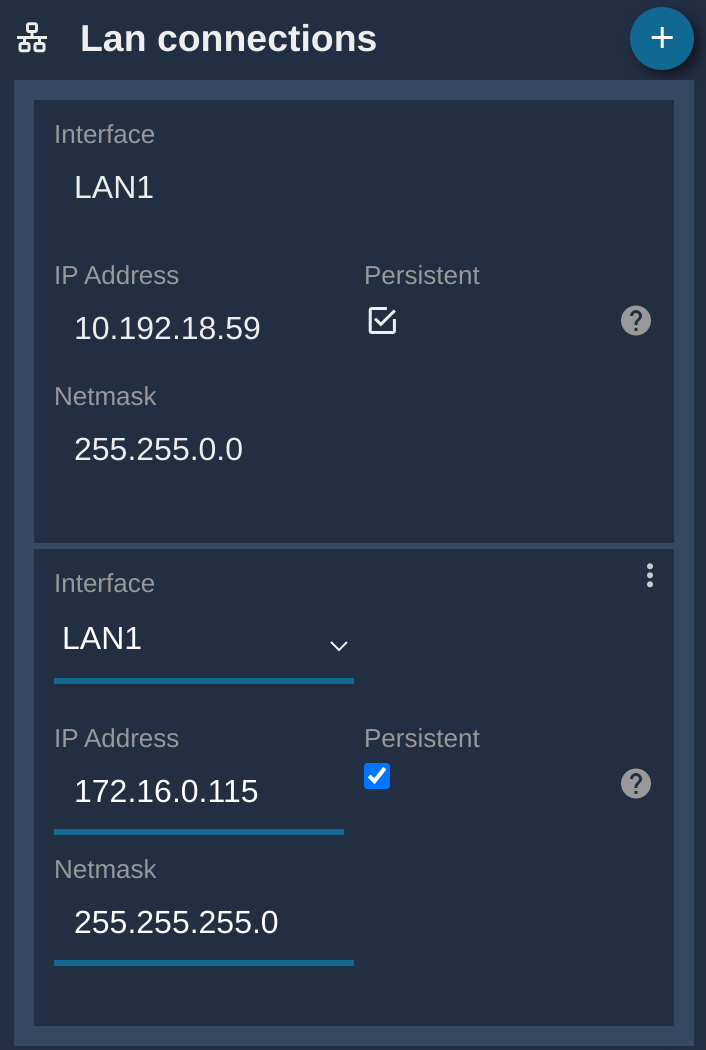
Result: The RCP becomes reachable at 172.16.0.115 and is accessible from a computer at 172.16.0.114 (persisted).
Setting static IPs on both the RCP and your computer makes accessing the Web UI easier. For instructions on setting a static IP on Windows, see here.
WAN configuration
By default, devices connect to the internet via DHCP. Static configuration is also possible if you have specific network requirements.
Steps:
- "Configuration" tab > "IP Connections"
- Click "+" in the WAN Connections block
- Select "LAN1"
- Enter the IP, mask, and gateway
- Enter a DNS server (e.g.
8.8.8.8) - Click "persist"
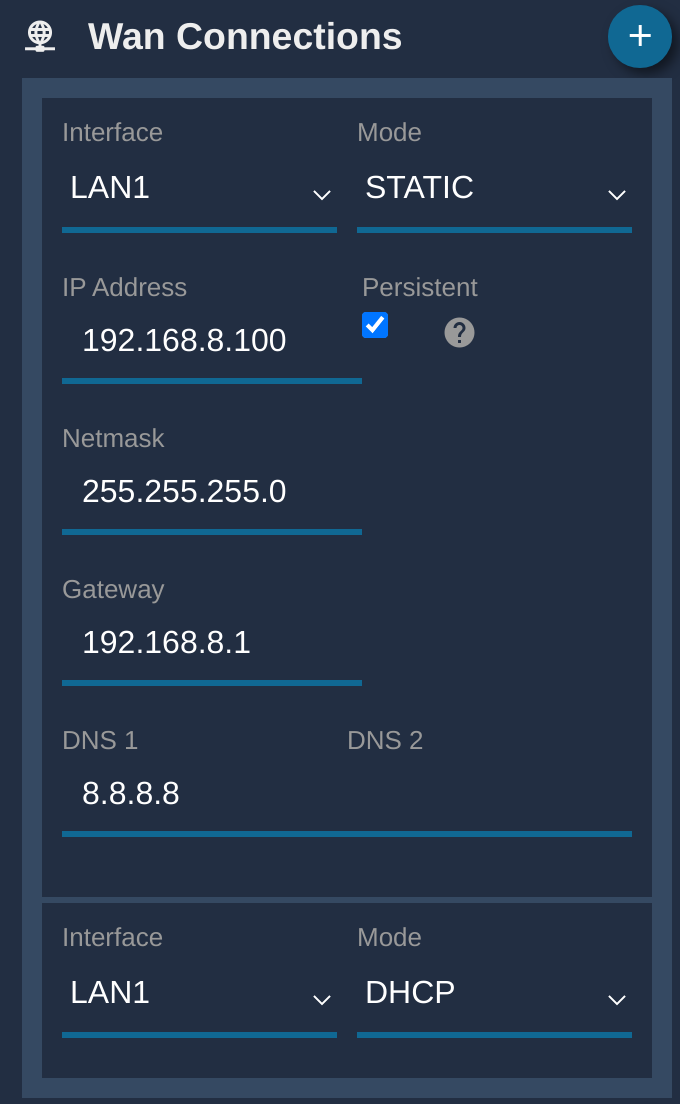
Result: The RCP is configured with 192.168.8.100, gateway 192.168.8.1, and DNS 8.8.8.8, and this persists across resets and OS upgrades.
Route configuration
Typical use case: You want to reach a specific network via a specific router.
Steps:
- "Configuration" tab > "IP Connections"
- Click "+" in the Routes block
- Select "LAN1"
- Enter the gateway, destination network, and netmask
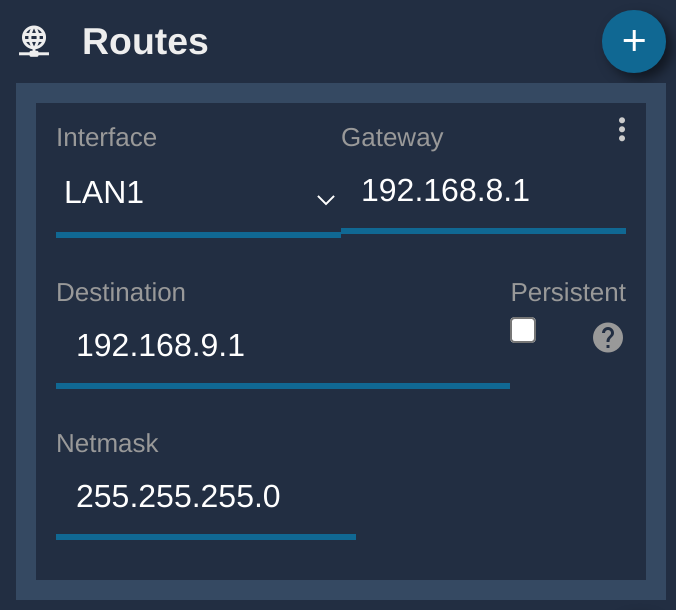
Result: The RCP routes traffic destined for 192.168.9.0/24 via 192.168.8.1.
USB dongles
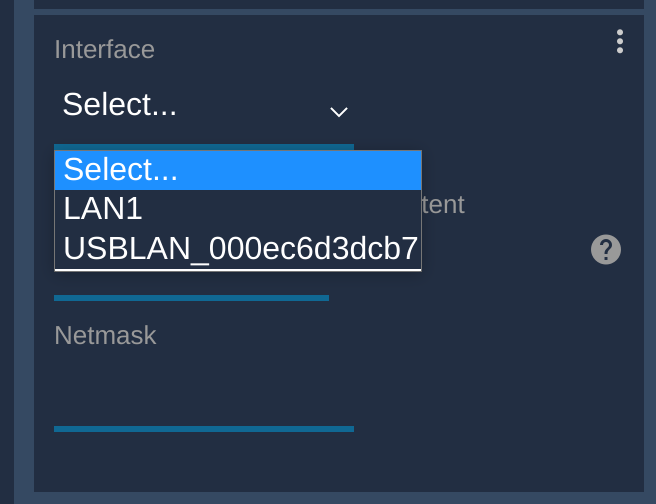
Cyanview supports a wide range of USB Ethernet dongles, allowing you to build a physically separate network.
The dongle appears alongside "LAN1" in the dropdown list.
Checking the network overview
The "Diagnostics" tab shows a list of IP addresses for all interfaces, including DHCP addresses.


Example: an RCP with factory default IP 10.192.18.4 and DHCP address 192.168.88.30
Checking internet connectivity
You can run a connectivity check from the "Admin" tab (a few seconds if everything is fine, up to about a minute if there's an issue).

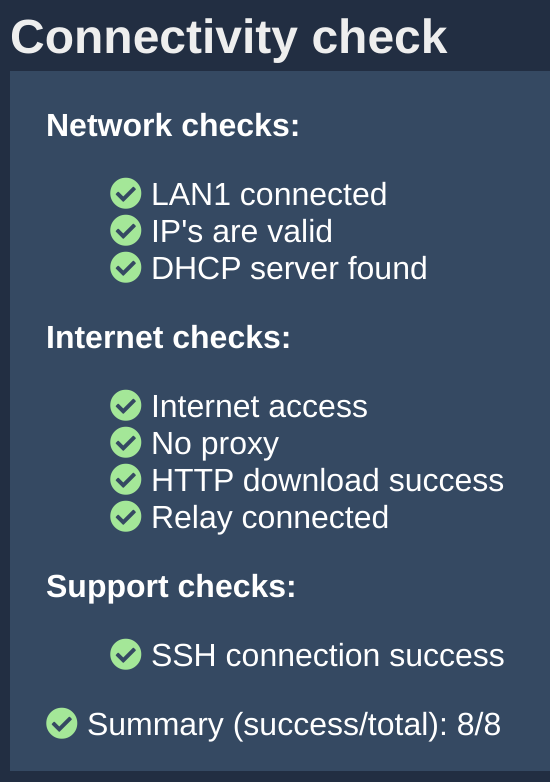
A green indicator means the internet connection is working correctly.