Tally Configuration
https://support.cyanview.com/docs/Configuration/Tally
Overview
Tally information can be distributed to cameras via Cyanview devices such as the RCP, based on data received from a video switcher. Typically, tally is ingested using the TSL protocol or through direct integration with supported switchers, then relayed to the cameras through the control protocol or sent to an external tally light.
Tally data follows the same routing as camera control signals, whether transmitted locally between RCPs or distributed remotely via the REMI cloud through a RIO. Any device in the system can ingest tally data, and it is then automatically shared across all connected devices, both locally and remotely.
Input methods:
- TSL
- GPI (RCP/NIO)
- ATEM, VMix, Tricaster
- Pro-Bel SW-P-08 (VSM, etc.)
Output methods:
- Camera protocol (for supported models)
- GPO (RCP/NIO)
- Built-in LED (CI0/RIO)
- External LED (CI0/RIO)
Tally input
TSL
The RCP, RIO, and NIO have a built-in TSL server that functions as a multiviewer.
- Supports TSL versions 3.1 and 5.0
- Supports both UDP and TCP protocols
- The RCP acts as the TSL server
- Each camera is assigned a TSL display ID matching its camera number, so tally for all configured cameras can be received simultaneously through a single connection
Since the RCP acts as a TSL server, you must configure your TSL client (switcher, etc.) to use the RCP's IP address as the screen/display IP address.
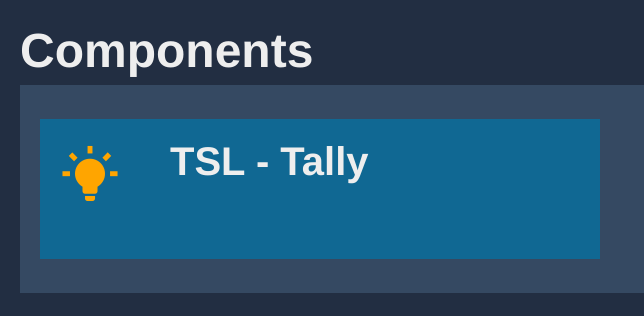
TSL is active by default. To configure it, click the "TSL" block in the Components section.
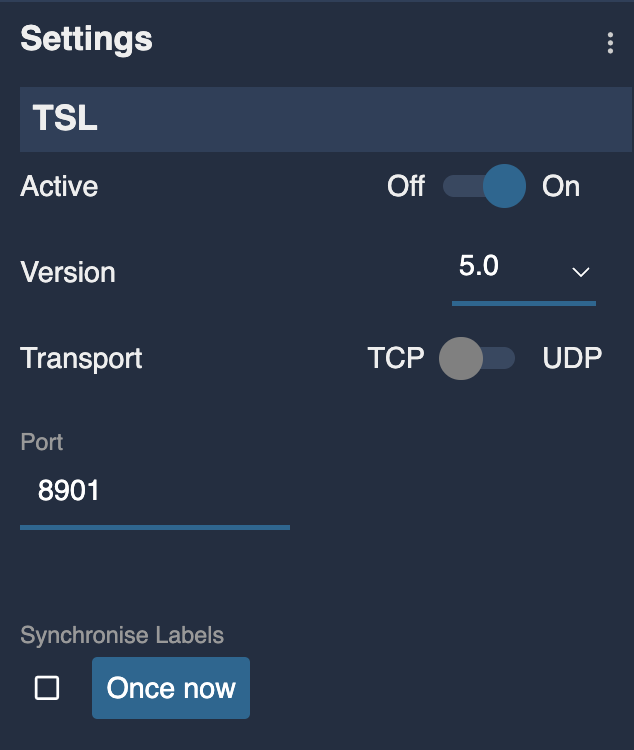
Configuration items:
| Item | Description |
|---|---|
| Active | Enable/disable the TSL server |
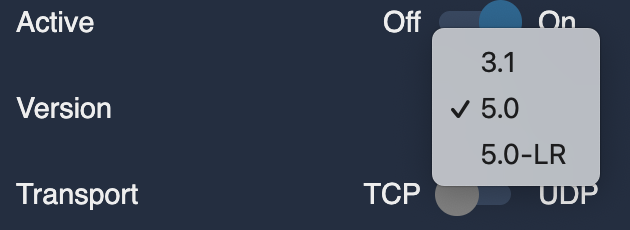
| Version | TSL 3.1 / TSL 5.0 / TSL 5.0-LR / TSL 5.0-TXT |
| Transport | UDP or TCP |
| Port | Listening port number |
| Synchronise Labels | Renames the cameras with the TSL UMD labels. If ticked, names are continuously synchronized with the TSL labels. "Once now" updates the names only once, with the labels received so far |
Version options:
| Version | Details |
|---|---|
| TSL 3.1 | The "Tally 1" bit is assigned to the camera's green tally, and the "Tally 2" bit to its red tally ("Tally 3" and "Tally 4" bits are ignored) |
| TSL 5.0 | Color is determined by the Left Hand/Right Hand bits (red bit 0/4 → red tally, green bit 1/5 → green tally). Text tally bits 2-3 are ignored |
| TSL 5.0-LR | Any Left Hand bit (red or green) is assigned to red tally and any Right Hand bit to green tally, regardless of the color defined by the protocol. Similar to TSL 3.1, which had no color definition; Ross and FOR-A TSL appear to use this convention |
| TSL 5.0-TXT | Only Text Tally bits 2-3 are considered; Left Hand/Right Hand bits are ignored |
Whether you use TSL 3.1 or 5.0, the important point is to assign the camera number to the display index on the TSL client. TSL 3.1 has only a single index (possibly a named address), while TSL 5.0 has both a primary screen index and a display index. The screen index is ignored; the display index is used to match the camera number. In a multiviewer, this corresponds to the position of the picture within the multiview layout.
If TSL 5.0 doesn't seem to work, check that tally information is being sent to the Left Hand/Right Hand Lamp State rather than the Text Tally State (which is ignored). TSL conventions vary: some devices use green on the left and red on the right, others use both lamps to show red or green, and the text may always be red whether tally is red or green. This is why the text tally bits can't be relied on to get the correct tally color.
GPI
Typical use cases:
- If the GPI is near the RCP: connect a
CY-CBL-JACK-GPIO8to the RCP - If you want to use GPIO over Ethernet/Wi-Fi/4G: use an NIO
Configuration steps:
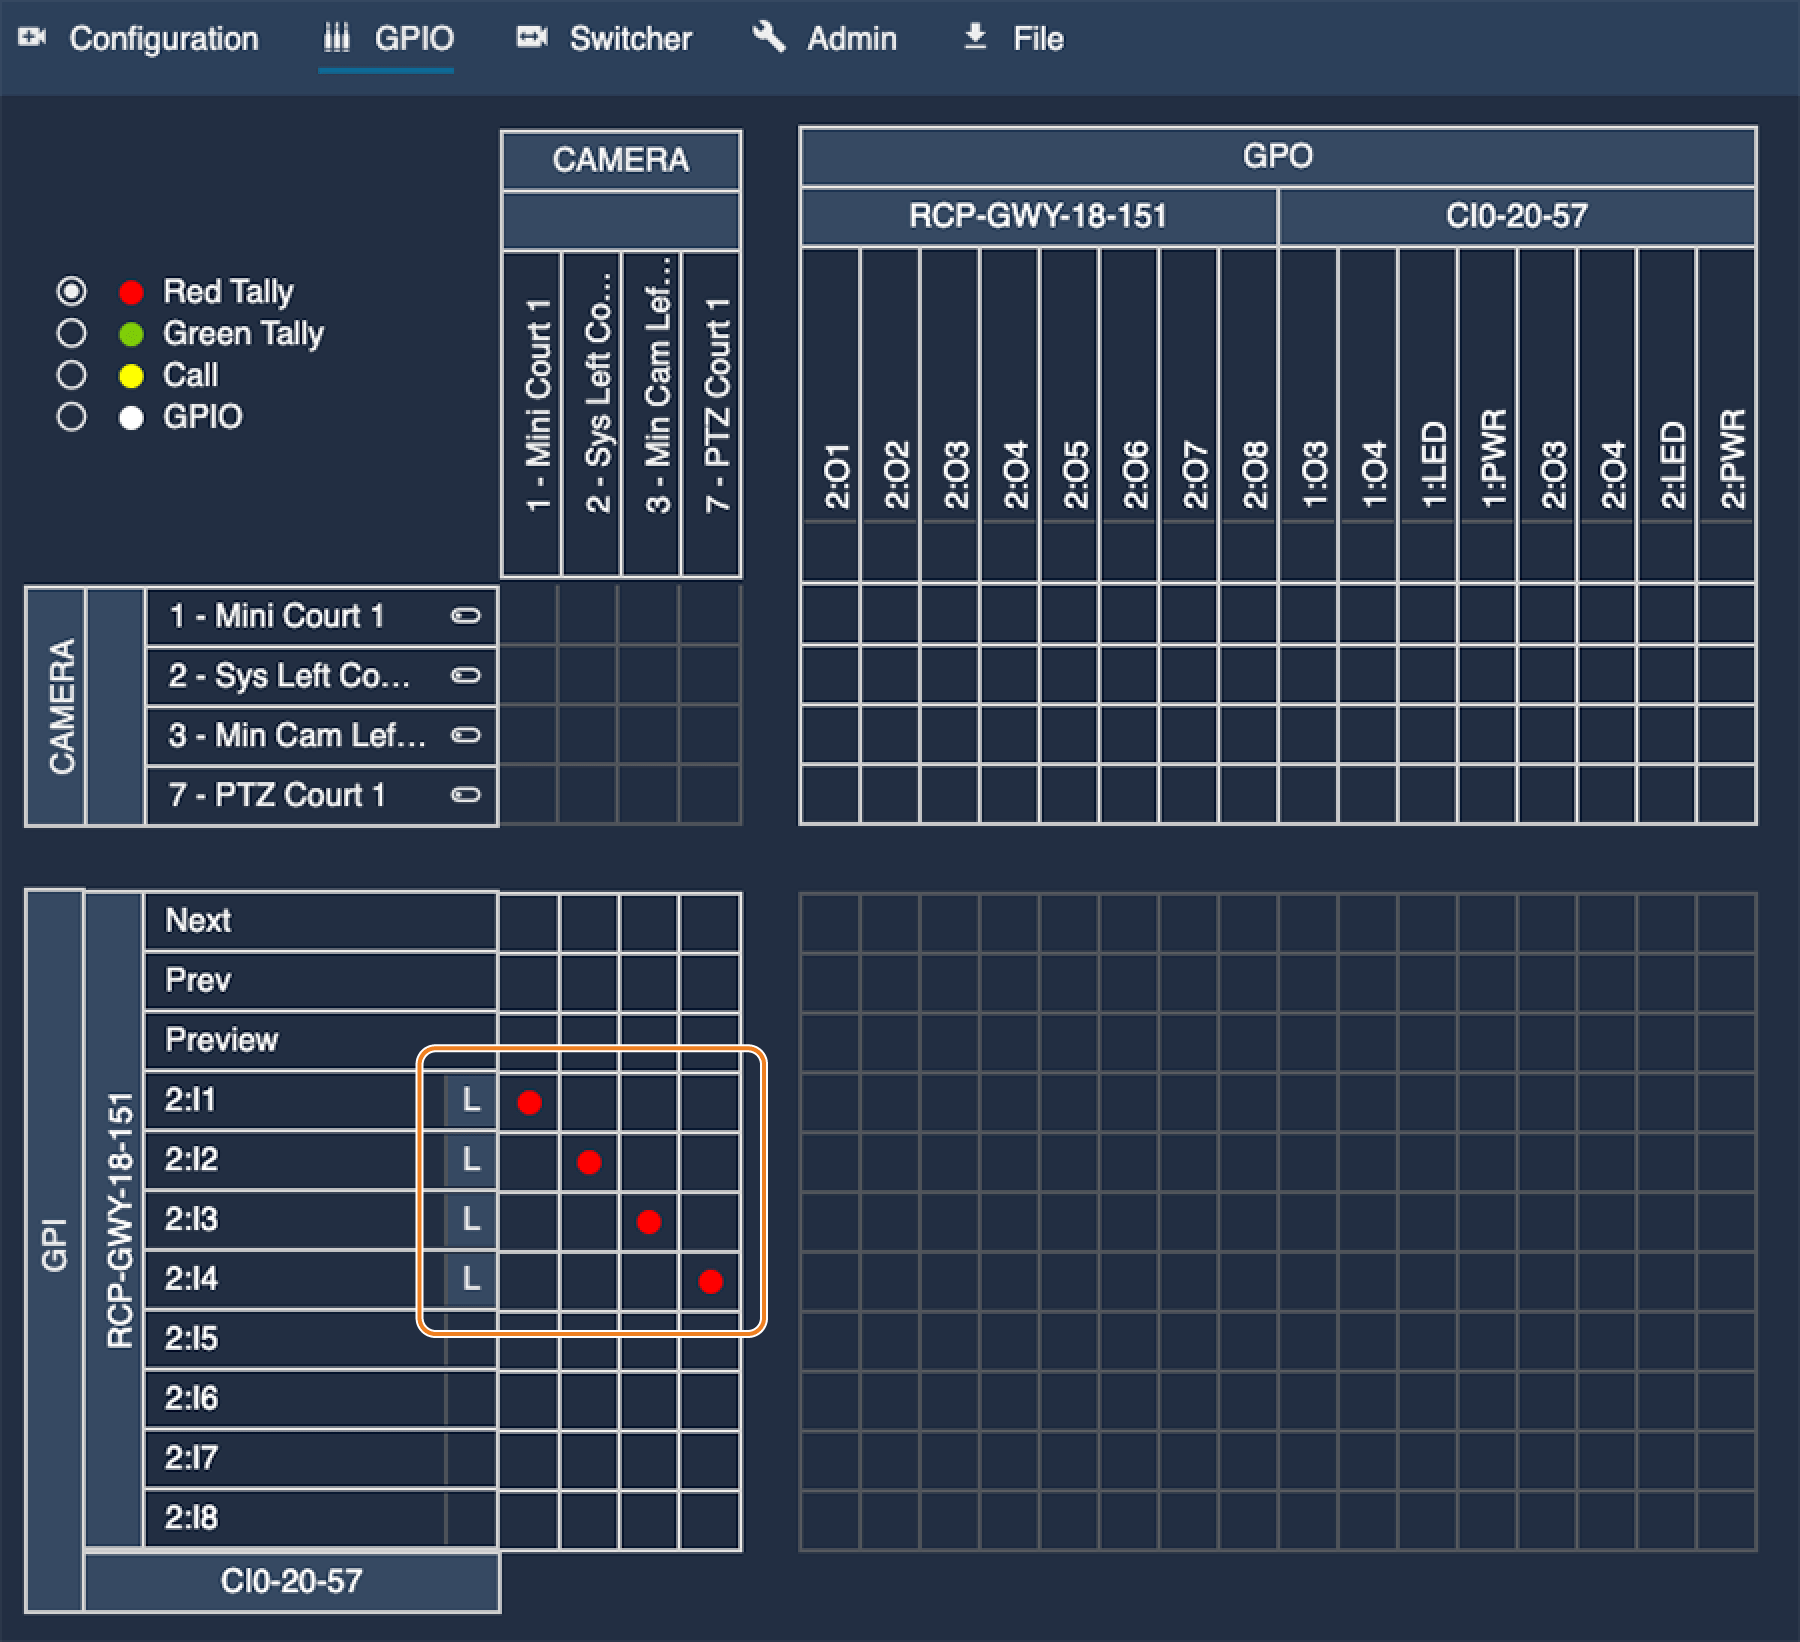
- Open the RCP's GPIO page
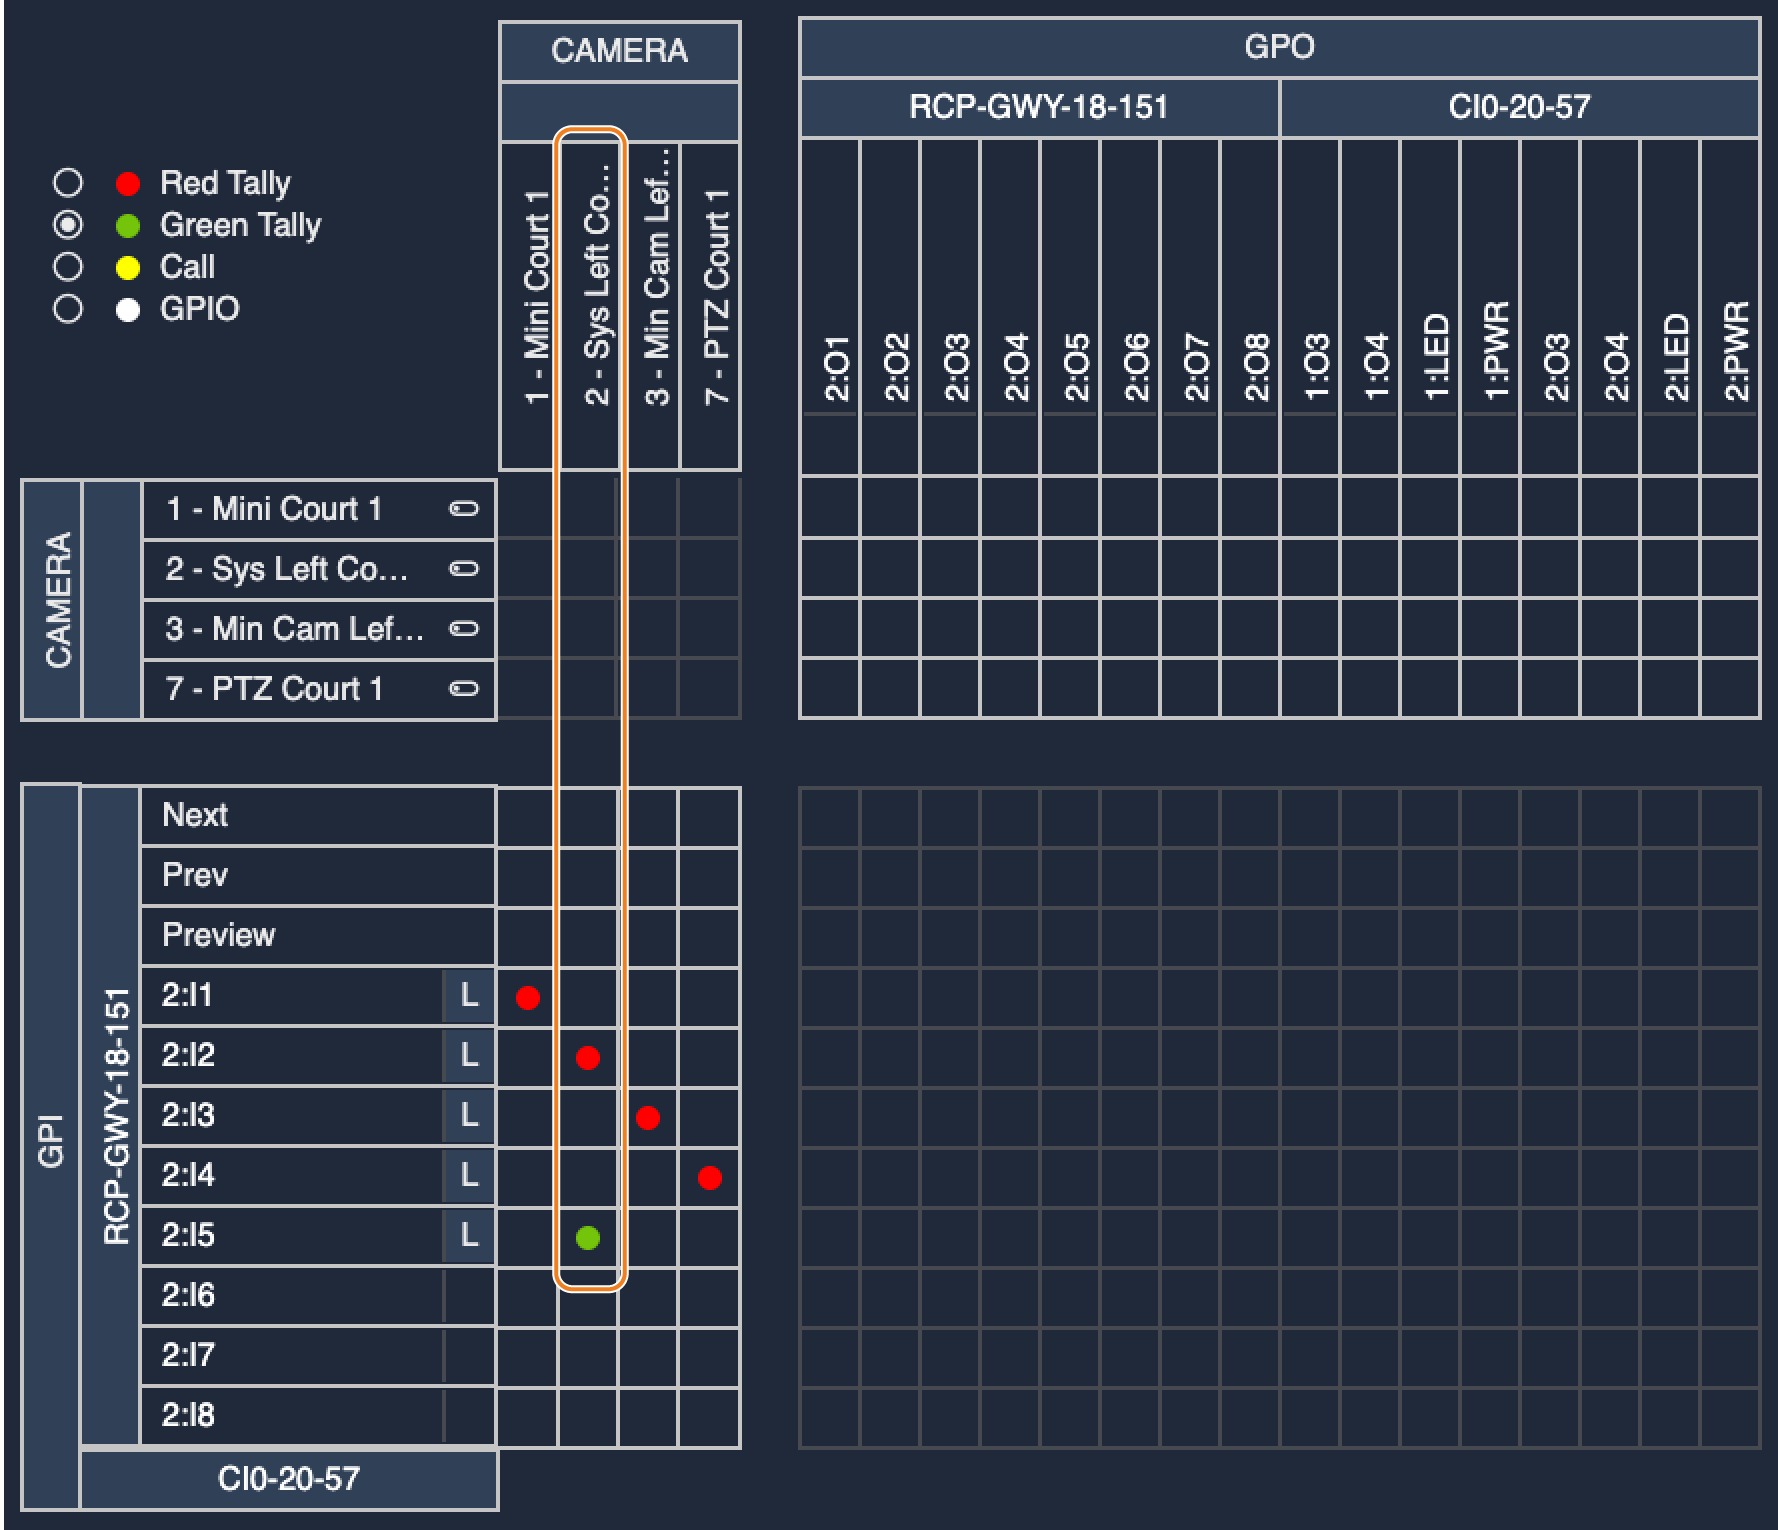
- Associate the GPI input with the target camera
- Select "Red Tally"
- Click the cell where the GPI row and CAMERA column intersect
Example configuration:
| GPI | Target |
|---|---|
| GPI 1 | Red tally for camera 1 |
| GPI 2 | Red tally for camera 2 |
| GPI 3 | Red tally for camera 3 |
| GPI 4 | Red tally for camera 7 |
| GPI 5 | Green tally for camera 2 |
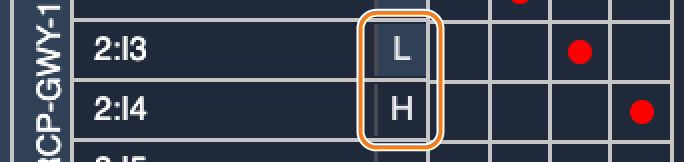
Setting polarity: Set the input level (H-L) to match your wiring. Clicking "L" toggles between H/L.
The pins on the CY-CBL-JACK-GPIO8 are High by default. Select (L) if the tally is active on a Low polarity, or (H) if it is active on a High polarity.
ATEM
First, configure the ATEM side appropriately. The underlying concept is the same as the Pro-Bel/VSM configuration described below.
Pro-Bel SW-P-08
If you're using VSM, configure it appropriately first.
Configuration steps:
- Link each camera to the corresponding input
- Link the RCP to an auxiliary (Aux) output if needed
- Set which output is Live (generates red tally)
- Set which output is Preview (generates green tally), if needed
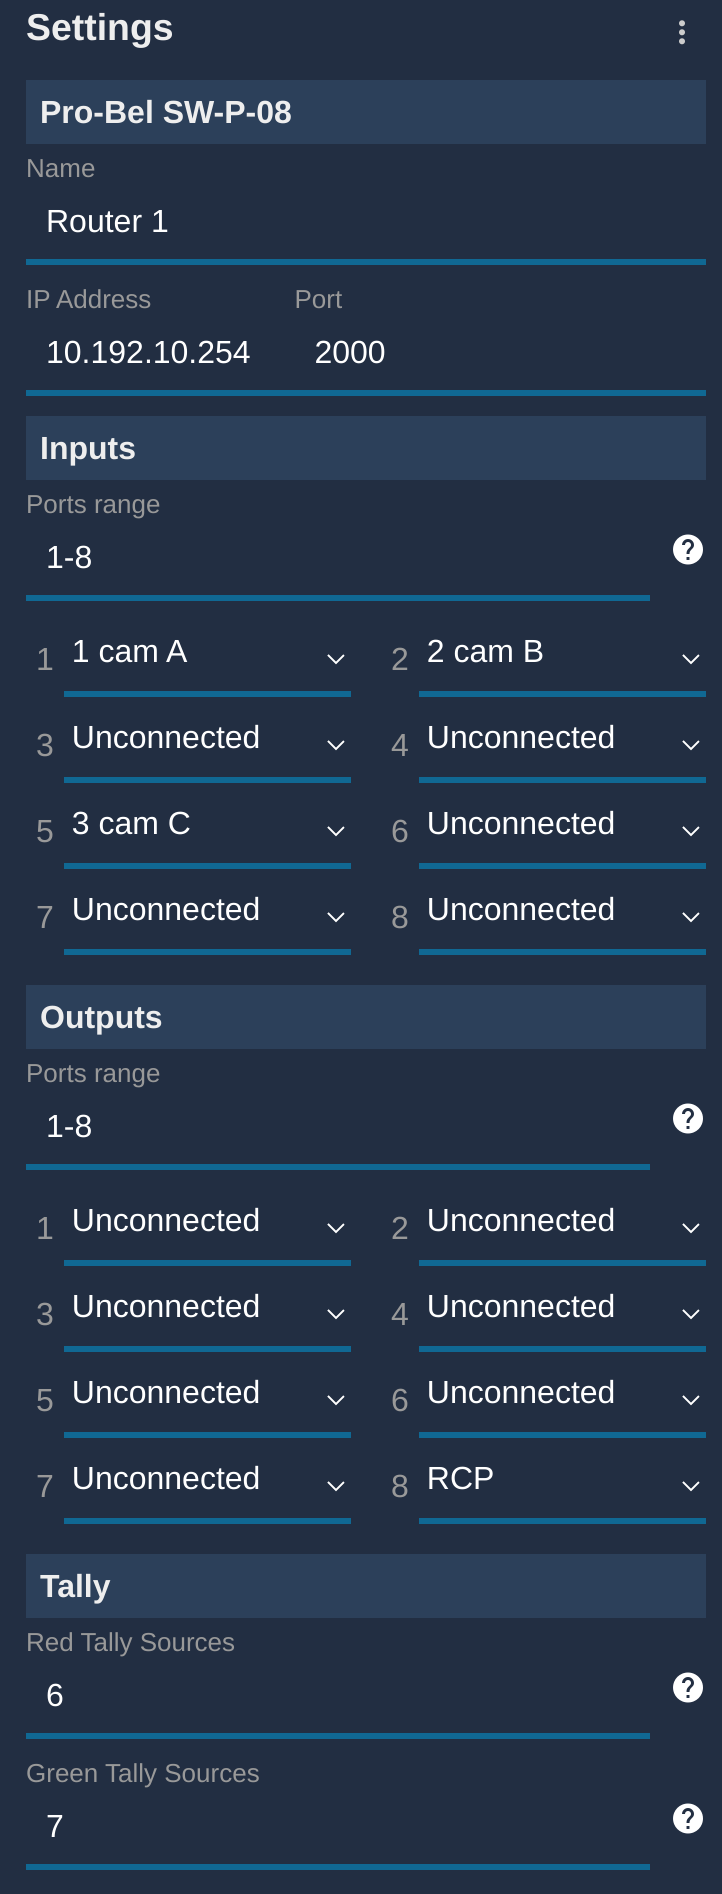
Example configuration: 3 cameras (Cam A = 1, Cam B = 2, Cam C = 3), with Cam A on input 1, Cam B on input 2, Cam C on input 5, and the RCP on output 8. Output 6 is used for red tally, output 7 for green tally.
Behavior: Switching cameras on the RCP links the corresponding input to output 8, and when the camera goes Live/Preview, the matching tally output is generated.
Checking tally status
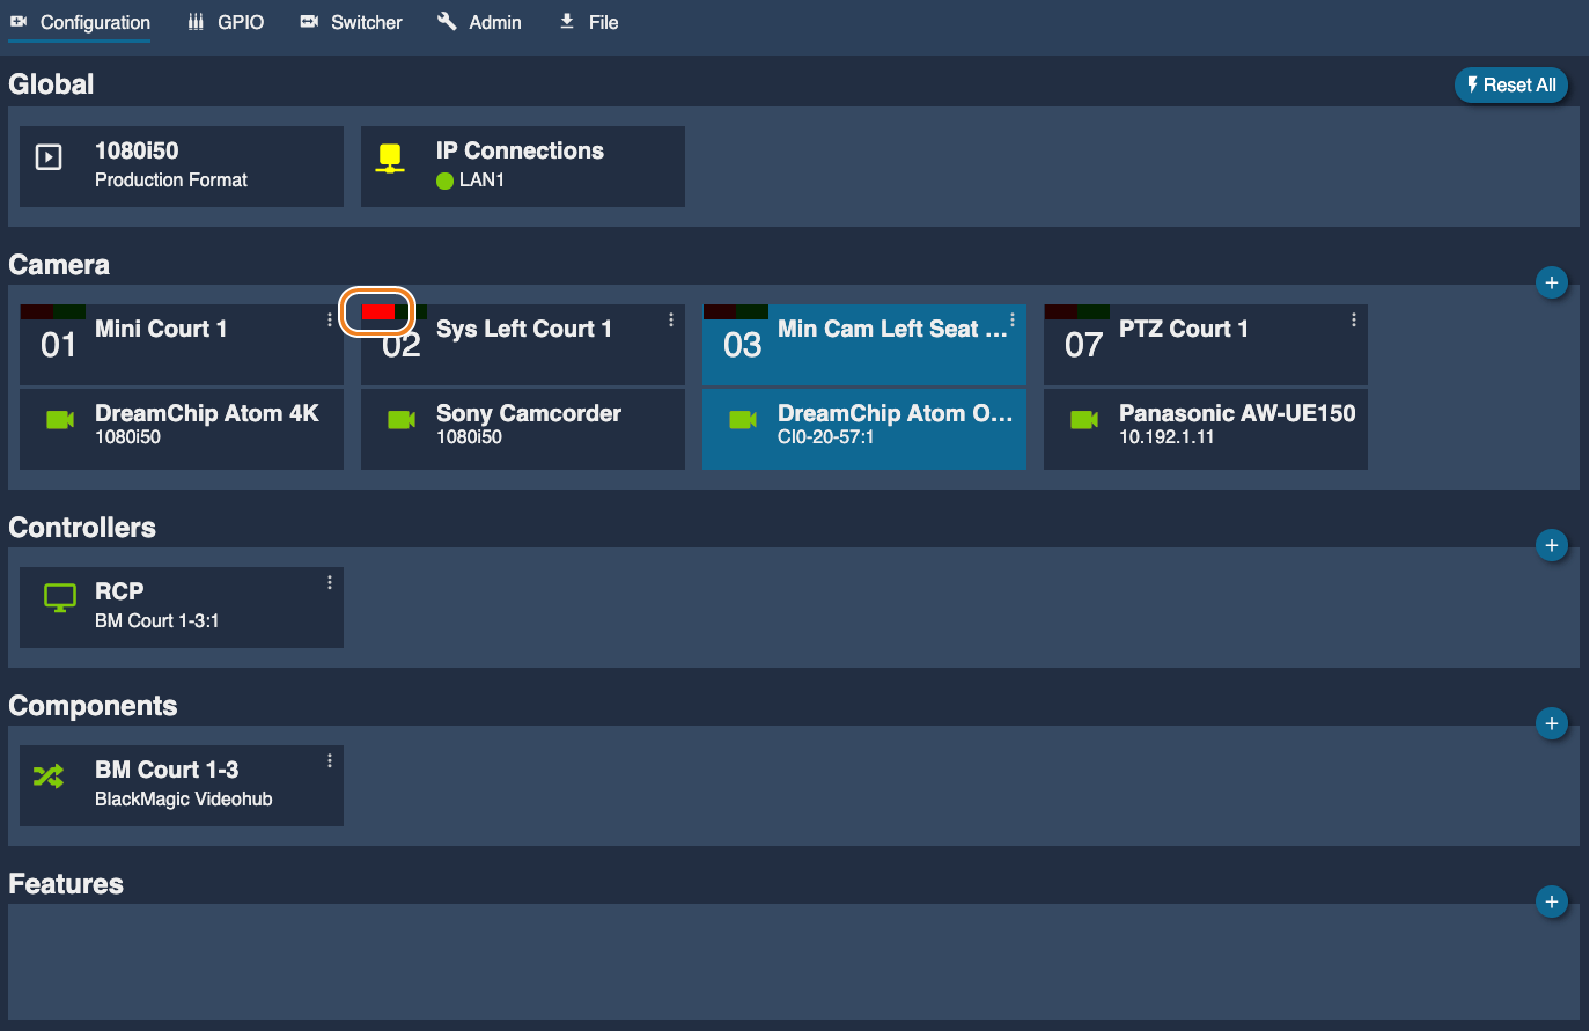
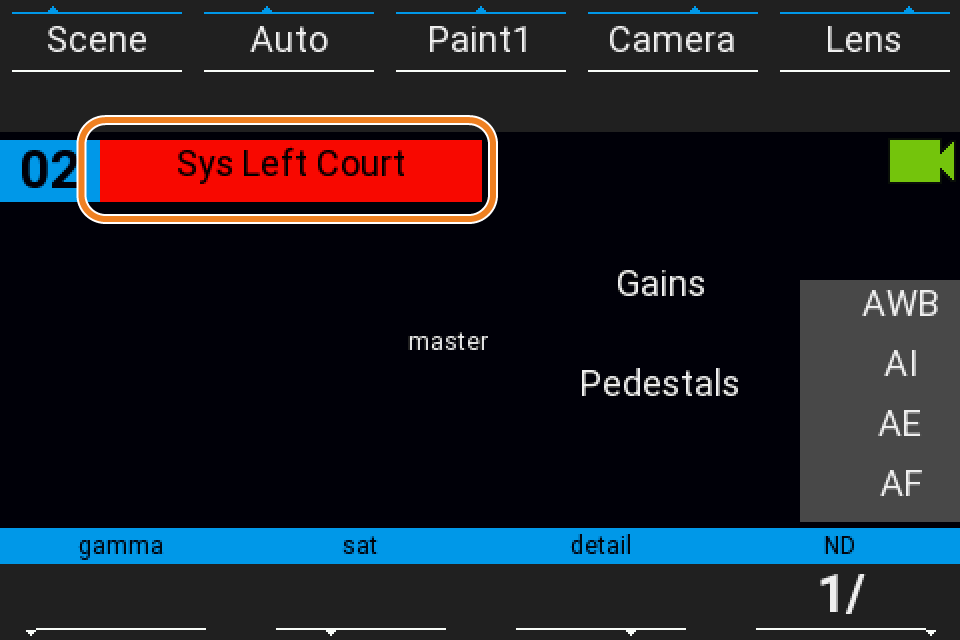
Tally status can be checked on the Configuration page of the RCP's Web UI. On the RCP screen itself, the tally color is shown as the background color behind the camera name.
Tally output
Via camera protocol
If the camera's control protocol supports tally, the RCP automatically includes tally information in the control commands. No additional wiring or external tally device is needed — tally information travels over the same path as camera control. How the tally is displayed depends on the camera's implementation: it may show on the viewfinder, activate a recording indicator, or both.
Supported examples: Panasonic UE-150 / UE-70 / UE-100, Sony PMW-500 / PMW-300 / PXW-Z450, Blackmagic MicroStudio series, JVC cameras with a supported protocol
GPO
- If the GPI is near the RCP: connect a
CY-CBL-JACK-GPIO8to the RCP - If you want to use GPO over Ethernet/Wi-Fi/4G: use an NIO
Each pin can be used as either GPI or GPO.
CI0/RIO built-in LED
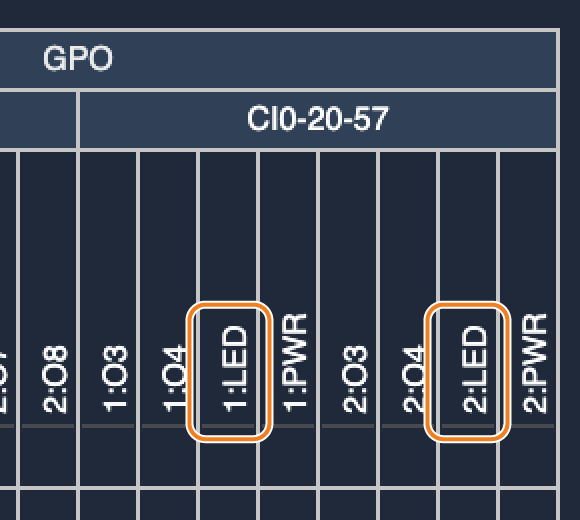
By default, the tally signal is shown on the unit's LED (e.g. 1:LED = LED for port 1).
CI0/RIO external LED
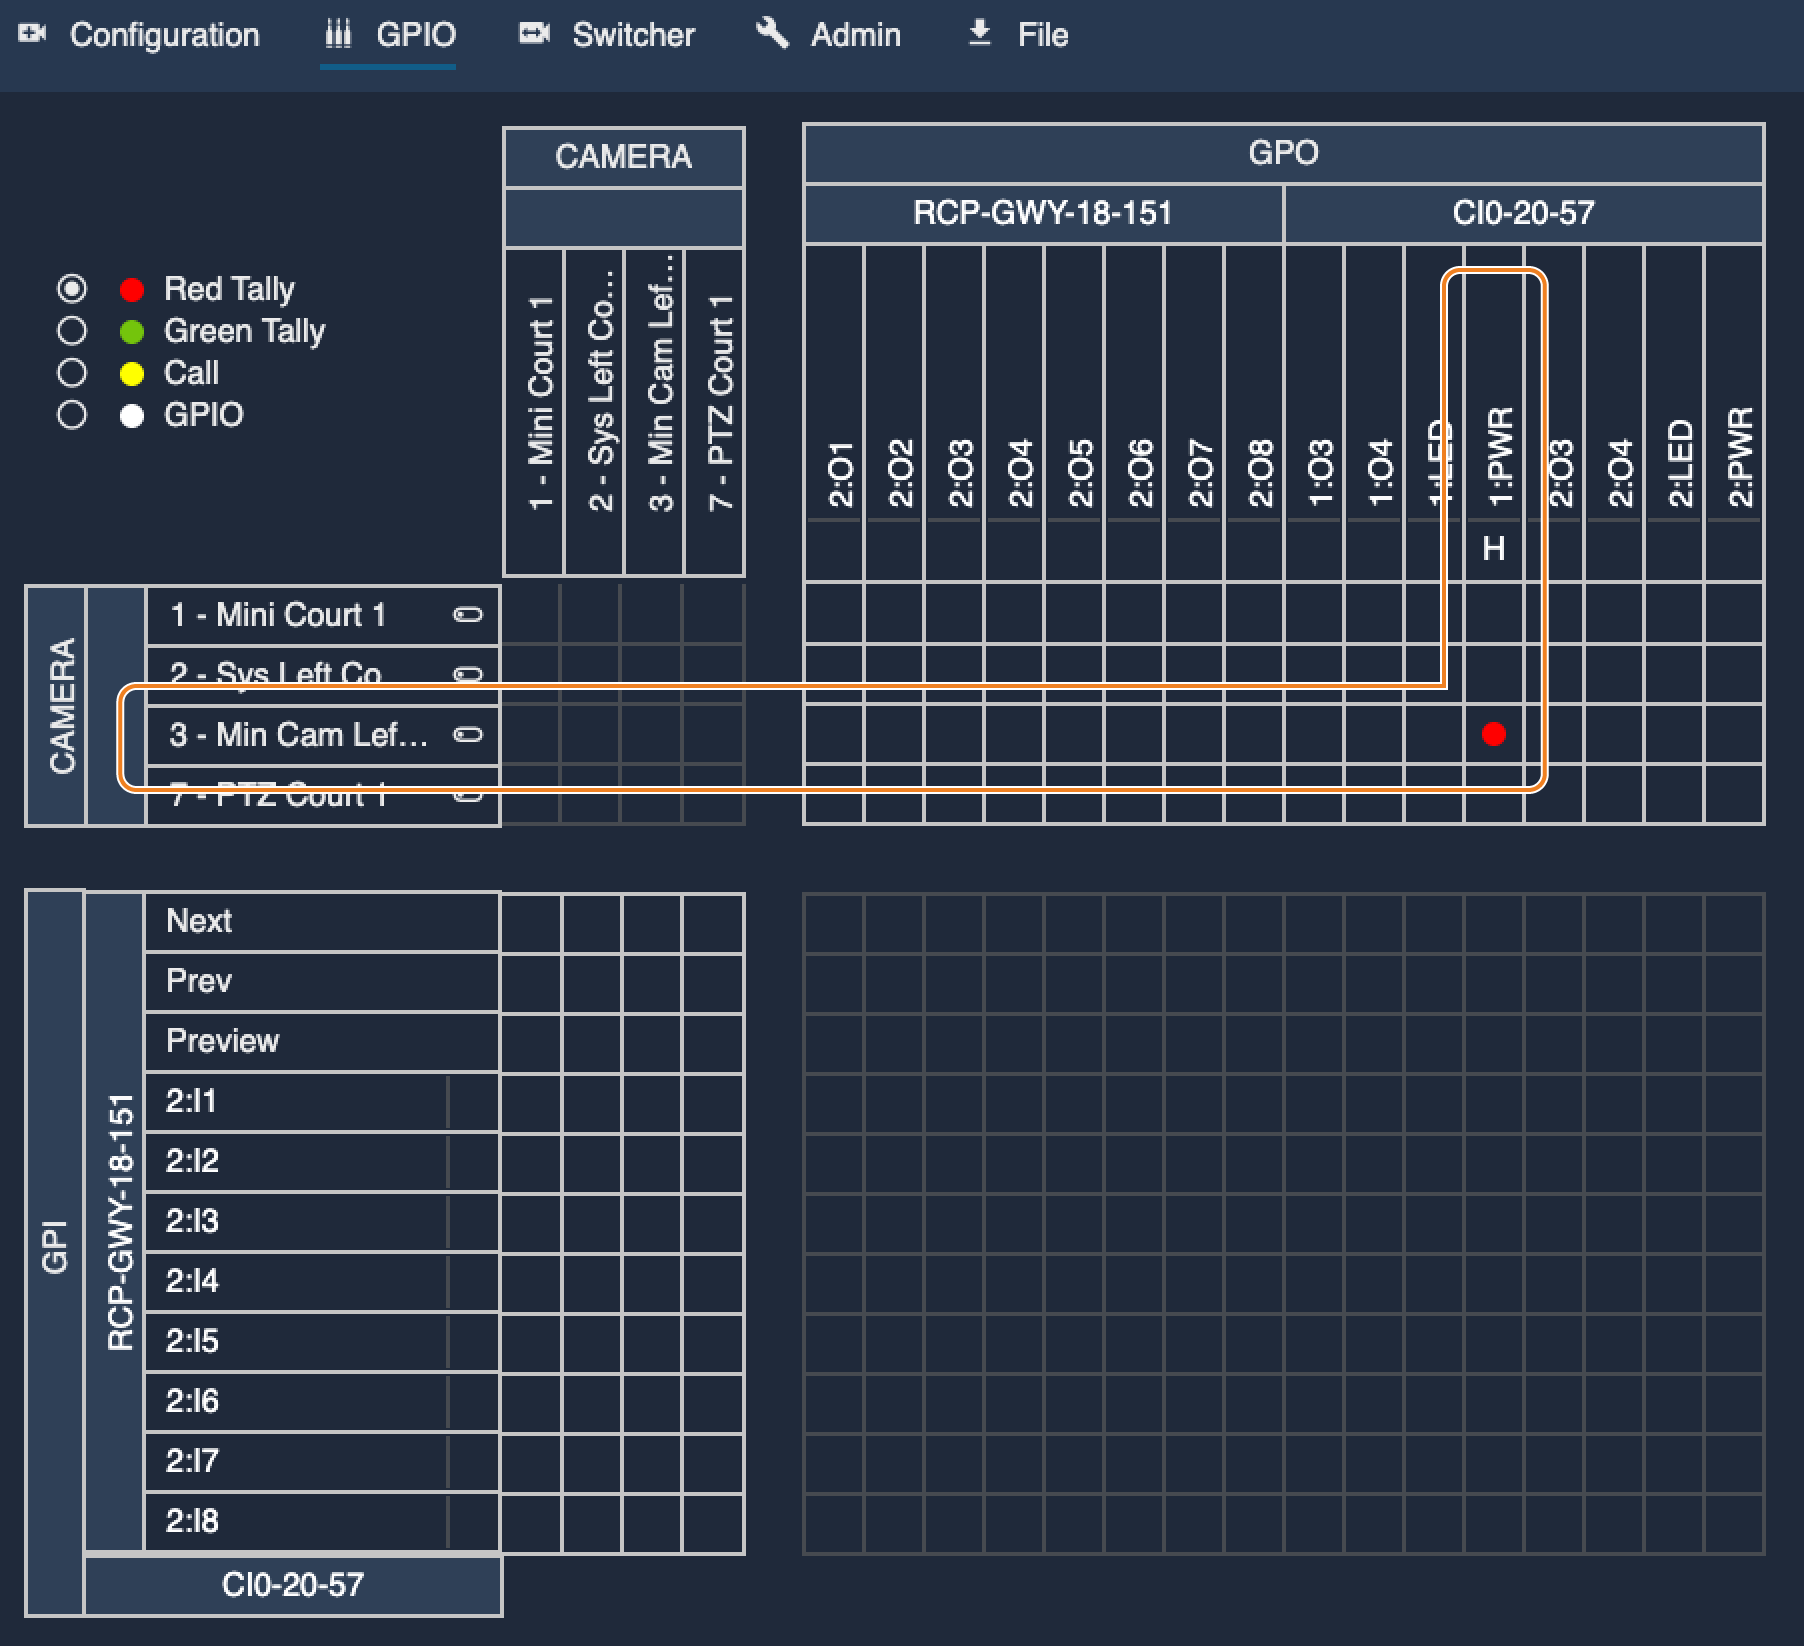
If a single camera is connected on port 1, the second port can be used as an external tally output (12V). Drive the tally signal with a CY-CBL-6P-PWR cable.
Example: When a red tally is sent to camera 3, the 12V output on port 1 of CI0-20-57 switches accordingly.

Tally output to a monitor
Overview
This method outputs the tally status of the currently selected camera to a monitor in real time. It assumes the RCP is configured as a router/switcher and linked to an auxiliary output.
Goal
Following this guide lets you achieve:
- Tally input from ATEM (red/green tally shown on the RCP and Web UI)
- The RCP synced with ATEM's AUX1 (visible on a monitor)
- The monitor lighting up red when the selected camera is Live, and green when it is in Preview
Wiring
Connect the RCP and NIO to the same LAN.
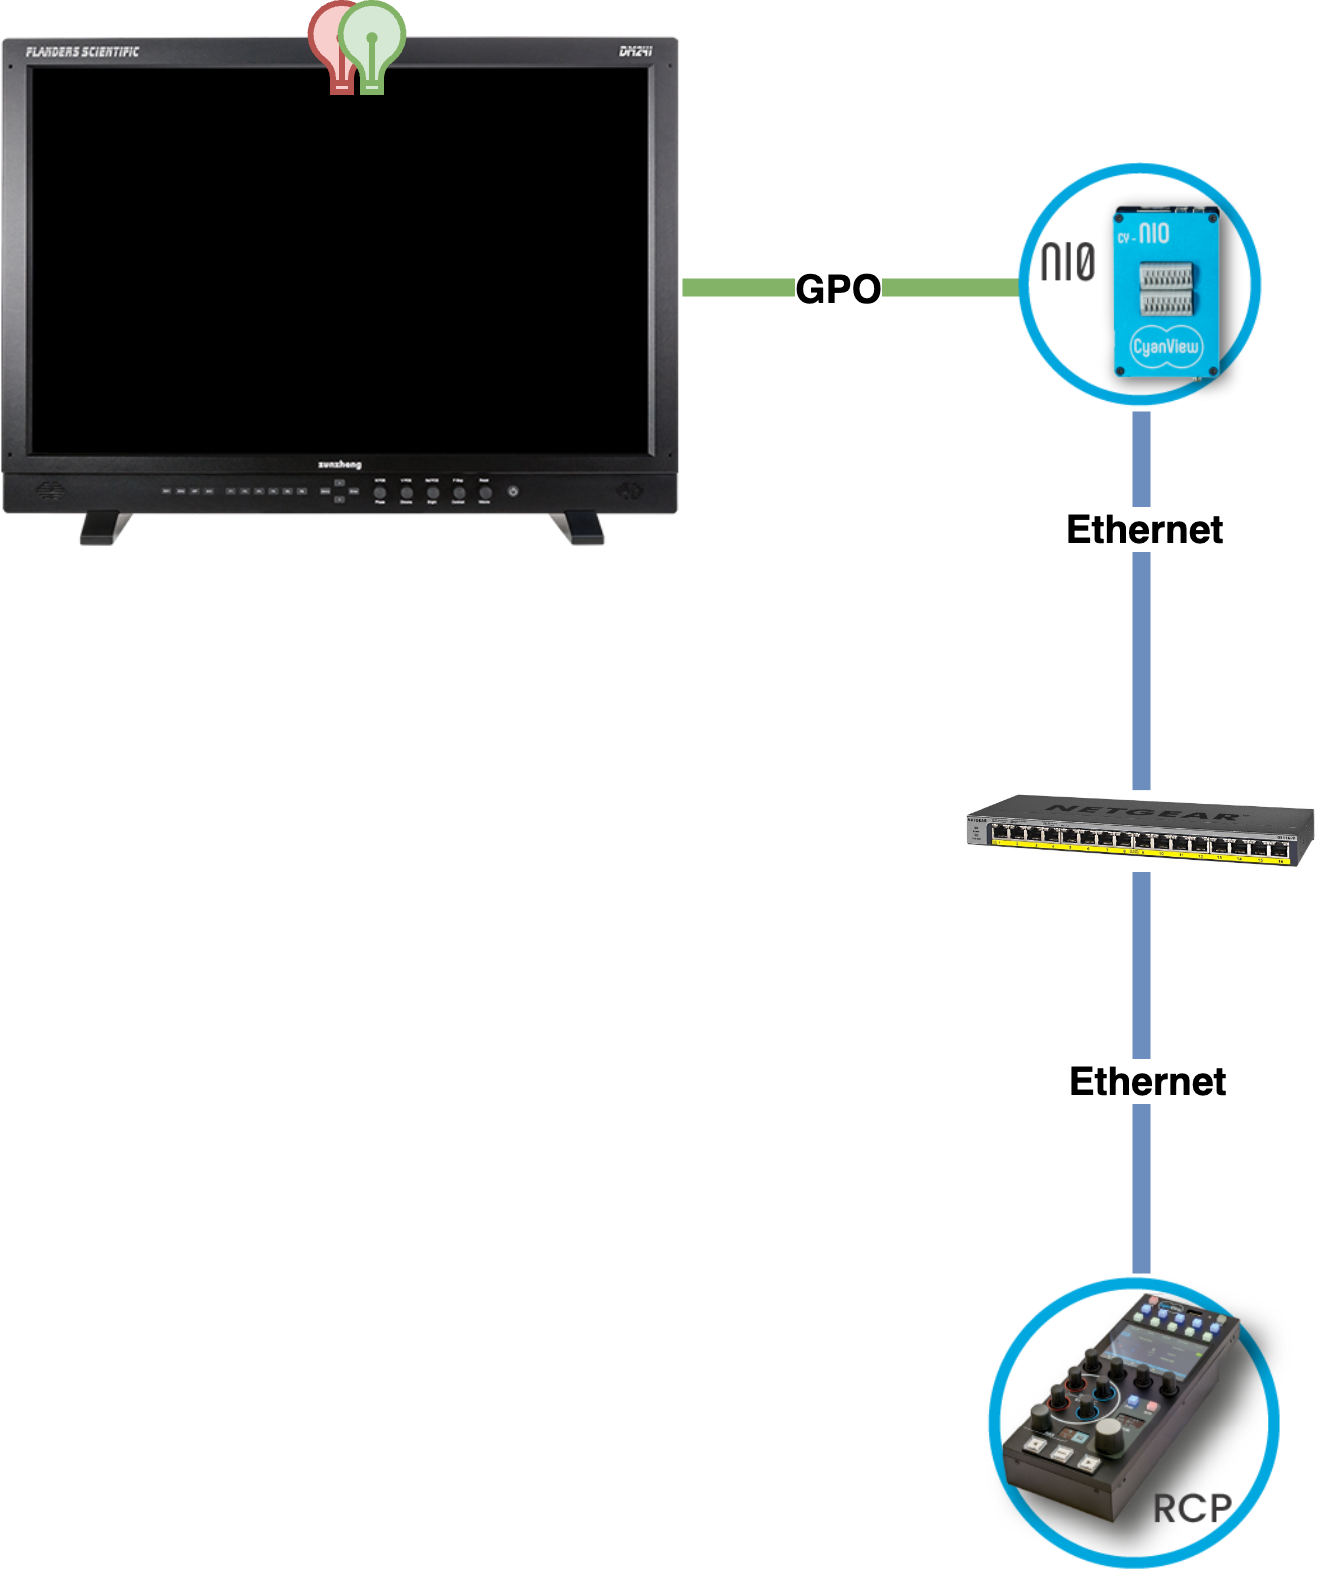
A GPIO dongle connected directly to the RCP can be used instead of an NIO.
Configuration
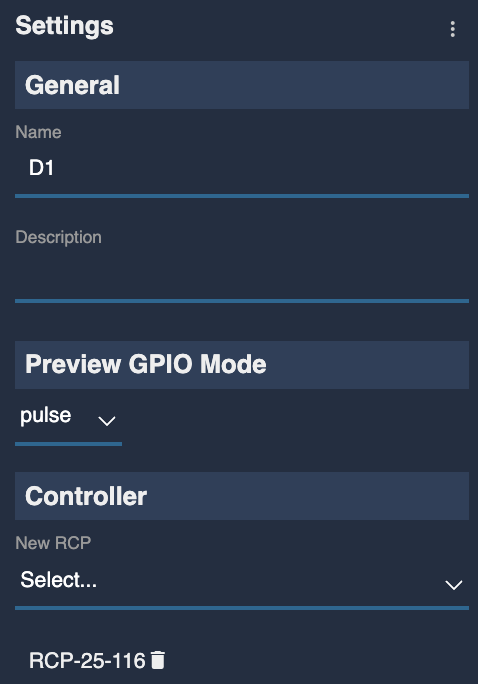
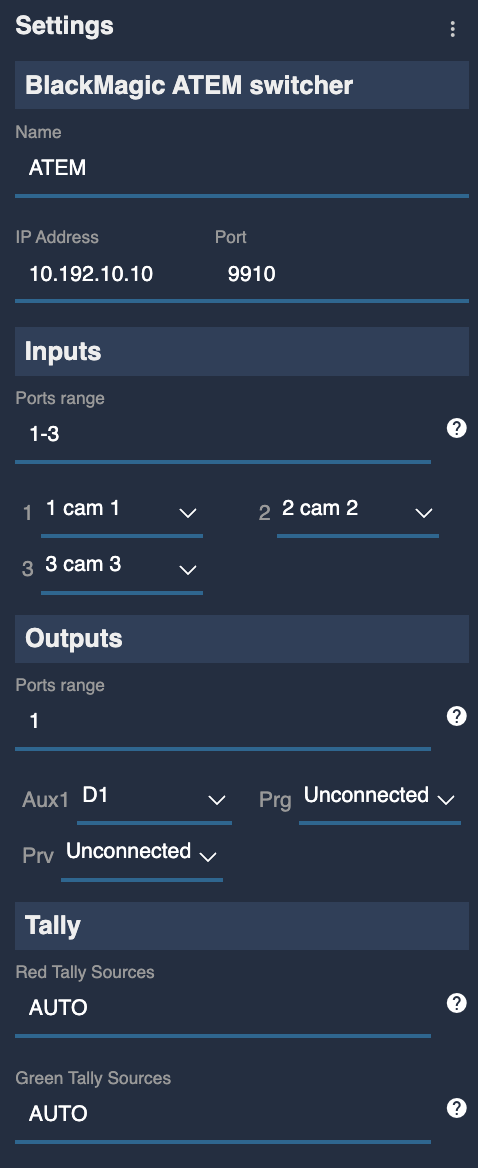
Example setup: 3 cameras (Cam 1/2/3), one RCP as a virtual monitor (D1), one ATEM
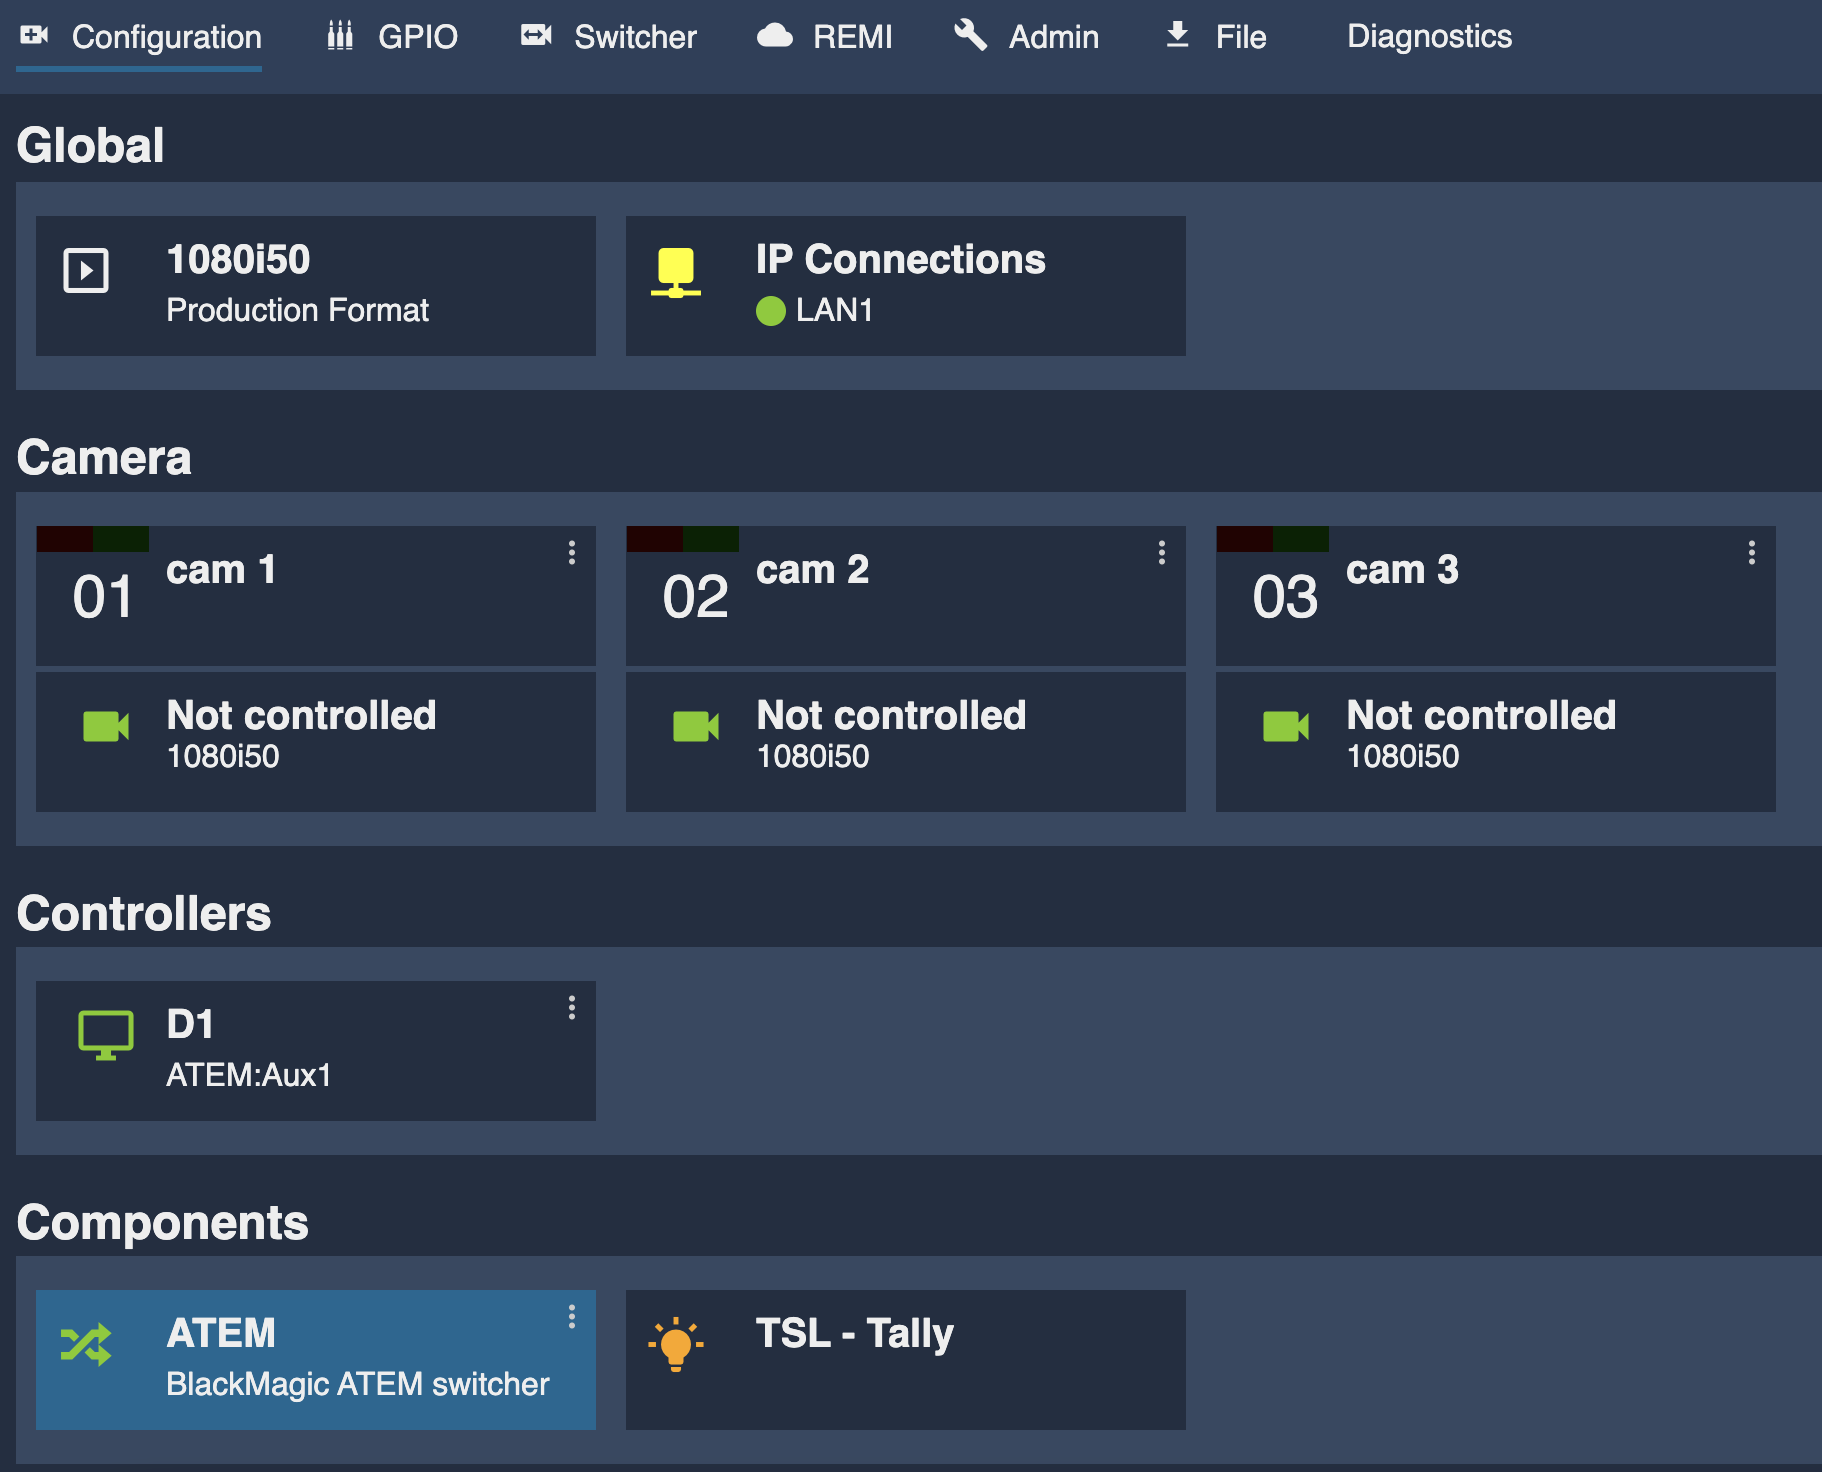
Virtual monitor: In the "Controllers" section, click on virtual monitor D1 and rename the RCP to "D1" (you can have multiple virtual monitors).
ATEM configuration: Link each camera to the corresponding input, and link the virtual monitor (D1) to the auxiliary output. Set red/green tally to "AUTO".
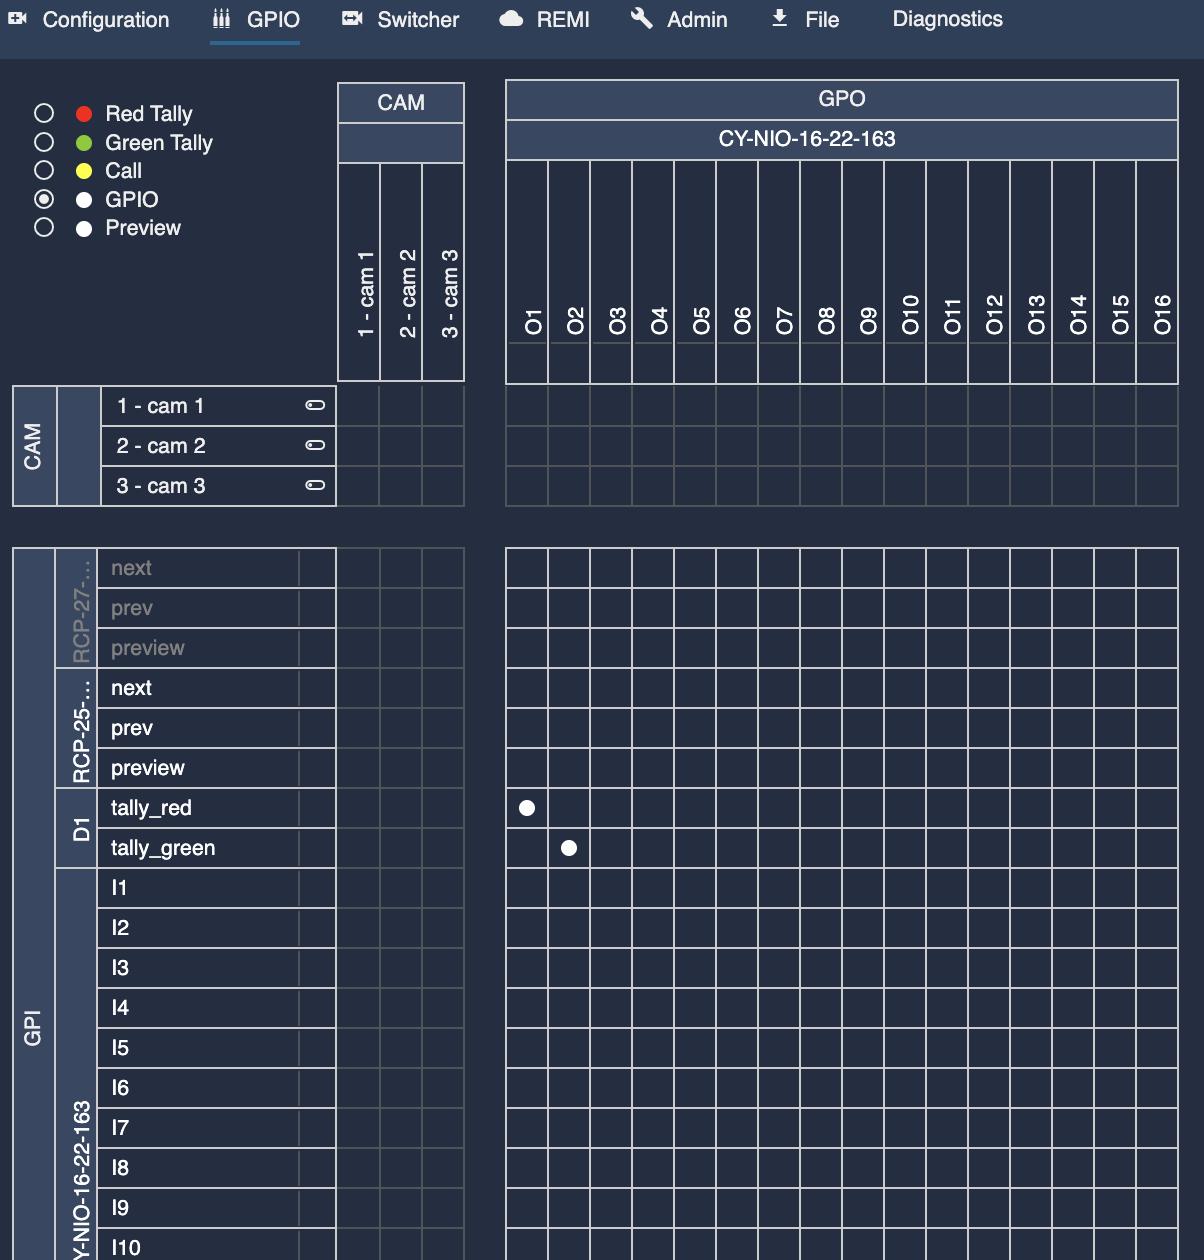
Monitor GPO configuration: Link virtual monitor D1's red tally to GPO1, and green tally to GPO2.
- Select the GPIO selector in the top left
- Find the row for virtual monitor D1's red_tally
- Click the NIO's GPO1 column
- Find the row for virtual monitor D1's green_tally
- Click the NIO's GPO2 column
If a white dot appears at the intersection of the virtual monitor's tally and the corresponding GPO, it is configured correctly.