IJ Usage
https://support.cyanview.com/docs/Manuals/IJ/IrisJoystick
Main screen
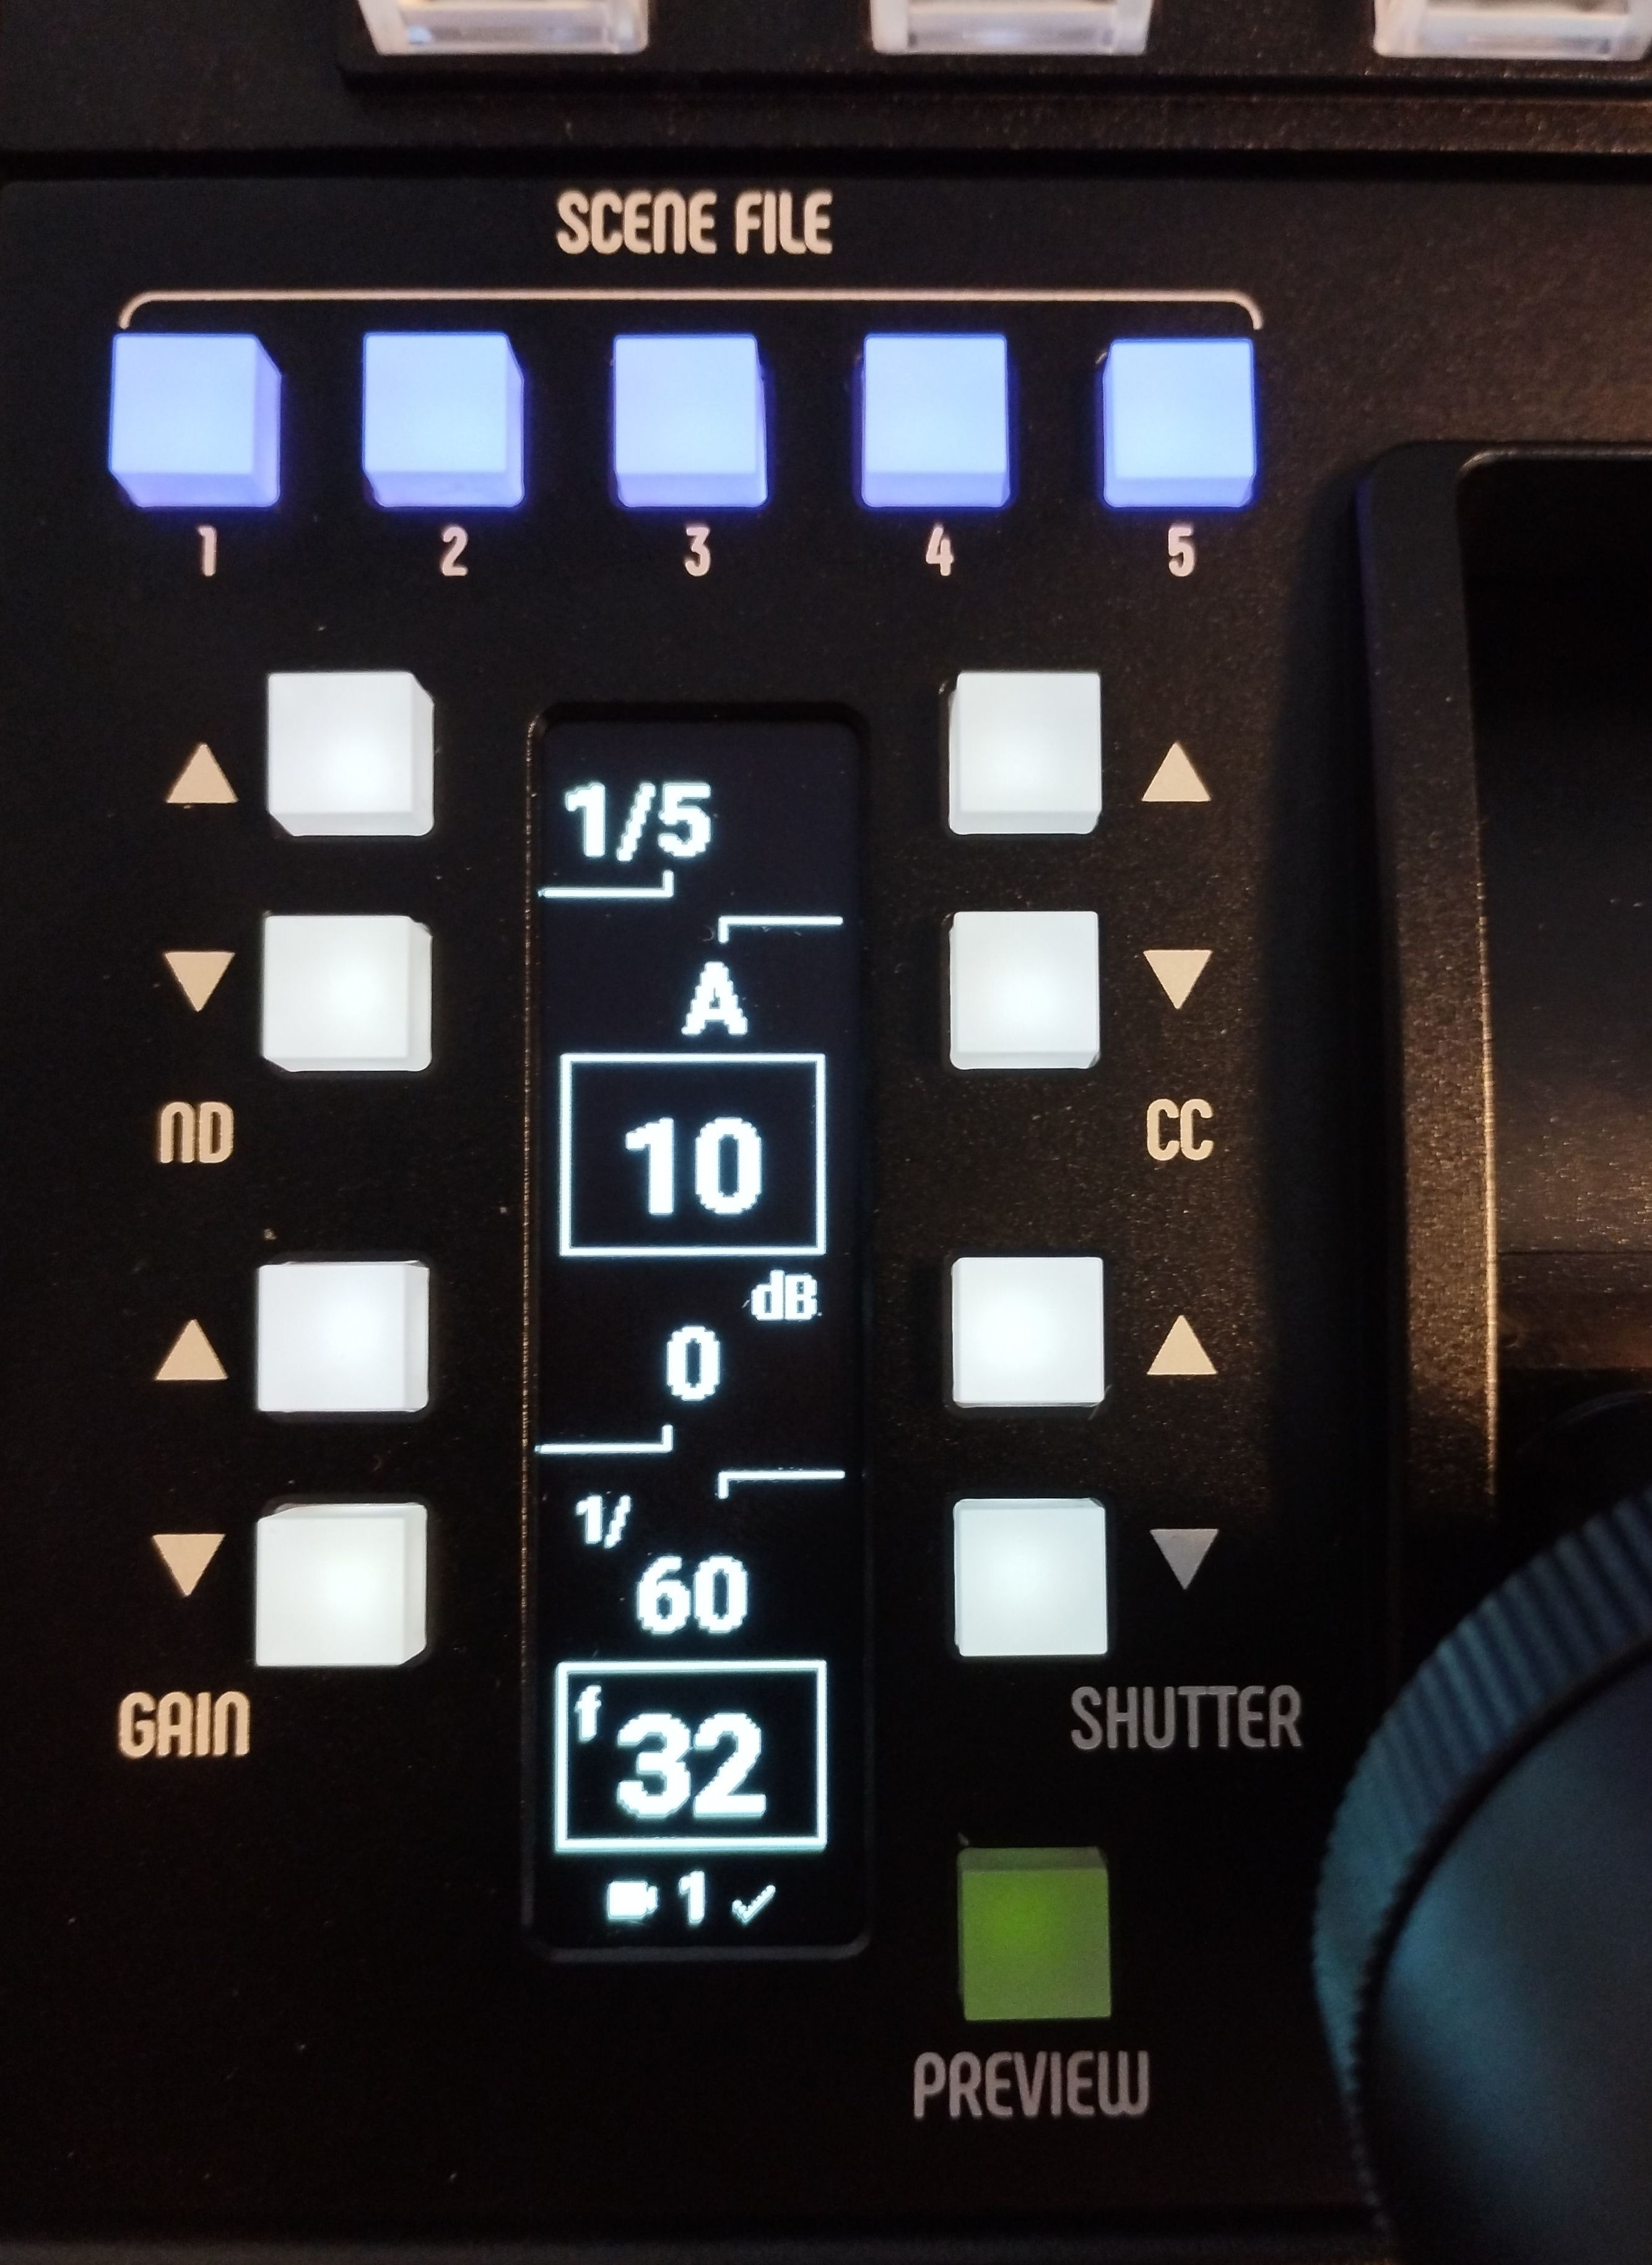
The default screen displays and controls the following parameters:
- Iris
- Black
- ND
- CC
- Shutter
- Gain
The bottom of the screen shows the camera number, camera status (online/offline), and a lock icon if the joystick is locked to a specific camera.
The joystick button acts as a preview, just like the green PREVIEW button.
While the PREVIEW button (green) is held, the joystick and black ring are disabled. This lets you physically reposition the joystick or the ring without changing the value on the camera.
The five blue buttons above the joystick section can be used to recall scene files (Scene 1-5). Scene files cannot be saved from here; this must be done from the RCP menu.
Configuration screen
Holding the Iris Joystick shaft while pressing the PREVIEW button gives access to the configuration screen.
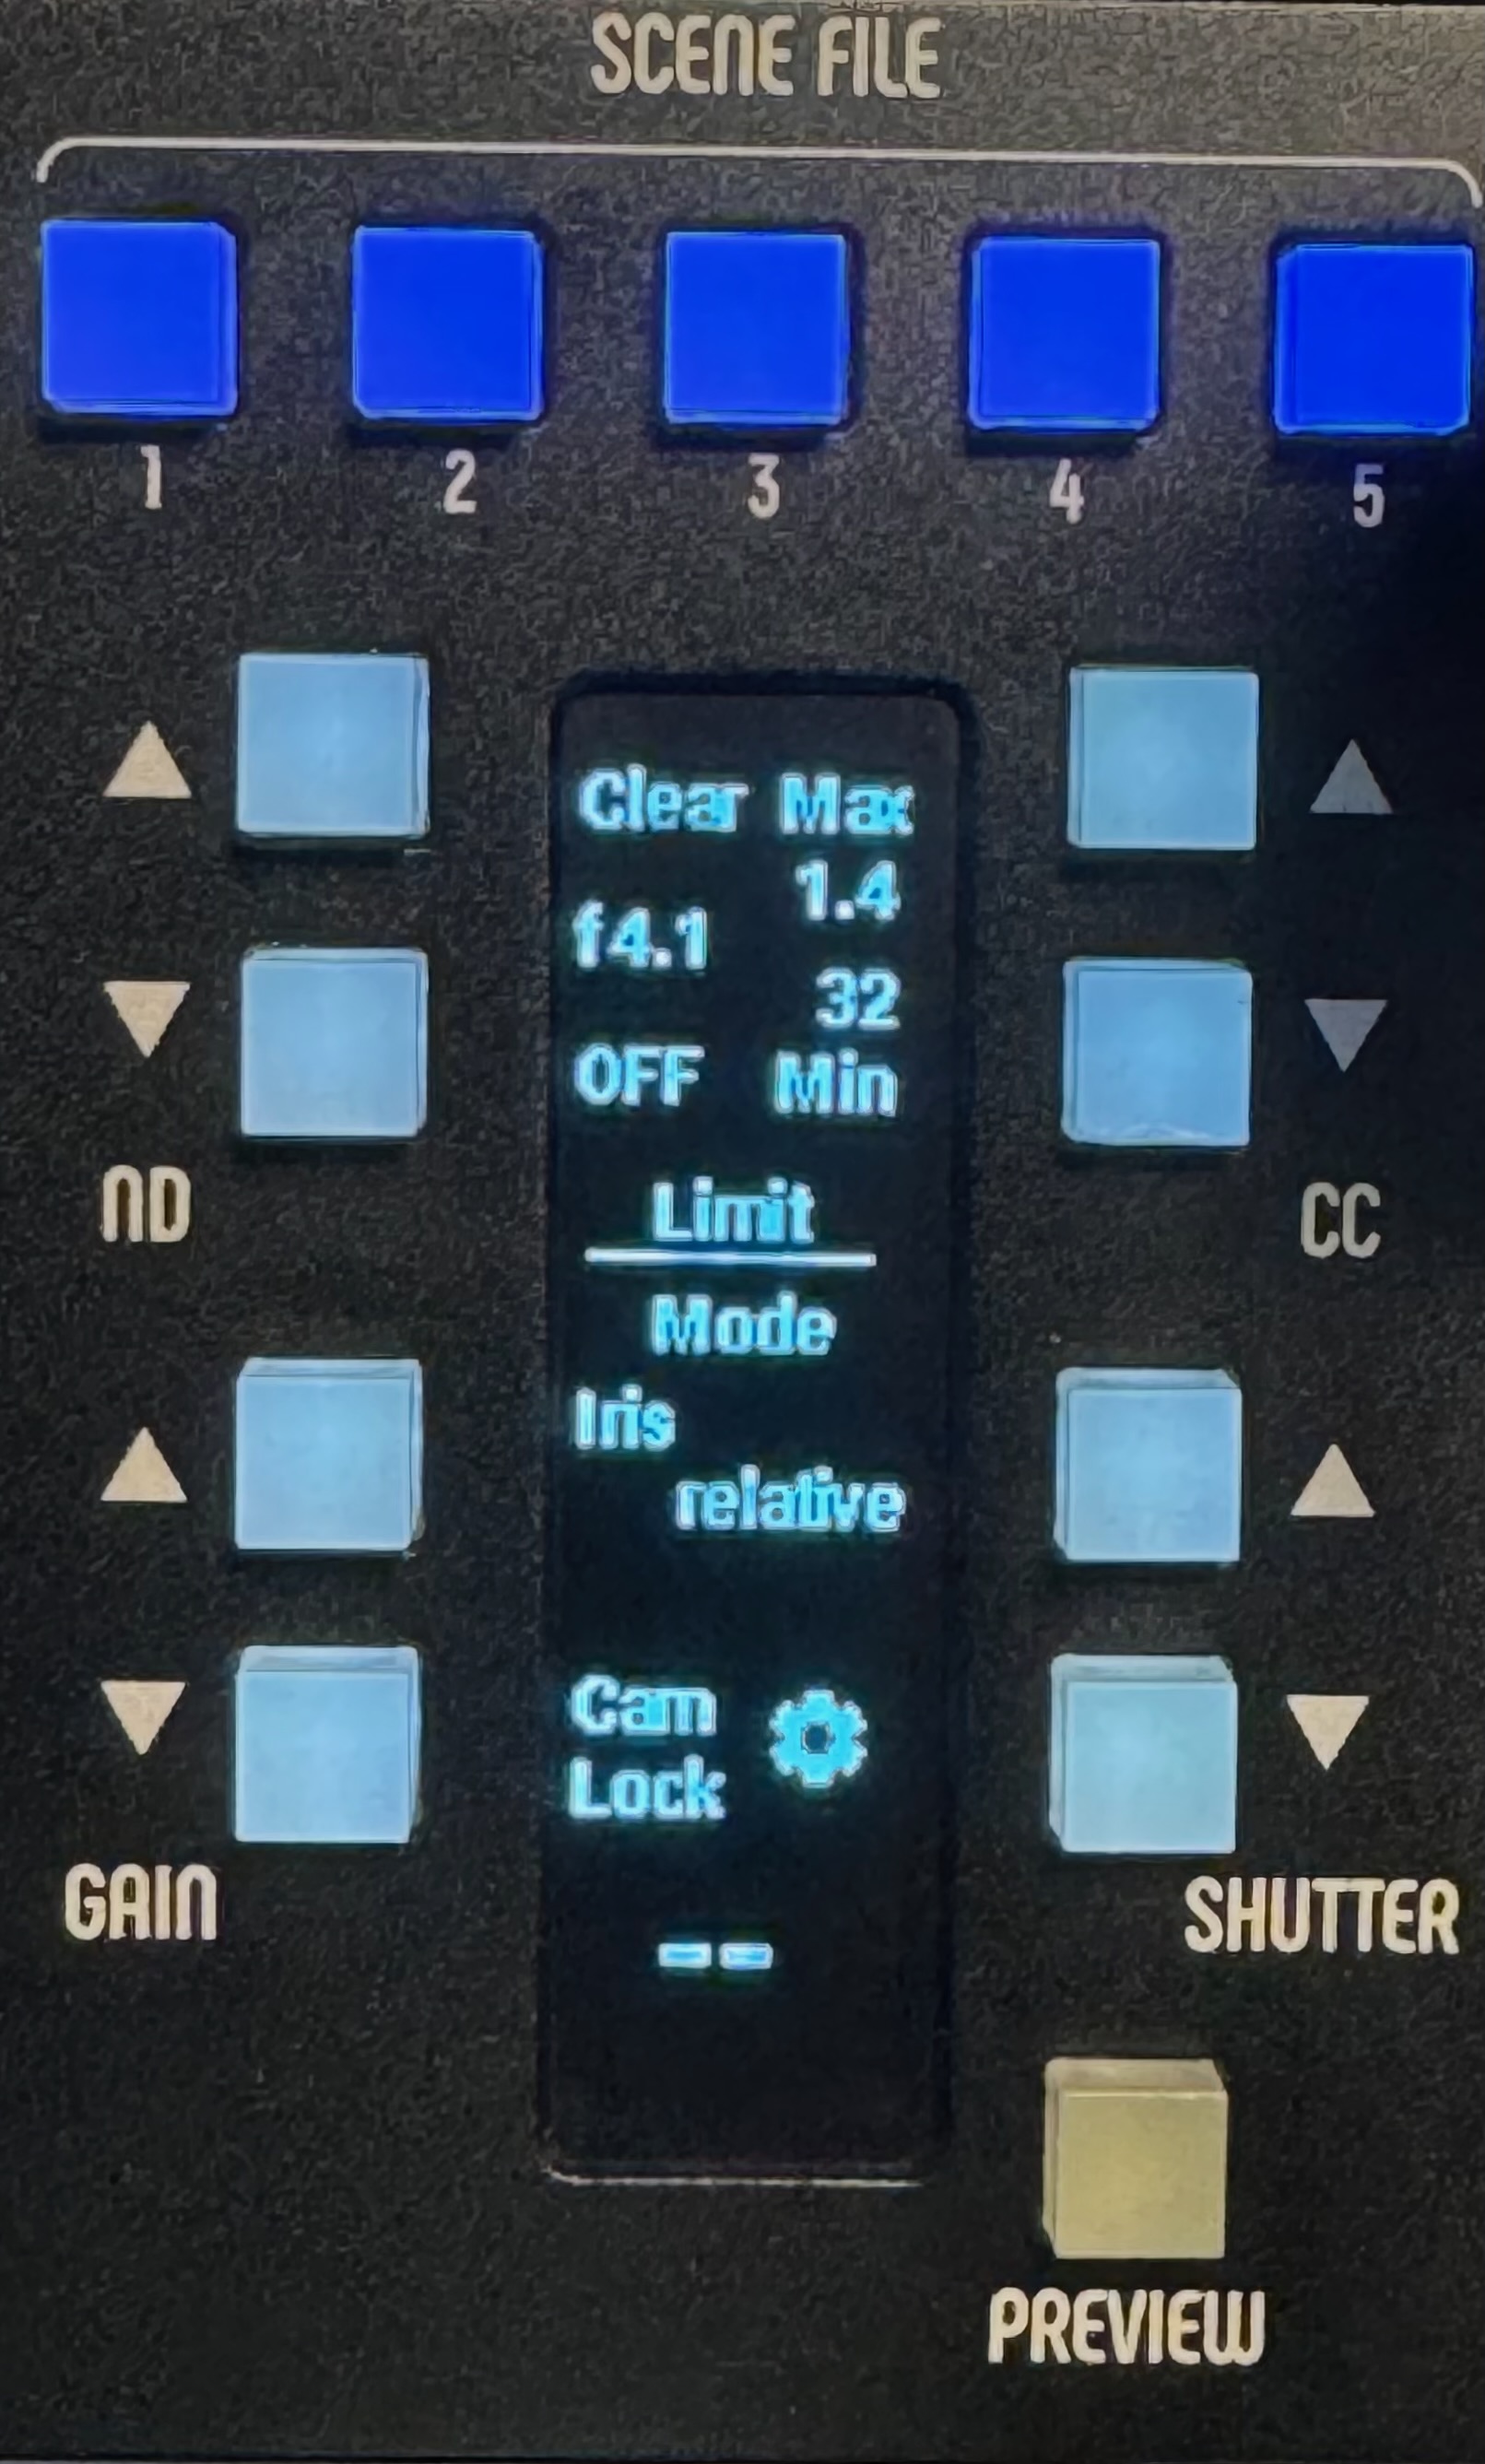
At this time the joystick limits feature is not fully implemented and may not work on every camera model. If you run into this, please report it to the support team.
Configurable parameters:
| Item | Description |
|---|---|
| Joystick limits | Clear: clears the limits / OFF, ON: disables/enables the hard limits. When enabled, the joystick works within the limits; when disabled, it works in the range defined by the limits but can go outside it (by pushing against the springs) / MAX: move the joystick to the desired value, then press Max / MIN: likewise, press Min to set the minimum |
| Black 1X / 2X | At 2X, the range of motion is halved, allowing for more precise control. This feature has moved to the RCP main screen — see "Sensitivity" in RCP Settings |
| Iris / ND / Shutter / Variable Gain | Selects the function assigned to the joystick lever (Iris by default). For example, on cameras with a continuous ND filter you can set it to ND so the joystick controls the variable ND for exposure instead of the iris. Gain or ISO can be assigned if it varies continuously rather than in fixed steps |
| Joystick mode | Relative mode (default): joystick movements produce a proportional change on the camera; the camera value is not directly linked to the joystick's physical position / Absolute mode: the joystick position is directly linked to the camera value. Better suited to single-camera workflows, since switching cameras and then moving the joystick produces a jump |
| Cam Lock | Locks the Iris Joystick to a camera. Select the camera on the RCP (with the next/prev buttons), then press "Cam Lock". The camera number is displayed and a lock icon appears on the main screen |
| Gear icon | Access to the technical menu |
To go back to the main view, press the PREVIEW button (green).
Technical menus
Press the gear icon during loading to open the technical menu. From the main screen, you can also hold the shaft, press PREVIEW, then press the gear icon.
This menu lets you calibrate and assign the RCP (see Configuration), and view Iris Joystick information (IP address, MAC address, firmware version, error codes).
The "Reboot" button restarts the Iris Joystick. Forcing bootloader mode also lets you update the internal firmware to the latest version (see Forcing the Bootloader for details).
Multi-camera operations
When controlling multiple cameras with a single RCP, the main behavior is as follows:
- The joystick operates on a relative basis, ensuring smooth camera adjustments without sudden jumps. When it reaches the end of its range, it can either be pushed further with a spring effect — similar to a PTZ joystick — for continuous adjustment until released, or repositioned by holding the PREVIEW button for a "FREE" effect. The main exposure and master black encoders can also be used for quick multi-camera adjustments without relying on the joystick.
- While the joystick is locked to a single camera, the "split camera" mode can be used in the upper section of the RCP to switch to other cameras.