Integrating an IP Camera (Generic)
https://support.cyanview.com/docs/Integrations/Generic/IPCamera
The RCP provides direct control of cameras over IP networks (no CI0 or other interface is needed).
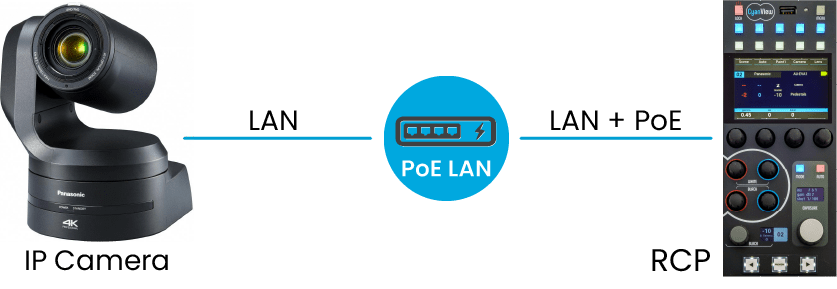
Required Equipment
PoE network switch: The RCP supports PoE (power over the Ethernet cable), so a PoE switch is the easiest way to get started. Inexpensive models from Netgear, Ubiquiti, TP-Link, etc. are perfectly fine. Without a PoE switch, 12V power supplies with locking plugs can be ordered separately (they are not included in the default package), and regular DC 12V power adapters can also be used.
Computer: Required to access the RCP's web configuration.
Connection Procedure
-
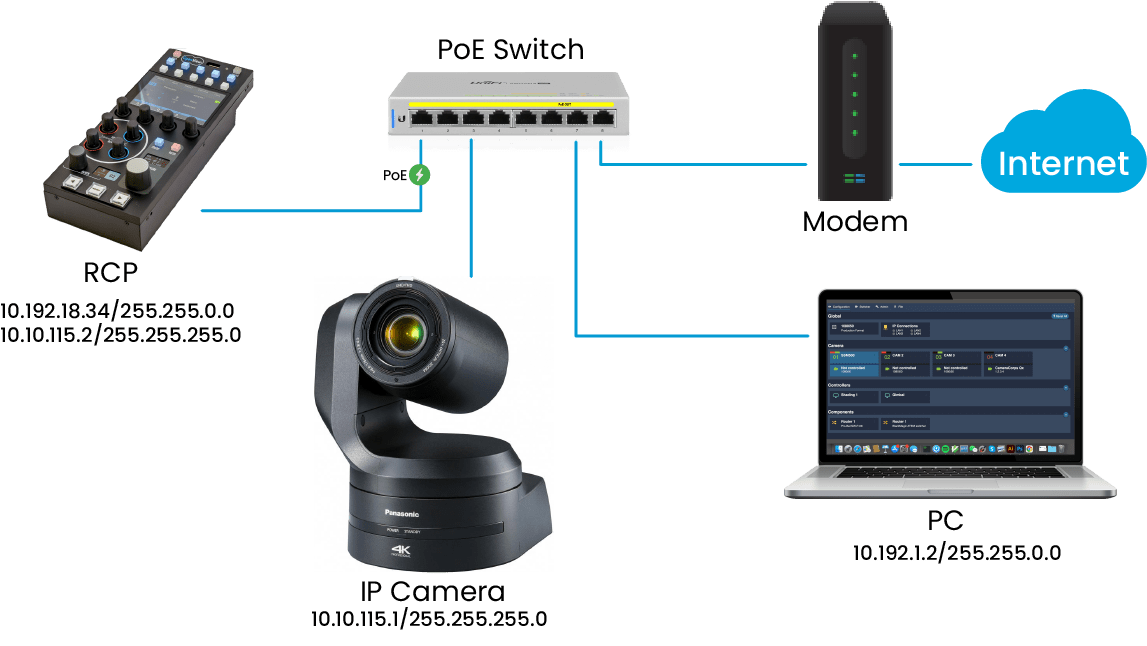
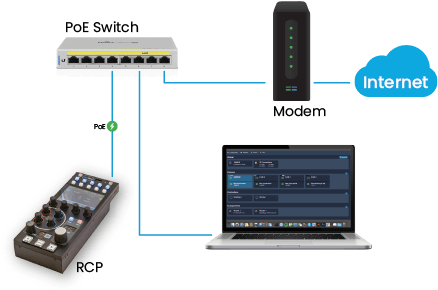
Connect the RCP and your computer to the PoE switch. For software updates, also connect the switch to the internet.
-
Connect the camera to the PoE switch. See the integration guide for your camera for camera-specific setup.
RCP Configuration
-
Access the RCP's Configuration Web UI. The diagram below shows a static configuration for an RCP with serial number
CY-RCP-18-34.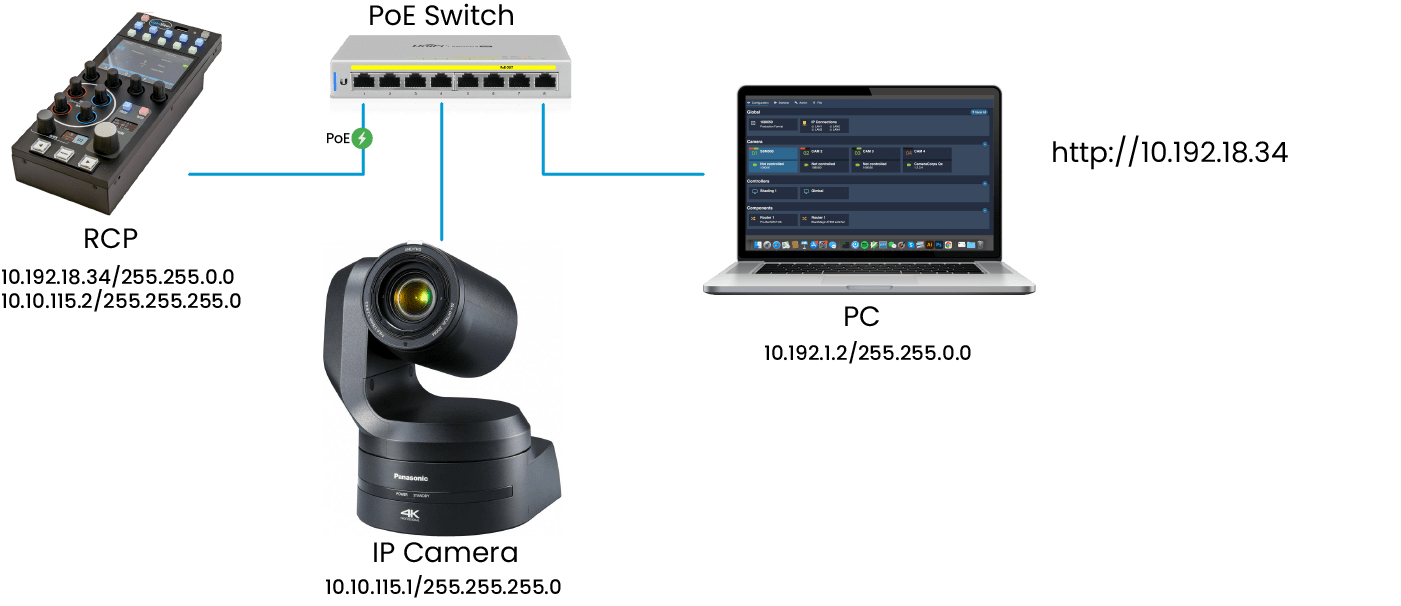
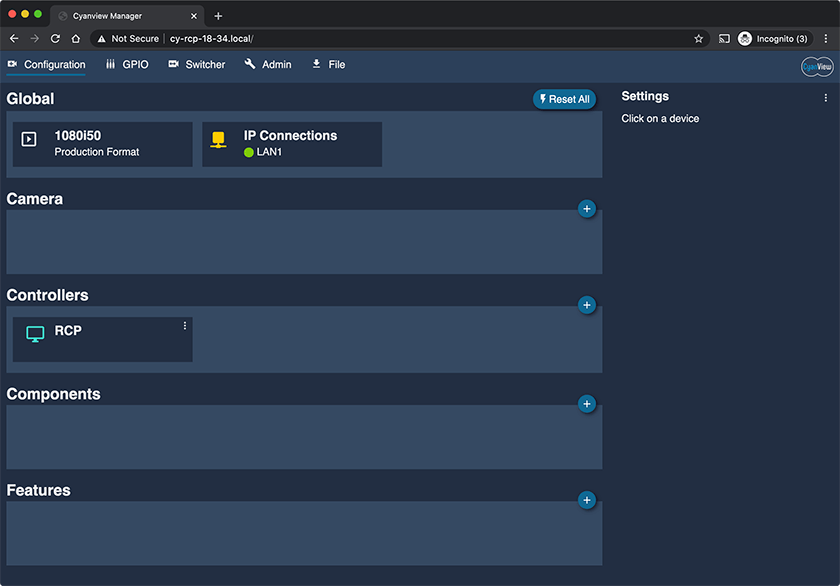
You should see the following page.
-
Add a camera: click the "+" button at the top right of the camera section. The new camera's properties appear in the right sidebar. Fill in these fields:
- Number: Camera number displayed on the RCP
- Name: Camera name displayed on the RCP
- Camera Head Model: Select your camera make and model from the list. An interface section appears.
- IP Address: Enter the (default) IP address of your camera.
-
Add an IP address to the RCP in the same range (subnet) as your camera's IP address.
noteFor now, Cyanview devices only support CIDR entries (
/16,/24, ...). See this page for an explanation of CIDR.Example: camera
10.10.115.1(mask255.255.255.0), RCP10.10.115.2(mask255.255.255.0)The camera and the RCP must have addresses in the same subnet. With a mask of
255.255.255.0(/24), keep the first three numbers the same (10.10.115in this example) and change only the last number.noteThe example on the official site gives the RCP as
10.10.155.2, which would not be in the same subnet as the camera. We treat this as a typo and use10.10.115.2.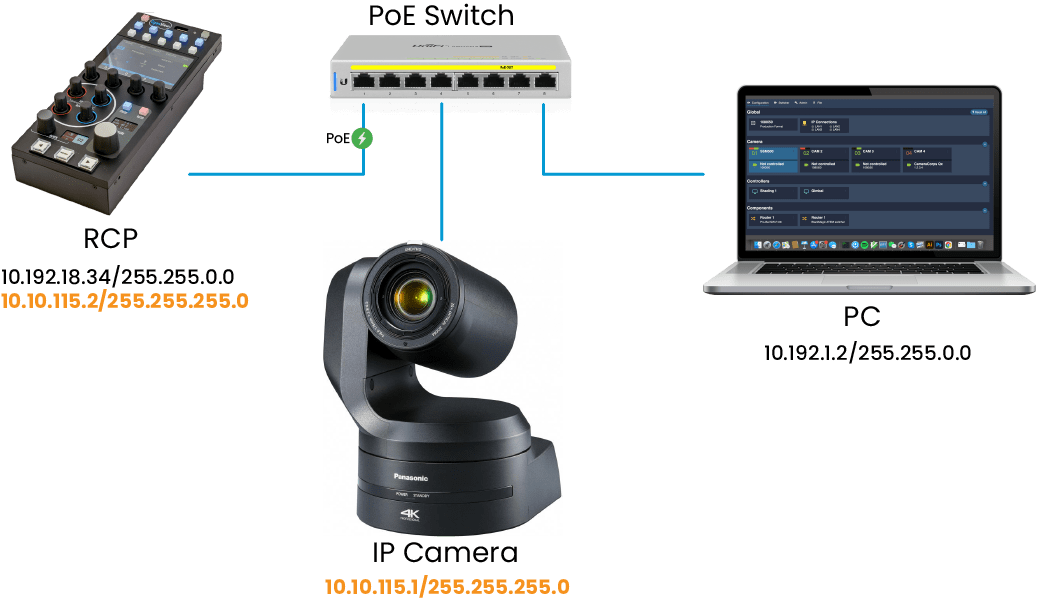
-
Check that the camera is properly connected.
- The camera icon in the Web UI turns green when the camera has been detected and configured.
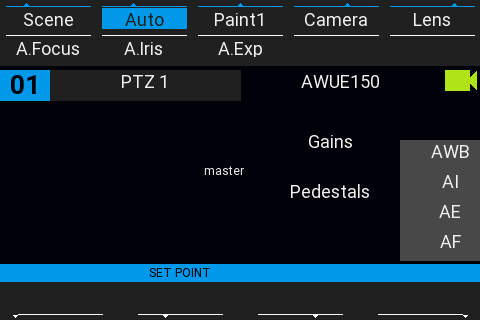
- The camera icon on the RCP turns green when the camera is properly controlled. It stays red if communication with the camera can't be established.
Operation
The RCP should now be operational. A few tips to get started:
- The top row of buttons selects the top menu of the main LCD
- The bottom row selects the submenus (the second row of labels on the LCD)
- The Paint menu cycles through OFF → PAINT 1 → PAINT 2
- The "Menu" button shows status pages, including the IP address received by DHCP
- The left/right arrows at the bottom cycle between cameras
For details, refer to the RCP UI manual.
Software Updates
Product updates are delivered continuously, so it is a good idea to bring your system up to date at this point. Connect the switch to an internet access, a modem, or a 4G access point.
Once the RCP has internet access, it lists the available releases in the Admin tab of the Web UI. Clicking "Download Latest" refreshes the list. Click "Select and start" on the latest release to activate it. The release name indicates the release date: 20(year).11(month).1(number). The update takes roughly 30 seconds and automatically upgrades your configuration.
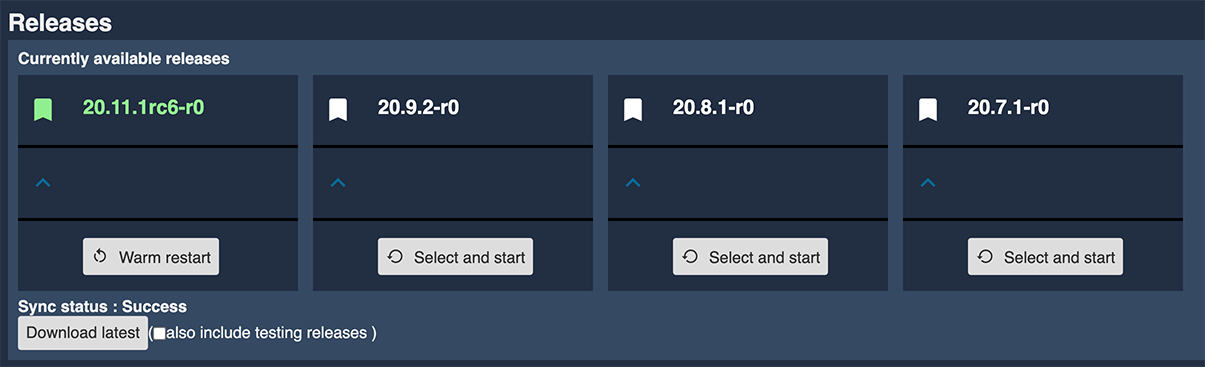
This updates only the software running on the RCP, not the full system. See Product Updates for keeping the full system up to date.