Integrating a Video Router
https://support.cyanview.com/docs/Integrations/Generic/routers
Overview
Integrating the RCP with a video router provides:
- Bi-directional synchronization between the camera selected on the RCP and the source shown on the operator's monitor. When the operator changes camera on the RCP, the router output follows; if the source is changed on the router panel, the RCP selection updates accordingly.
- Joystick override mode, letting the operator see the camera while holding the preview button or joystick down, then returning to a fallback signal when it is released.
- Sharing the router configuration with other RCPs, so multiple RCPs can work together while using a single connection to the router.
- Tally generation based on the camera feeding a given router output.
Supported Devices
- Pro-Bel/Snell SW-P-08 (VSM, Cerebrum, Hi, Ross switchers, etc.)
- Evertz Quartz
- AJA Kumo
- Blackmagic Videohub and ATEM
- NewTek TriCaster
- VMix
- AVMatrix Multiviewer
Configuration
Configure only one router per device. The UI lets you add more than one, but the behavior will be unpredictable.
All router and switcher integrations work over IP, so the RCP must be on the same network as the router.
- Open the "Configuration" tab and go to the "Components" section.
- Click "+", then select "Router / Switcher".
- In the list, choose the router/switcher type that matches your device.
- A new block appears. Click it to display its settings on the right.
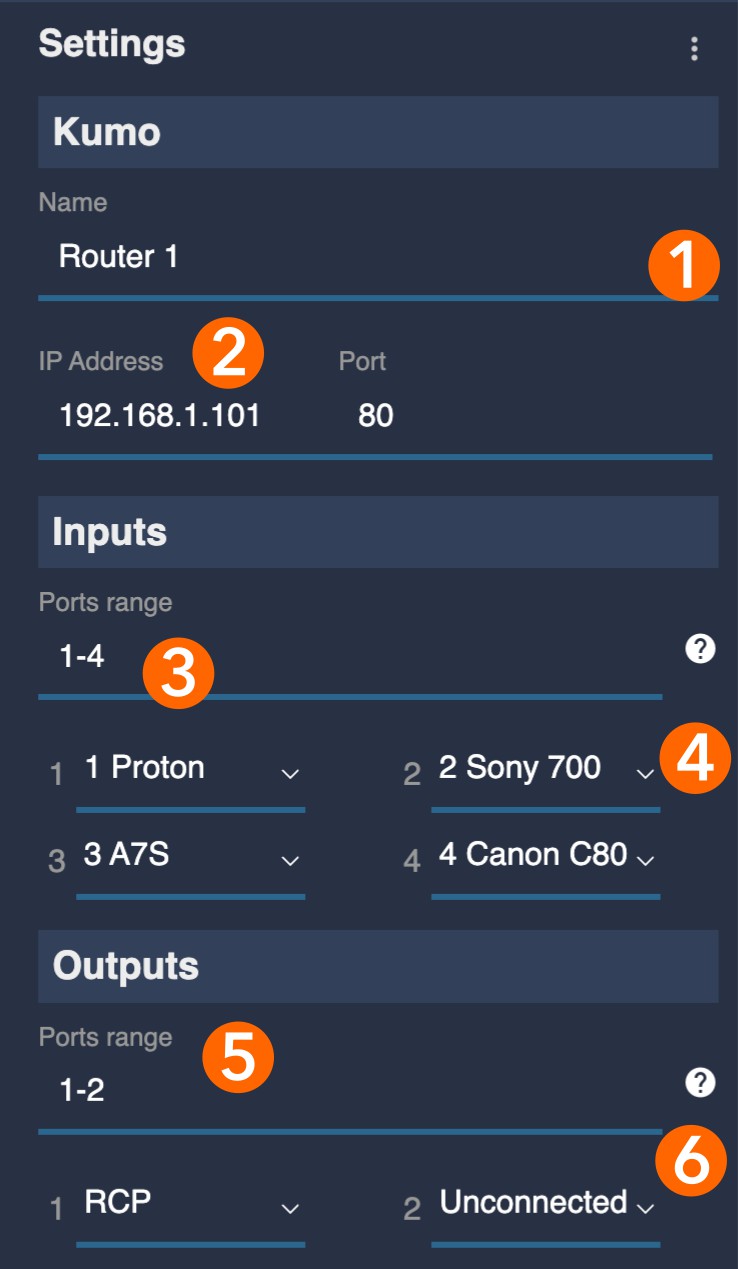
- [1] Optionally rename the router.
- [2] Enter the IP address of the router.
- [3] Select the range of inputs to assign to cameras (for example
1,2,3,1-3, or1,2,5-9). - [4] Map each camera to its router input.
- [5] Select the range of outputs to consider for monitoring.
- [6] Associate the RCP with one or more auxiliary outputs used as operator monitors.
If everything is configured correctly, the router block turns green, confirming that communication is working.
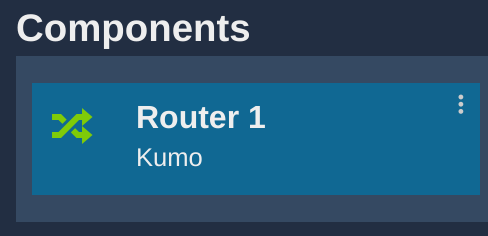
Input/output fields accept lists so you can filter only the relevant ports on large grids:
- Numbers:
1,2,4(ports 1, 2 and 4) - Ranges:
1-4,9-10(ports 1–4 and 9, 10) - Combinations:
1-3,5(ports 1, 2, 3 and 5) - A single value such as
1is also valid
Joystick Override Configuration
This configuration uses the development interface. The main UI will be overhauled in the future, which is why this functionality is not yet available there.
Joystick override switches the router input to the selected camera while the preview button is pressed and held, and restores the previous router input when the button is released. In this mode, when no preview button is pressed, the router returns to a dedicated fallback signal. Configuration takes three steps:
- Configure the RCP to generate level-type signals so button release is detected
- Configure a fallback input on the router
- Configure the RCP panel behavior (whether it follows the router, and whether camera changes generate preview actions)
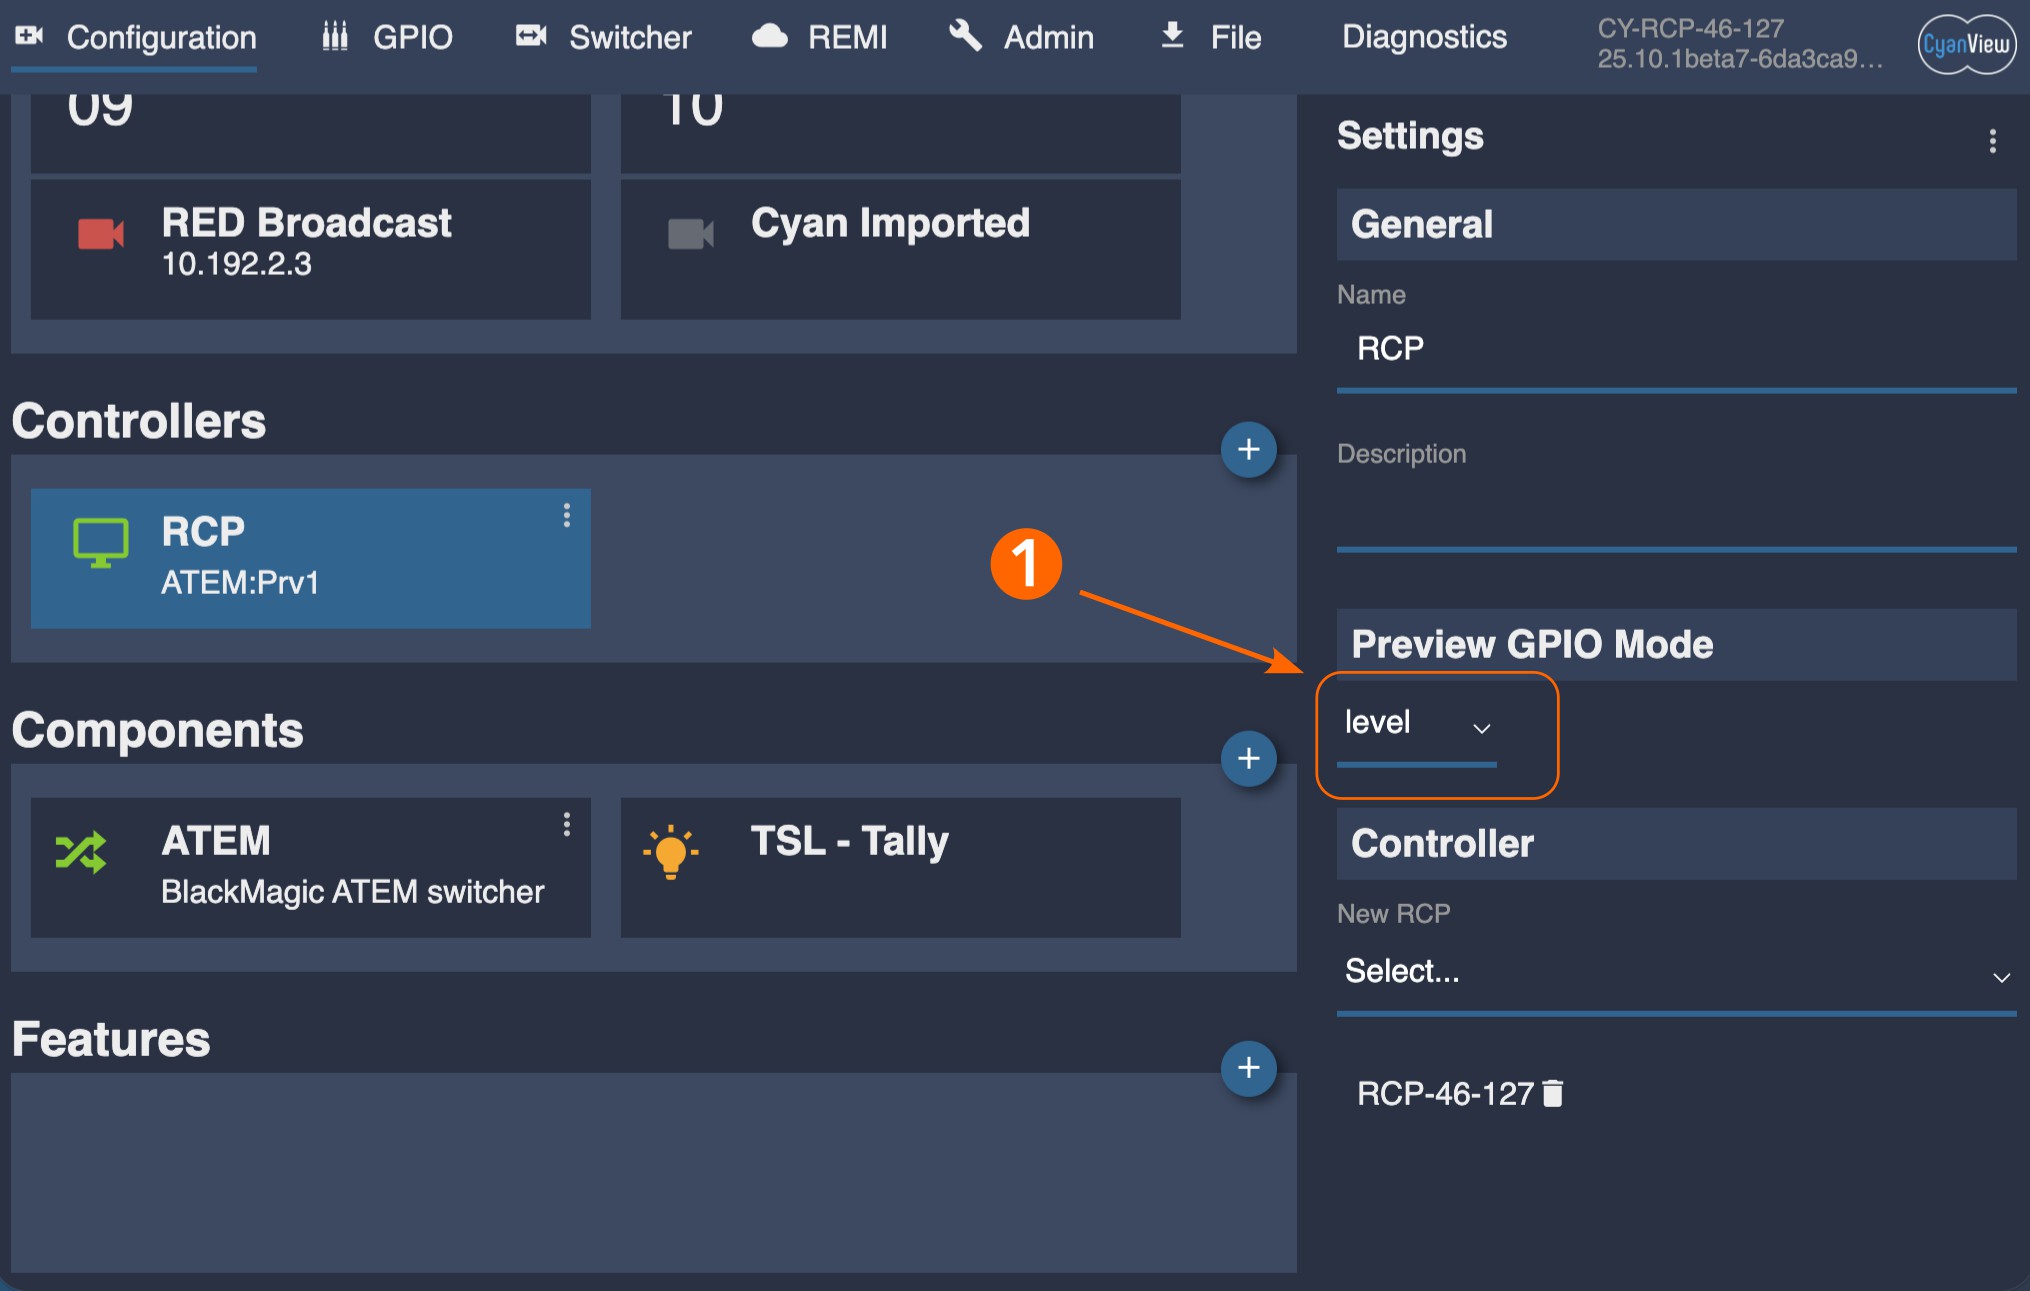
1. Configure the RCP to Generate Level Signals
Select the "RCP" block in the Configuration tab and change "Preview GPIO mode" in the properties on the right to "Level".
2. Configure a Fallback Input
This is done in the development interface, available by appending /dev/app.html to the RCP's IP address (e.g. http://10.192.xx.yy/dev/app.html).
- Find the router block in the third column and select it by clicking its outer shape (green area).
- In the properties at the top right of the window, add the router input used for the fallback signal (10 in the example below), then click "ok".
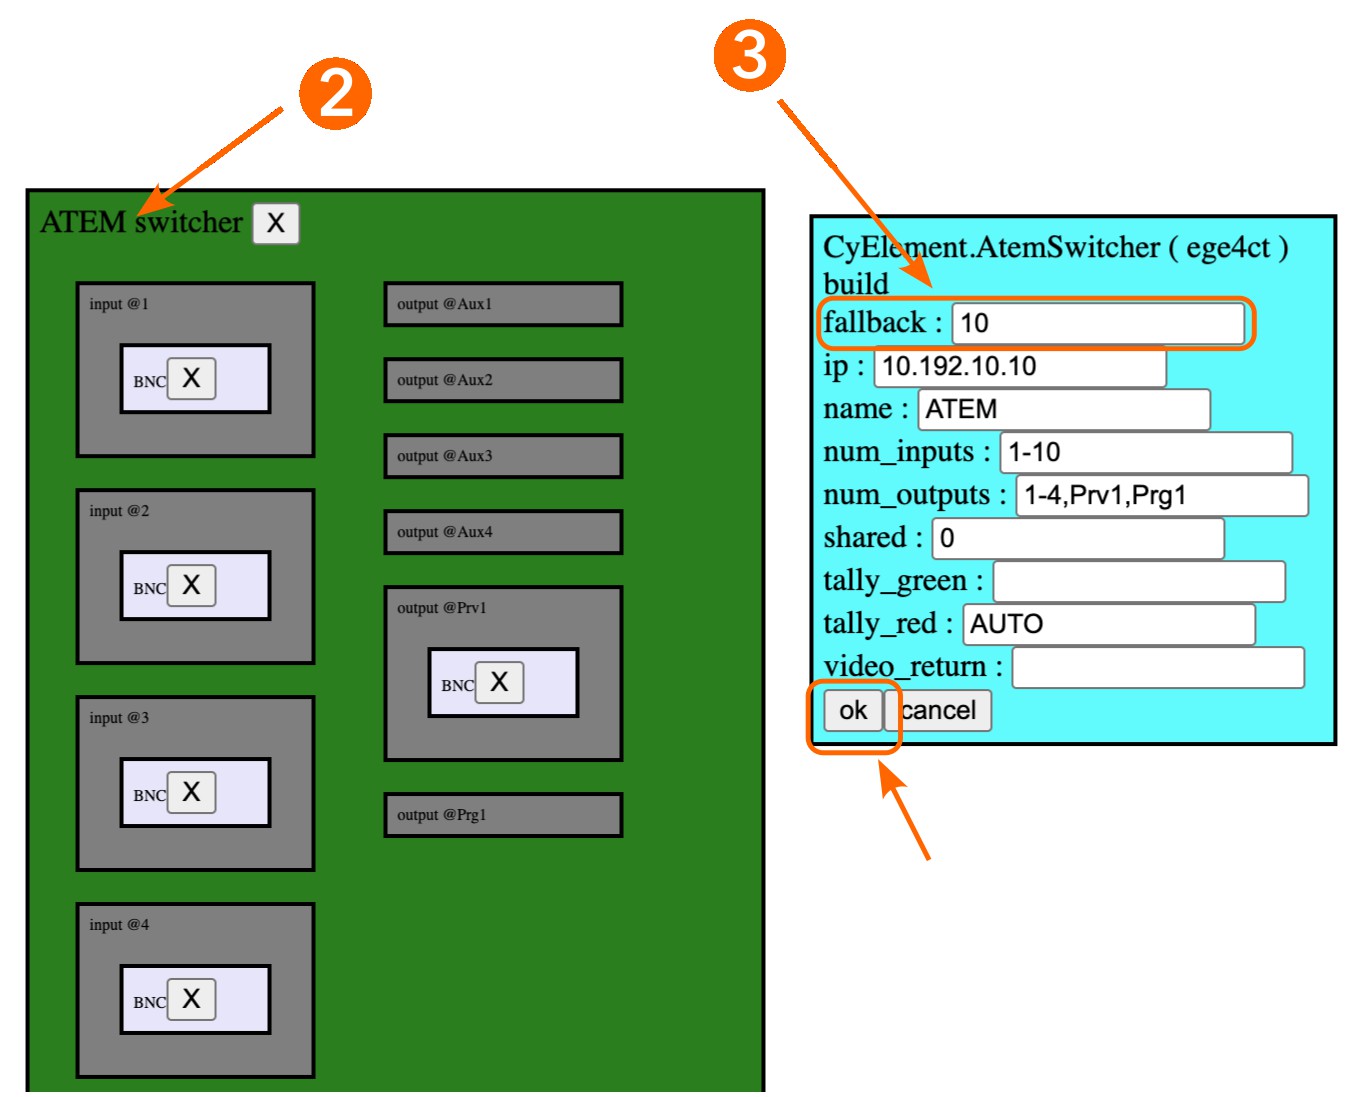
The router should now switch to the fallback input whenever the RCP's preview button is released.
3. Configure the RCP Panel Behavior
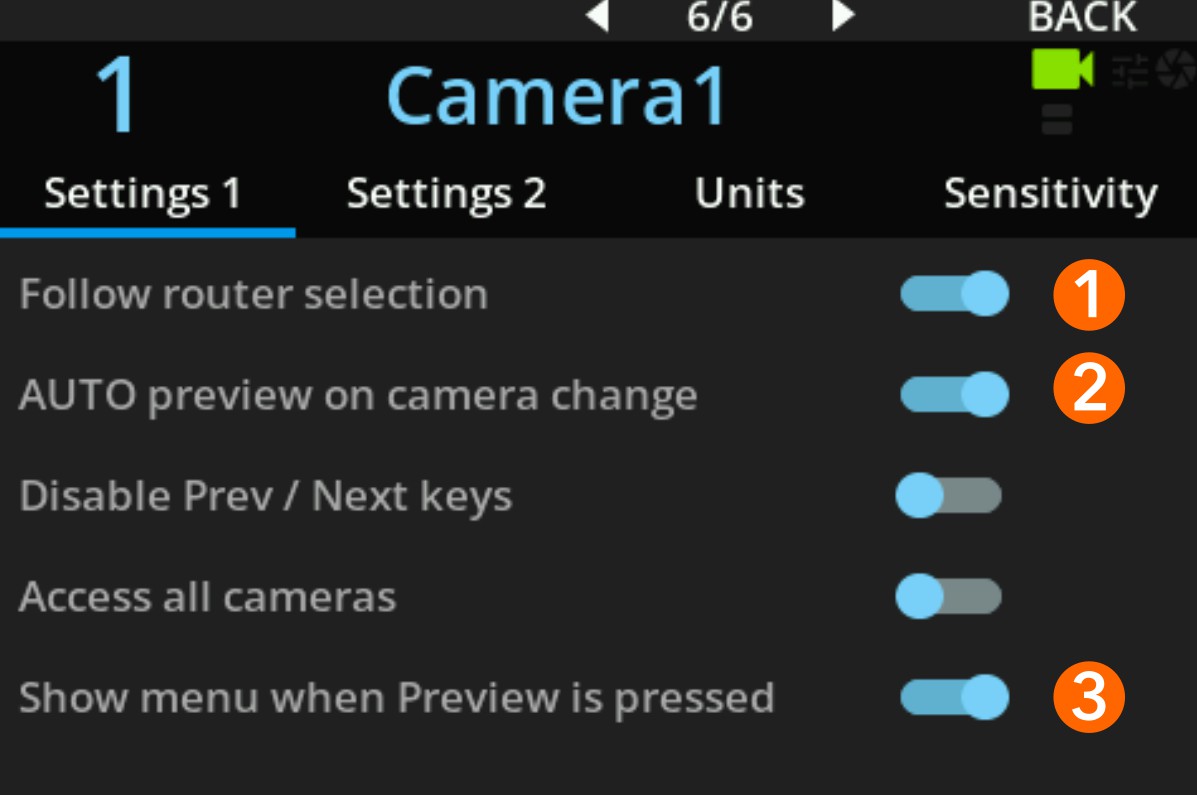
- [1] Follow router selection: Disabling this makes the RCP ignore the router input and always stay on the current camera. This is usually needed when multiple RCPs are used, or if you prefer to select the camera on the RCP independently of the monitoring signal.
- [2] Auto preview on camera change: Disabling this avoids generating "preview" actions when the camera is changed on the RCP, so the router is not switched while changing cameras. This is often necessary; otherwise, changing cameras briefly switches to the selected camera before immediately falling back to the fallback signal.
- [3] Show menu when Preview is pressed: Should be disabled. This option shows the selection menu while the button is held, but in this workflow the goal is to adjust RCP parameters while previewing, which it would prevent.
Sharing a Router Configuration with Other RCPs or Devices
This configuration uses the development interface. The main UI will be overhauled in the future, which is why this functionality is not yet available there.
In many systems, especially with one RCP per camera, it is important to avoid creating too many connections to the router or router control system. To address this, configure the router integration on a single RCP and share that configuration with the other RCPs.
When sharing is enabled, the other RCPs automatically see the router in their configuration. Each RCP can be set up as if it had its own router integration, but all of them actually use the same router connection from the sharing RCP.
Sharing is enabled only on the main RCP; the other RCPs need no additional configuration.
- Open the development interface by appending
/dev/app.htmlto the main RCP's IP address (e.g.http://10.192.xx.yy/dev/app.html). - Find the router block in the third column and select it by clicking its outer shape (green area).
- In the properties at the top right of the window, set "Shared" from
0to1, then click "ok".
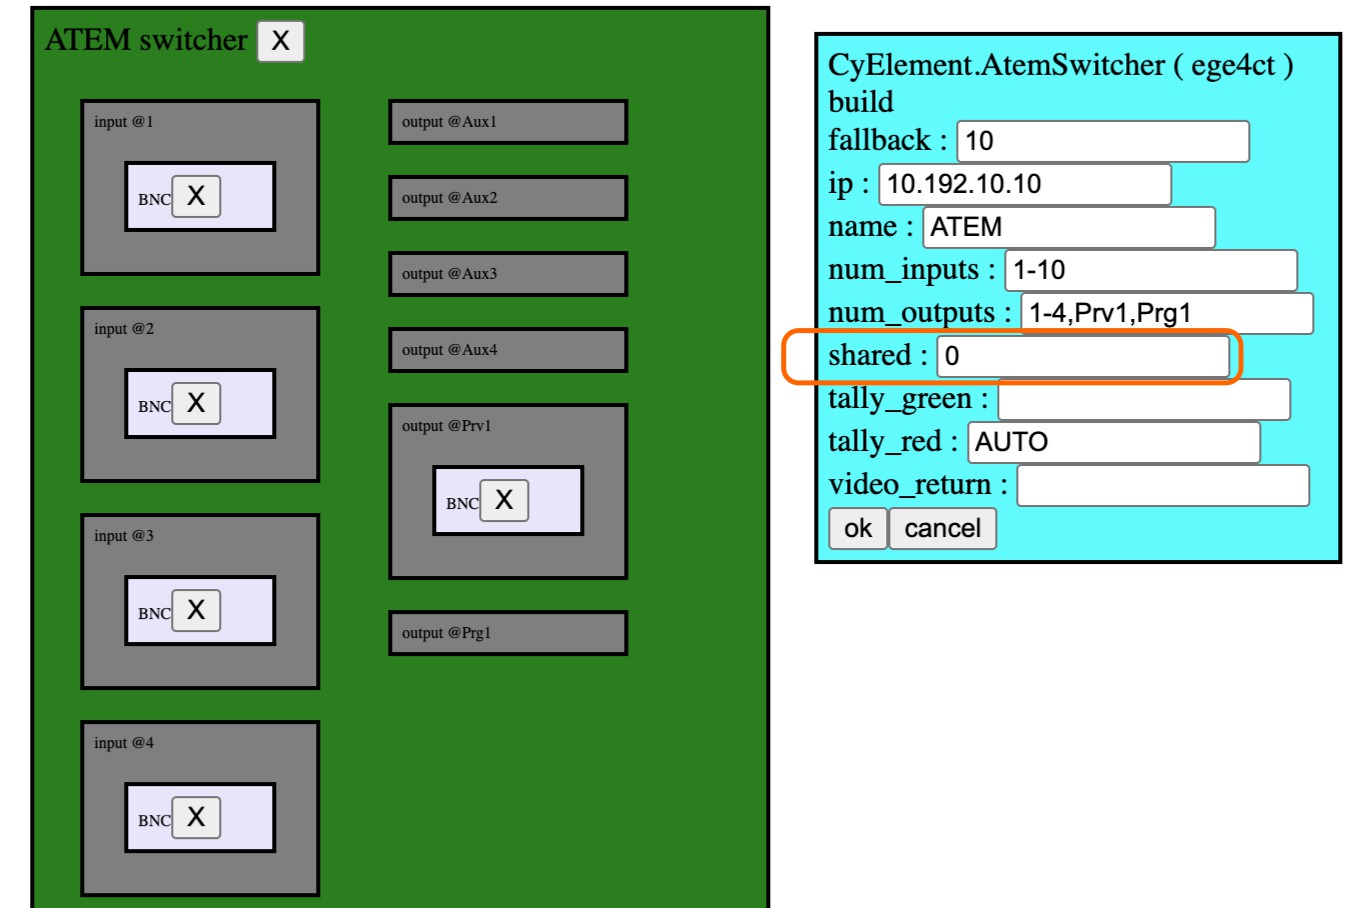
Because one RCP acts as a proxy for all the others, it must remain connected for them to work. If this RCP is disconnected, even temporarily, all the other RCPs lose communication with the router.
The other RCPs should now show the same router block in the "Components" section of their "Configuration" tab. Configure each RCP with the cameras it controls as inputs and the output used for monitoring.
Tally
In some setups, you may want to derive tally directly from router outputs. This is done by monitoring one or more router outputs and using them as the tally source. You can also combine several outputs into a single tally signal, so that a camera is considered on air whenever any of those outputs carries it.
This approach is common with larger ATEM switchers that have multiple M/Es. ATEM only exposes native tally for the first M/E; router-based tally lets you base tally on another M/E, or merge tally information from several M/Es.
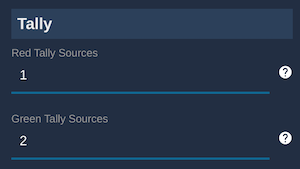
In the red and green tally fields, enter the router outputs used for program (red) and preview (green). Each field accepts one or more outputs:
1: a single output1,2,3: a list of outputs, useful when you run multiple productions in parallel. Tally states from all listed outputs are combined to compute the final tally status sent to the cameras.
For ATEM, M/E program outputs use specific names such as Prg2, Prg3, etc. See the ATEM integration page on the official site for the exact labels. For general tally settings, see also Tally Configuration.