Dreamchip AtomOne
https://support.cyanview.com/docs/Integrations/Dreamchip/

Supported Models
All Dreamchip AtomOne cameras are supported. They use the same protocol and have essentially the same features.
- AtomOne
- AtomOne Mini
- AtomOne Mini Zoom
- AtomOne 4K
- AtomTwo
It is highly recommended to update the camera and Cyanview equipment to the latest software version. This is especially critical with new camera releases such as the AtomTwo in 2025.
Important changes were made on both the Dreamchip and Cyanview sides in 2023 and 2024. Incompatibility issues are known when cameras are used with different firmware versions.
The Dreamchip SSM500 slow-motion camera has a standalone mode (replay and trigger from a Stream Deck or Shuttle Pro) and an EVS mode (the RCP acts as a gateway for the EVS). For example setups, see LanSee / Fiber and EVS Hypermotion.
Supported Controls
All paint controls available on Dreamchip cameras are accessible from the RCP. Dreamchip's official ProVideoGUI software is a good way to discover the cameras' capabilities and make sure they have the latest firmware. You need Dreamchip's connection cable to control the camera from a computer (Windows only).
| Control | Notes |
|---|---|
| Exposure: gain, shutter, CLS (Clearscan) | |
| Exposure: iris | Available on the Mini Zoom or when using Dreamchip motors |
| White balance: R/G/B gain, AWB (single-shot), ATW (continuous) | |
| White balance: color temperature | Changing the color temperature sets the R/G/B gains, similar to a Sony system camera |
| Primary corrections: R/G/B/master black level, R/G/B/master gamma (in BT.709), saturation, detail, denoise | |
| R/G/B/master flare | |
| Knee slope and point | |
| User matrix | |
| Multi-matrix | Selection of 12, 16, 24, or 32 vectors |
| Color space: BT.709 or BT.2020 | |
| OETF | BT.709 or the HDR formats HLG, PQ, and S-Log3. Some HDR settings disable parts of the video pipeline, but the camera doesn't prevent them from being changed, so gamma can still be adjusted even though it has no effect on the picture |
| Lens: iris, focus, zoom | A C-mount lens with Dreamchip motors is controlled through the camera (AUX port) and detected automatically by the RCP. The motors must be calibrated and configured with Dreamchip's ProVideo software. Zoom is only on the AtomOne Zoom |
| Other: flip (upside-down or mirror), video format, genlock |
Workflow
AtomOne with Serial Communication
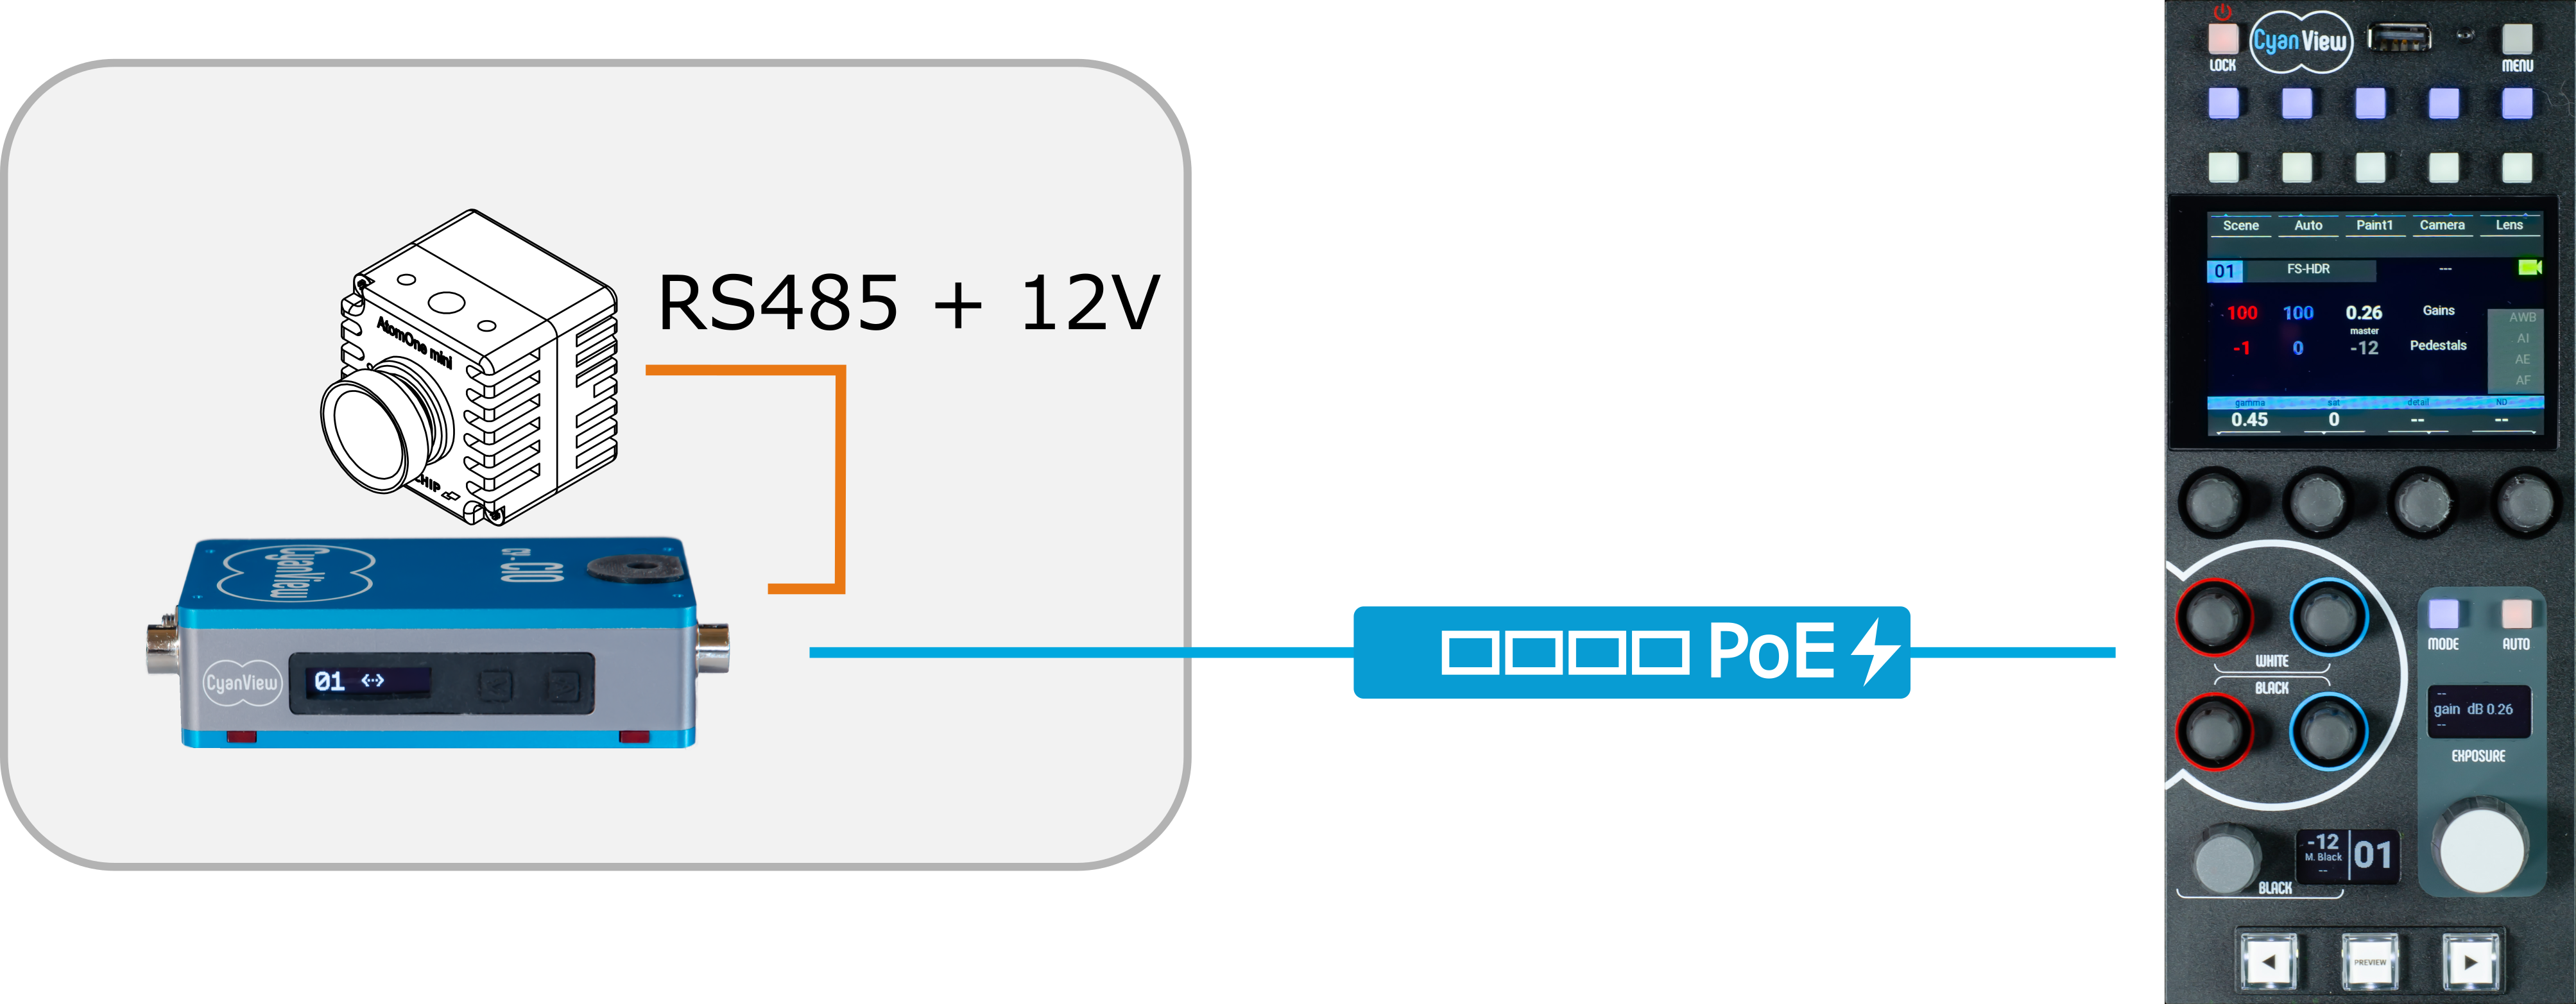
Cables Required
CY-CBL-DREAMCHIP-03: CI0/RIO adapter cableCY-CBL-6P-EXT-*: CI0/RIO extension cable (* = length)
See the Cable Catalog for details.
Configuration
Setup
Follow the Serial Camera (Generic) guide.
Power-Up Defaults
The camera doesn't save its current settings automatically. Dreamchip offers an "auto_save" feature, but it significantly reduces the camera's responsiveness, so we don't recommend it. As a result, the camera powers up with predefined settings for video format, frame rate, genlock, and all paint settings. When the RCP detects the camera, all paint settings are restored from the RCP's values, so the last values come back automatically after a power cycle.
Note that if you use the ProVideo GUI to adjust camera settings and save them as power-up defaults, the RCP overwrites most of them when it connects. The only settings the RCP does not restore are the video format, genlock settings, and special features not available from the RCP, such as lens calibration.
The RCP has two special commands that are important to know:
SAVE: saves all current settings as power-up defaults. Use it in these situations:
- When you change the video format or genlock settings. The RCP does not restore these, so you must save them or the camera restarts with the previous settings.
- When the camera is used over a weak control link (e.g. wireless or remote). If the link is lost and the camera restarts, it keeps incorrect settings until the connection is restored. Adjusting the camera and saving makes it restart with roughly correct settings until the RCP reconnects.
- When you adjust the camera with the RCP but then use it as a PoV without a control link. Saving ensures the adjustments persist.
FACT-D (Factory Default): resets the camera to its factory defaults. This is useful when the camera does not behave as expected, as special settings may have been changed with the ProVideo GUI. Resetting lets you test the RCP with the camera under standard conditions. This function is also available from SCENE > S FILES > Reference with the "Load Factory" button.
Baud Rate
The AtomOne can use different baud rates. Always check which baud rate the camera is set to.
If the camera is not set to the default baud rate (115200), the CI0/RIO setting must be changed:
- In the camera configuration, click the three dots at the top right and tick the box to activate advanced mode (see also Advanced Mode).
- Scroll down to the "Speed" field just below "Interface: Port" and enter the camera's baud rate.
External Lens
A C-mount lens with Dreamchip motors is controlled through the camera itself (AUX port) and detected automatically. The motors must be calibrated and configured with Dreamchip's ProVideo software.
Only configure the Lens settings when using external lens control. If the lens is controlled through the camera and an external lens is also configured on the CI0/RIO, it will cause compatibility issues.
To configure external lens control, scroll down to "Lens" in the camera configuration and enter the "Model" and the RIO interface port.
Troubleshooting
General Recommendations
Important code adjustments have been made by both Cyanview and Dreamchip, up to at least 2025 (25.9.3). Update both the camera and the RCP to the latest release before further troubleshooting.
It is also recommended to test the camera with the Dreamchip software and compare the results. This is a good way to report issues, as Cyanview can then easily reproduce the same situation.
Updating and Testing the Camera
- Check that the camera firmware is up to date. See the Dreamchip wiki for the latest versions.
- Verify that the camera can be controlled with Dreamchip's official ProVideoGUI. This software can also update the camera firmware and check for the latest version.
Camera Stays Red in the Config
Even if the camera icon is red, the RCP keeps sending commands to the camera.
If you see adjustments on the video output after sending commands, communication to the camera works; the red icon means no data is coming back from the camera. Possible reasons:
- Equipment between the CI0/RIO and the camera, such as RF modems or fiber converters, may not return the camera's data properly. This can happen with unidirectional links or devices that don't switch direction quickly enough.
- The Dreamchip software can set camera groups where only one camera responds and the others only listen. Make sure this is not enabled if you expect all cameras to respond.
If you don't see adjustments on the video output, the camera isn't receiving commands.
- Check the camera with the Dreamchip software and fully reset it in case the baud rate, camera ID, groups, etc. have been changed.
- If there is custom equipment between the CI0/RIO and the camera (custom cables, fiber, wireless links), bypass it and test with a direct connection to isolate the problem.
- If the CI0/RIO is directly connected to the camera, try another cable and another CI0/RIO port.
- You can also connect a USB-serial dongle to the RCP's rear USB ports and use the same wiring and camera as with the Dreamchip software, to validate the software and configuration separately.
Lens Control Issues
Dreamchip motors are connected directly to the camera and fully controlled by it. Test and calibrate the lens motors (or the built-in lens of a MiniZoom) with the Dreamchip software.
- When connecting, the RCP receives lens information from the camera, including available functions and usable range, and uses it to control the lens. If functions are missing or not working as expected, correct them with the Dreamchip software.
- If the iris moves in the wrong direction, or the RCP shows wrong f-stops (e.g. f2 when closed or f32 when open), calibrate the lens and invert the motor direction with the Dreamchip software. The RCP sends f-stop values to the camera, which positions the lens using its calibration data. The RCP cannot invert the motor direction itself; doing so would send incorrect f-stop values.
- Make sure nothing is selected in "Lens - External control override" below the camera configuration in the Web UI. That section is for adding a lens not controlled by the camera; selecting something routes lens commands to another interface and disables lens control from the camera. Select the empty line to restore lens control to the camera.
- With a camera that needs more power, such as the AtomOne 4K Mini with external motors, the CI0 may not supply enough power via PoE alone. Connect a 12V (up to 24V) DC power supply to the CI0.
Some Controls Are Not Working
- Make sure the camera and the RCP are both up to date.
- Some settings, such as an OETF in log or HLG, disable or limit the range of other functions.
- Reset the camera to factory defaults, from the Dreamchip software or from the RCP via
SCENE > S FILES > Referenceand the "Load Factory" button.