Marshall Mini Cameras
https://support.cyanview.com/docs/Integrations/Marshall/MarshallMinicam
Overview
Marshall miniature cameras allow remote control of OSD menus and multiple direct-access functions over RS485 (VISCA protocol). A typical setup uses a CI0 IP-to-serial interface to control the camera over IP from an RCP.
Main Adjustments
| Function | Notes |
|---|---|
| OSD menus | All functions available |
| Exposure | Iris ¹ ², shutter, gain, auto exposure |
| White balance | Auto (ATW), one push, manual |
| Primary corrections | Master black ¹, master gamma, color gains, saturation |
| Lens ² | Iris, focus, auto focus, zoom |
| Other | Detail enhancement, digital zoom ¹, white clip |
¹ Not supported on all models. ² On zoom-block cameras.
Wiring (IP Cameras)

If your camera is IP, it is controlled over Ethernet. You only need one RCP, and one RCP can control multiple cameras.
Wiring (Serial Cameras)

If your camera is not IP, it is controlled through its serial port. You need one RCP, one CI0, and the correct cable. There are two connector types:
-
If the back of your camera has this kind of connector, you need
CY-CBL-6P-PFAN.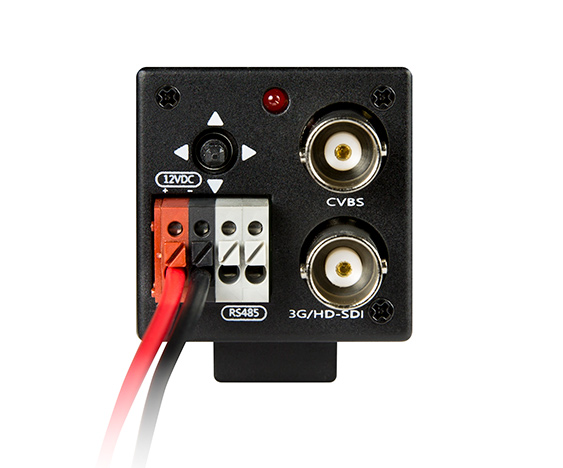
-
If the back of your camera has this kind of connector, you need
CY-CBL-6P-MARS-02.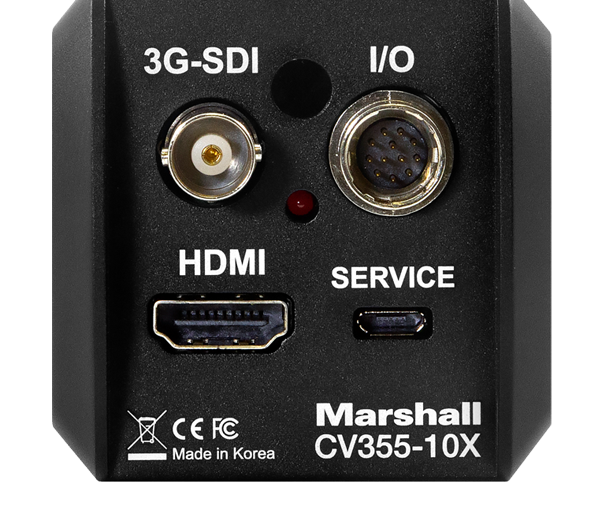
See "Cables" below for details.
Supported Cameras
All cameras use the VISCA protocol, but each has a different set of functions, and the supported protocol functions are model-specific. The following cameras have been tested and documented. Other cameras will likely work with the "Generic" model or a similar model.
Non-exhaustive list of supported models: CV225, CV226, CV345, CV350, CV355-10X, CV355-30X, CV370, CV374, CV420-30X, CV500, CV502, CV503, CV566, CV568, CV570, CV574, CV605, CV630, CV730
If your model is not listed but a "close" model is, it should work. For example:
- The CV506 is not listed, but you can select the CV503 model, as the protocol and features are the same
- Likewise, for the CV226 you can use the CV225 model
Camera Model Information
| Model | Notes |
|---|---|
| CV503 / CV506 | Unlike the CV502, color gains have no filtering, giving more reactive controls. Use moderate changes to prevent stepping. Digital zoom is directly available |
| CV226 | Digital zoom is available through the OSD menus only |
| CV350 | Full lens control: zoom, focus, iris |
| CV502 | The OSD menu automatically hides when direct commands are sent from the RCP. Some settings, such as color gains, are filtered: smoother controls but a longer reaction time. The camera might not be detected with early firmware (see Troubleshooting below) |
| CV225 | No direct master black control in the protocol, but master black can be changed from the OSD menus. Some settings, such as color gains, are filtered: smoother controls but a longer reaction time |
| CV500 | An old model controlled over Pelco RS485. Only OSD menu navigation is supported; paint controls are not possible. Use the CV500 camera model in the configuration, not Marshall Generic |
Configuration
Communication Settings
Marshall cameras are controlled over RS485 at 9600 baud. One camera can be connected to each CI0 port, and the camera address should be the same on each port.
Set the following values in the camera's OSD menus:
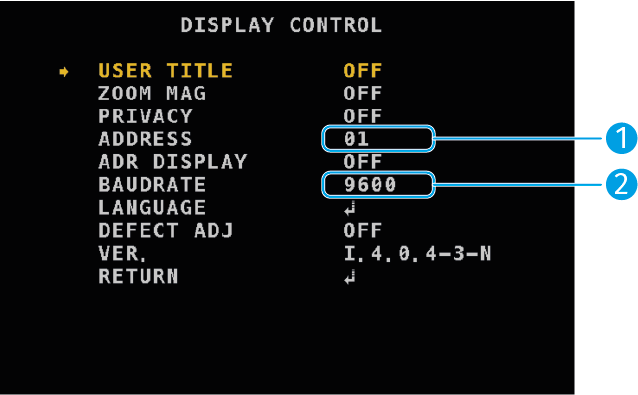
- [1] Set the camera address to
01. The system uses this address in all modes except a bus configuration. - [2] Default baud rate: 9600.
Camera Models
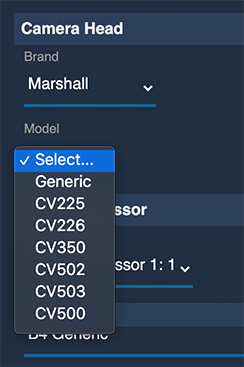
- Marshall - Generic: the default model for any Marshall camera. The model is detected automatically and the available features are adjusted to the camera's capabilities. Communication must be bidirectional, which is the case with a CI0 or RIO connected directly to the camera.
- Marshall - CVxxx: use when the camera model cannot be detected automatically, usually with unidirectional wireless or RS485-over-fiber systems.
Interface Port
Either CI0/RIO port can be used, as both support RS485. A USB RS485 dongle can also be plugged directly into the RCP.
Configuration in Unidirectional Mode
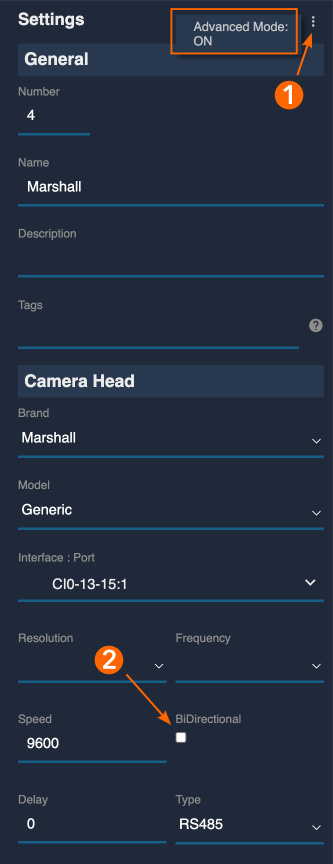
When the link between the RCP and camera is unidirectional, no data comes back from the camera, so it can't be detected and stays red. To send data without expecting a response, click the three-dot menu at the top right of the camera properties and untick "Bidirectional".
Cables
Cyanview provides cables to connect the camera in two ways:
- Directly to the 12-pin Hirose connector at the back of the camera
- Through the breakout cable supplied by Marshall with the camera
| Cable reference | Description |
|---|---|
| CY-CBL-6P-MARS-02 | Power and RS485 adapter cable for Marshall 12-pin Hirose cameras |
| CY-CBL-6P-PFAN | 5.5x2.1 mm DC power plug and RS485/RS422/RS232 fanout adapter cable for the Marshall breakout cable |
| CY-CBL-6P-FAN | Power and RS485/RS422/RS232 fanout adapter cable for the Marshall breakout cable |
Use the generic CY-CBL-6P-EXT extension cables for longer runs. See the Cable Catalog for details.
Connection to the 12-Pin Hirose Connector
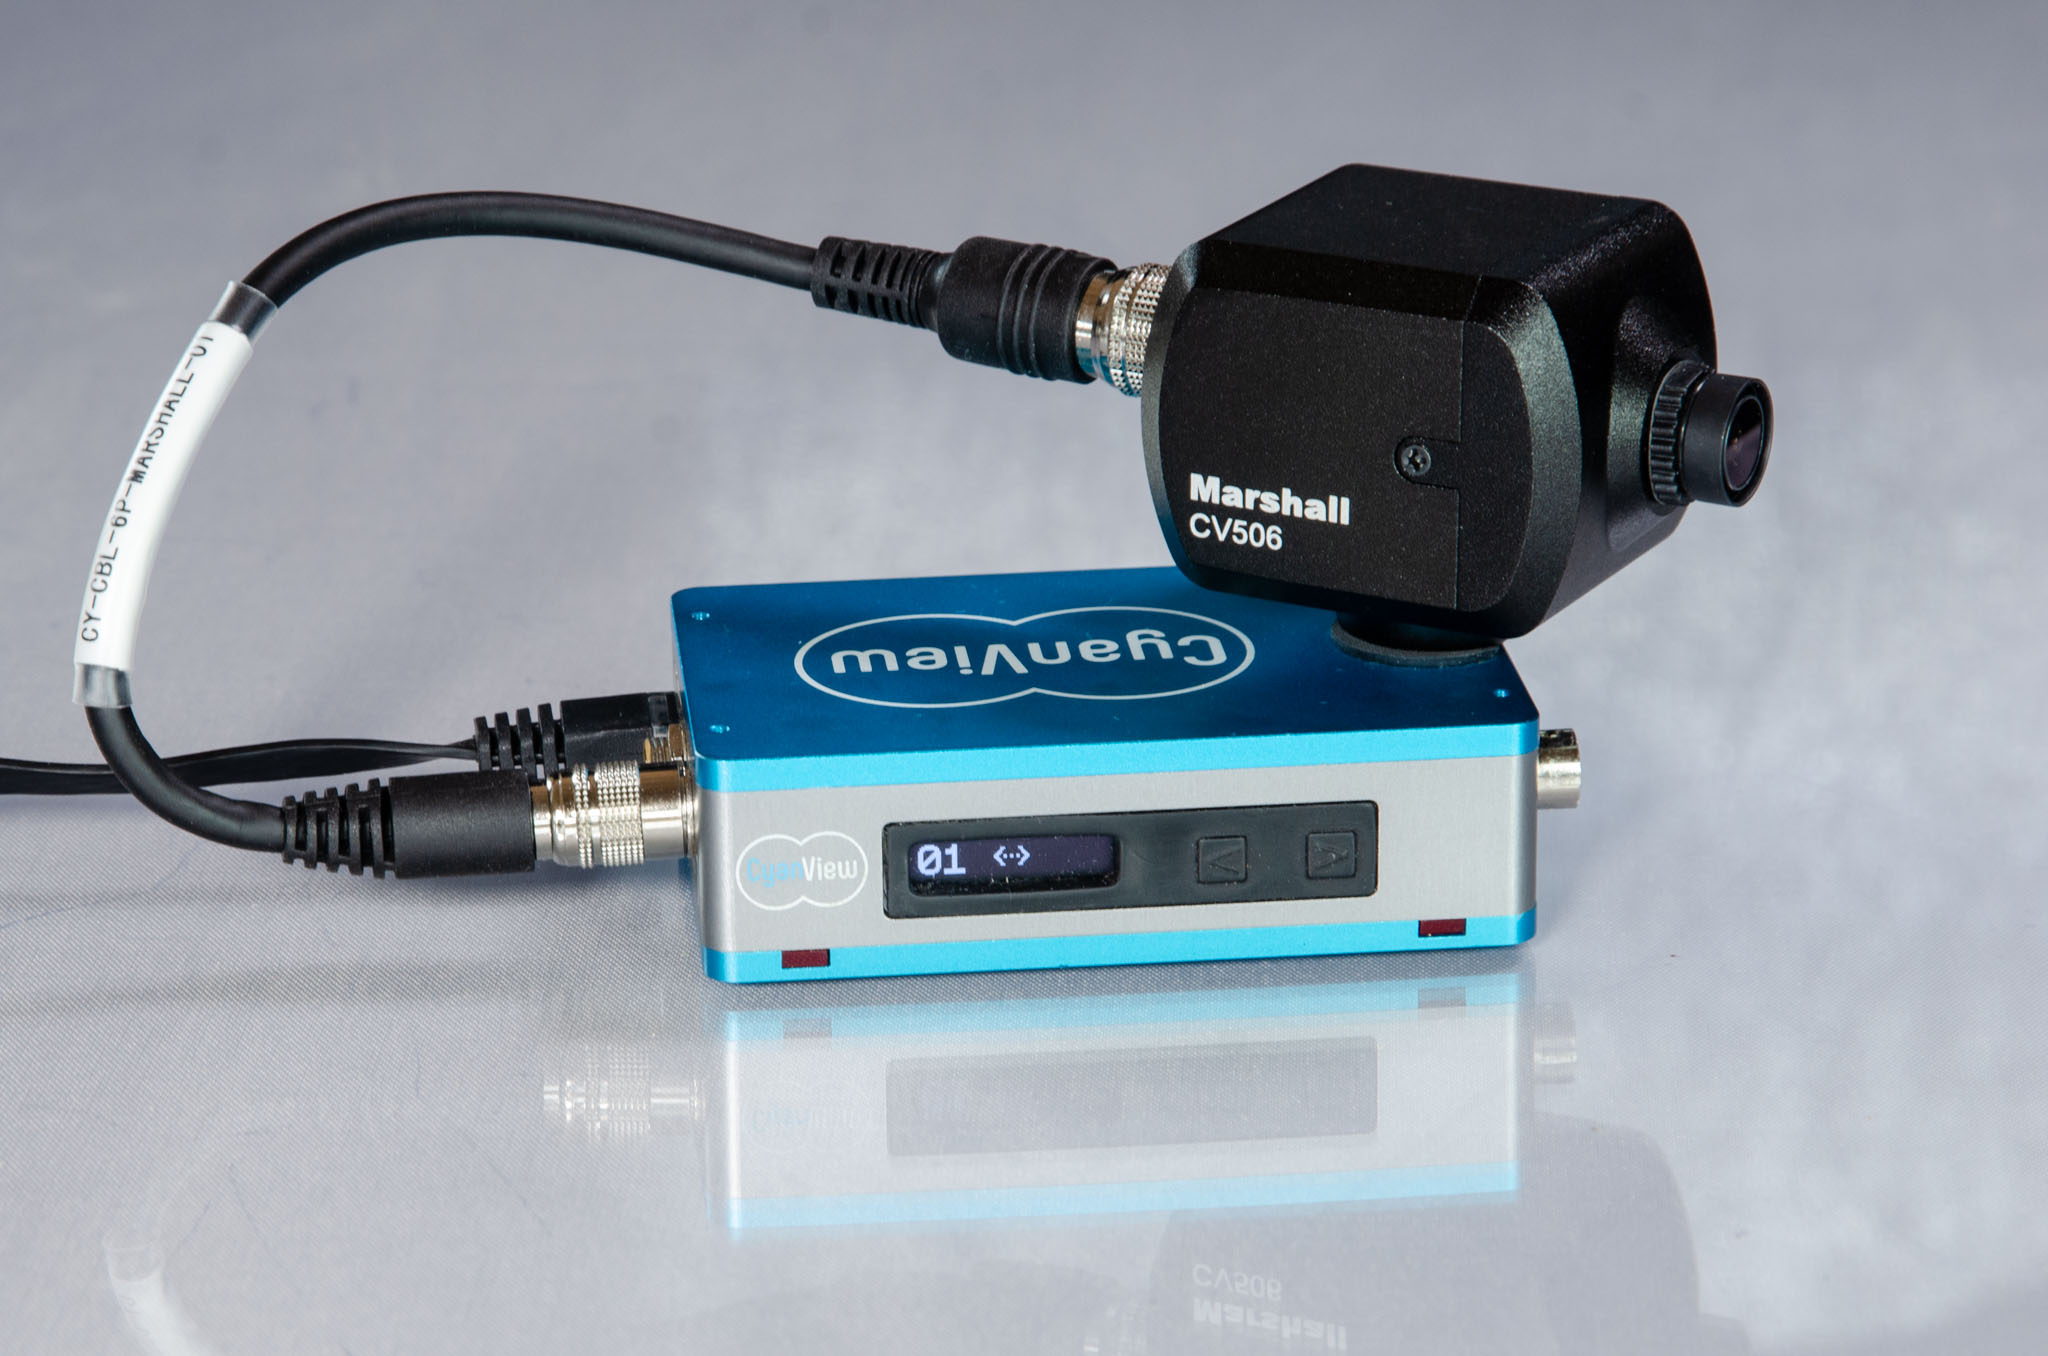
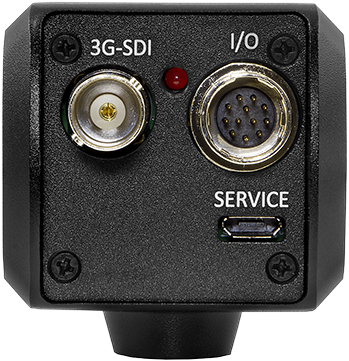
Newer Marshall cameras have a 12-pin Hirose connector for power and control. Cable P/N: CY-CBL-6P-MARS-02.

Connection Using the Marshall Breakout Cable
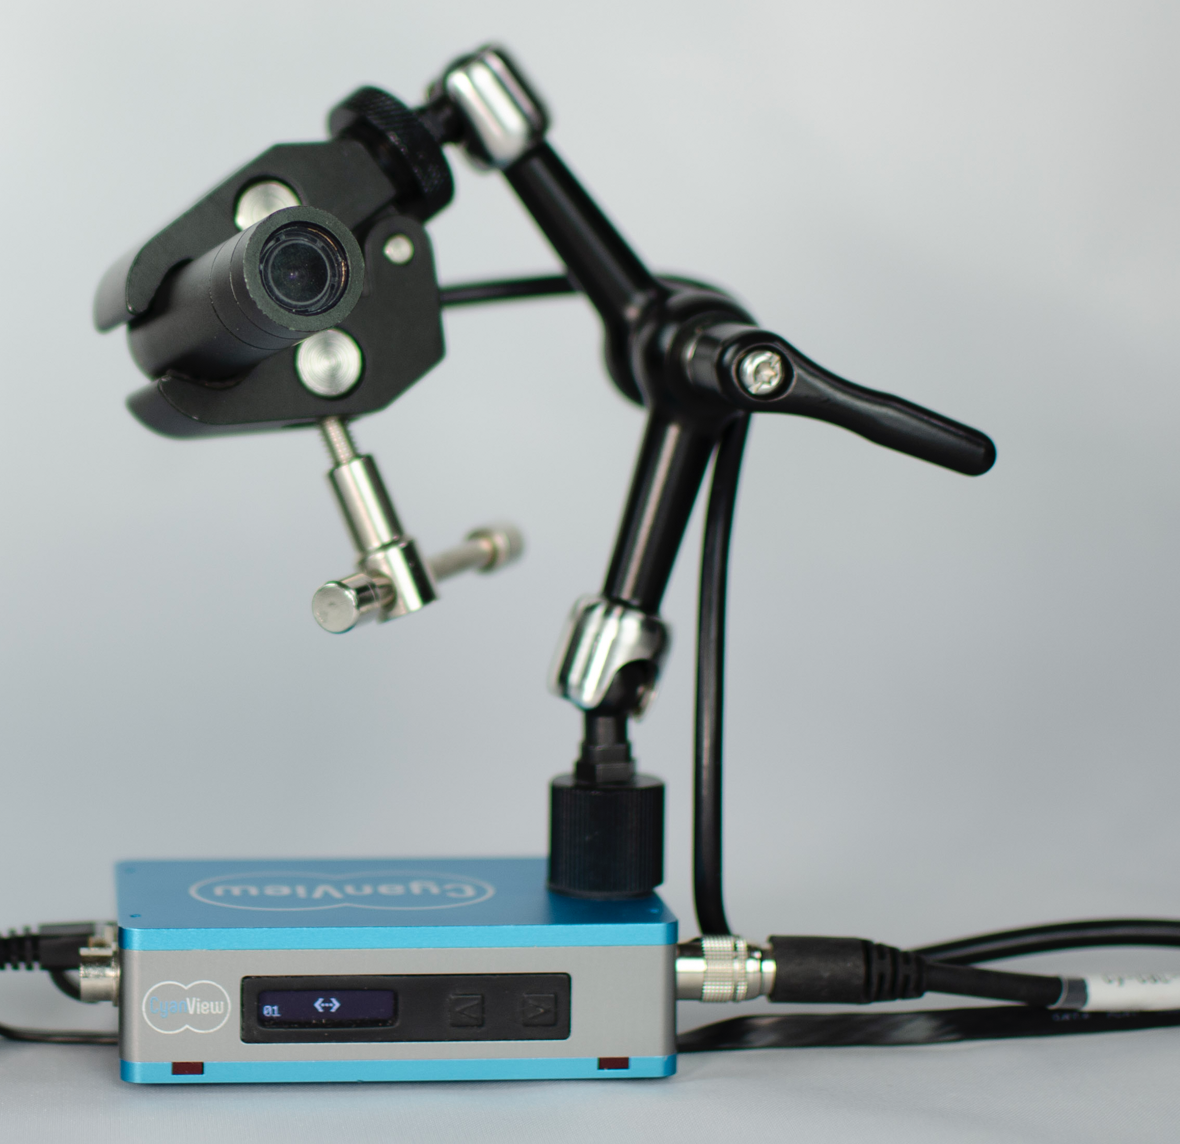
The CV225/CV226 bullet cameras and the Marshall breakout cable end in a DC 5.5x2.1 power jack and a Phoenix block connector for RS485 control. CY-CBL-6P-PFAN fits these two connectors.
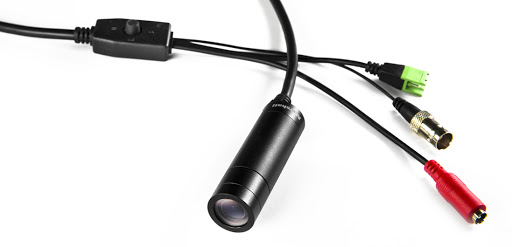

CY-CBL-6P-PFAN is a generic fanout cable with a separate DC jack for power. It doesn't come with the Phoenix block connector, but Marshall provides one with the cameras. Follow the diagram to connect it.
Connection Using Push-Lock Connectors
For the CV502/CV530 and similar cameras. Cable P/N: CY-CBL-6P-FAN.
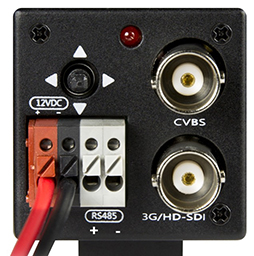

CY-CBL-6P-FAN is a generic fanout cable. Cut the yellow and blue wires, which are not needed for this Marshall camera.
Advanced Setup
RS485 Bus
VISCA allows up to 8 cameras on one RS485 bus. When a VISCA bus is added and assigned to a CI0 serial port in the configuration, up to 8 interfaces become available. Give each camera a different address (see "Communication Settings") and select the port matching that address in the configuration GUI.
Troubleshooting
1. The Camera Is Not Detected
- Verify the communication settings: the baud rate should be 9600 and the camera ID 1, unless you use a VISCA bus with multiple cameras.
- Check the cable and pinout: if you made your own cable, check the wiring against the diagrams in the Cable Catalog.
- Test for hardware issues: a defective RS485 interface is not uncommon. Compare with another unit of the same model, or test the camera with Marshall's control software and a USB-to-RS485 adapter. You should be able to control the camera with the Marshall software.
- Old firmware limitations: some older models or firmware versions don't acknowledge commands or send return data. The camera may then not be "detected" but still respond to control commands.
To test command reception without relying on feedback:
- Select the "Marshall Generic" model in the list.
- Disable bidirectional communication (see "Configuration in Unidirectional Mode" above).
- Use the
Camera > Menubutton on the RCP. All Marshall cameras share the same command for opening the on-screen menu, which helps confirm that control works.
2. The Camera Is in Black and White
The camera is probably in auto DAY/NIGHT mode. Set it to DAY so it doesn't switch to black and white when the light decreases. You also need to save the changed settings as startup defaults.
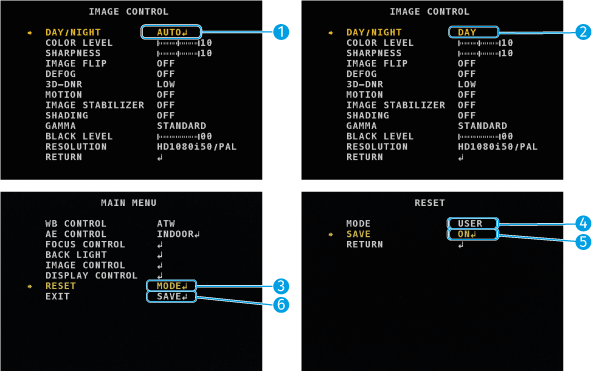
- In the "IMAGE CONTROL" menu, select "DAY/NIGHT".
- Change the value from "AUTO" to "DAY".
- In the "MAIN MENU", change "RESET" from "ON" to "MODE" and press select.
- Change "MODE" from "FACTORY" to "USER". The camera now starts up with USER settings instead of FACTORY.
- In "SAVE", select "ON" and press select. The current settings are saved as the USER startup settings.
- Exit the menus, which also saves.