RED Komodo / V-Raptor
https://support.cyanview.com/docs/Integrations/RED/Komodo
This guide explains how to control RED Komodo and V-Raptor cameras with a Cyanview RCP.

Wiring

Controls
| Function | Notes |
|---|---|
| Lens | Iris, focus, zoom |
| Exposure | Iris, shutter, gain/ISO, auto exposure |
| White balance | Auto (ATW), one push, manual |
| Primary corrections | Master black, master gamma, color gains, pedestal, saturation |
| Other | Tally (red) |
RCP Overview
Main View
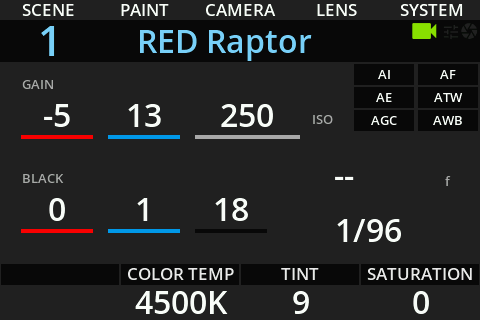
White Balance
Path: MENU > PAINT > WHITE

Click the first row to control R/G/B with the encoders. Click the second row to switch to color temperature and tint.

You can control:
- Presets: step through preset color temperatures (2800K, 3200K, 3800K, 4500K, 5600K, 7000K, 9000K)
- Color Temp: select any color temperature based on the camera's steps
- Tint
- Action (menu): set the A and B boundaries (minimum/maximum) for the color temperature
- A/B: direct access to the A and B boundaries
- Slider / A-B encoder: move the color temperature between the A and B boundaries
Black Balance
Path: MENU > PAINT > BLACK

ISO/dB
Path: MENU > PAINT > Gain

Matrix
Path: MENU > PAINT > Matrix
You can change the presets and enable/disable the matrix with the ON/OFF button.

Gamma
Path: MENU > PAINT > Gamma
In "Gamma", you can change the R/B/M (master) gamma.

In "Tables", you can change the OETF and the tone curve.

The tone curve list is updated based on the color space selected in the camera. You can check it on the RCP in MENU > PAINT > Matrix > Preset (Rec709 in the official example).
Shutter
Path: MENU > PAINT > SHUTTER
You can change shutter on/off, shutter in speed or angle, and ECS.

White Clip
Path: MENU > PAINT > KNEE
Saturation
Path: MENU > PAINT > COLOR

LUT
Path: MENU > PAINT > LOOK

Once LUTs are uploaded to the RCP (see "3D LUT Import/Export in the RCP" in Integrating a 3D LUT Processor), you can browse the LUT list.
- Clear: sets the camera's LUT to None
- Set: uploads the selected LUT to the camera
- ON/OFF: toggles the LUT
REC / TC
Path: MENU > RECORD
You can see the camera's timecode and trigger recording from the RCP.

Select a group and toggle it with the "Group" button to trigger recording on all cameras in that group. This only applies to cameras configured/imported on the RCP, so users usually set up one RCP with all the cameras (unlimited/broadcast version) and use it as an MSU and for this recording control.
The next tab lists all cameras with their timecode and recording status.

RCP/RIO Setup
- Connect the camera and your RCP/RIO to the same network.
- Add the camera in the RCP Configuration UI and enter a custom number, name, etc.
- Select the "Red" brand.
- Select the "Komodo" or "V-Raptor" model.
- Enter the IP address of your camera.
If your camera is in a different IP range from your RIO/RCP, see IP Configuration.

Once correctly connected, the block turns green.
