RCP UI - Scene Files
https://support.cyanview.com/docs/Manuals/RCP/RCPUI/RCPUIScene
Scene files let you save camera settings (paint values and so on) to slots and recall them later. From the RCP main view, there are two ways to access them:
- Press the SCENE button
- Press the MENU button, then navigate to SCENE
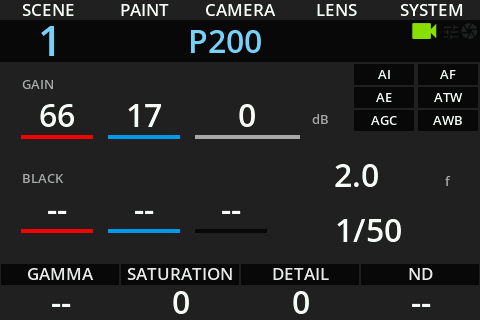
SCENE has two submenus:
- S. FILES: use the scene files (load, save, etc.)
- S. CONFIG: configure the behavior (folders, filters)
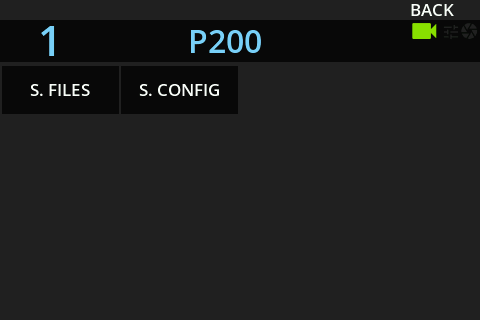
Once you are in a submenu (S. FILES or S. CONFIG), you can use:
- BACK button: go back to the previous view
- < / > arrow buttons: move between the submenu pages
- MENU button: go back to the main view
:::tip SCENE button vs. MENU button
- On a submenu page, pressing MENU takes you back to the main view. Pressing the SCENE shortcut then takes you back to the last SCENE page you were on (for example, S. FILES > Files).
- The last SCENE page and the MENU position are saved separately. If your last menu navigation was in another section (PAINT, for example), pressing MENU takes you there. MENU brings you back to SCENE only if you navigated there with the MENU button, while the SCENE shortcut always brings you to your last page in SCENE. :::
Quick Scene Files
This page provides a quick way to save and load scene files based on scene slots.
:::note RCP-J scene buttons The RCP-J has 5 scene file buttons, mapped to loading scene files 1-5. Note that:
- They only load the scene file slot (quick press). They do not save.
- Because the joystick module can be locked to a specific camera, its scene load buttons are linked to that same camera. So quick load on the RCP and quick load on the joystick, even though they work exactly the same way, may load different scene files on different cameras. :::
Save/Load
This main view lets you quickly:
- load a scene file
- save a scene file
- load/save on a whole camera group
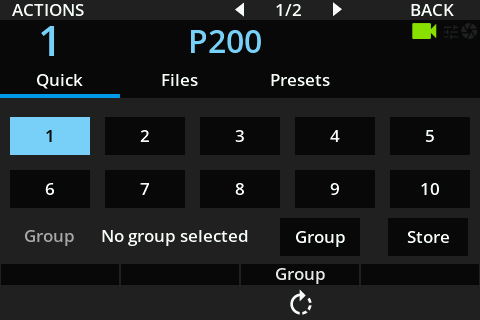
To save:
- Click Store. It is a modifier button: while it is engaged, you are saving rather than loading.
- Select the slot to save to.
- The last slot used is highlighted.
- You can overwrite a slot by clicking on it, even if it is highlighted.
- Once a slot is clicked, Store is disengaged and you are back in loading mode.
To load: simply click a slot.
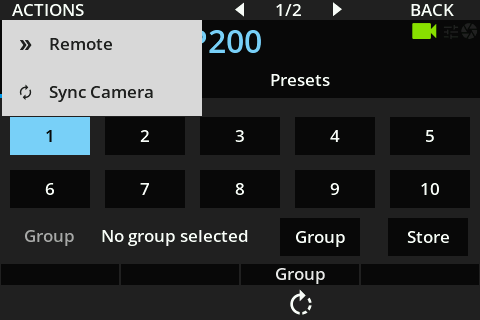
Actions
- Remote: a modifier that saves/loads on the remote device (if you use REMI from a RIO, it saves/loads on the RIO).
- Sync Camera: forces a refresh of the values from the camera. Useful for RF/wireless cameras.
Groups
See Camera Groups for how to set up groups. The group All exists by default, and every camera in the RCP configuration belongs to it.
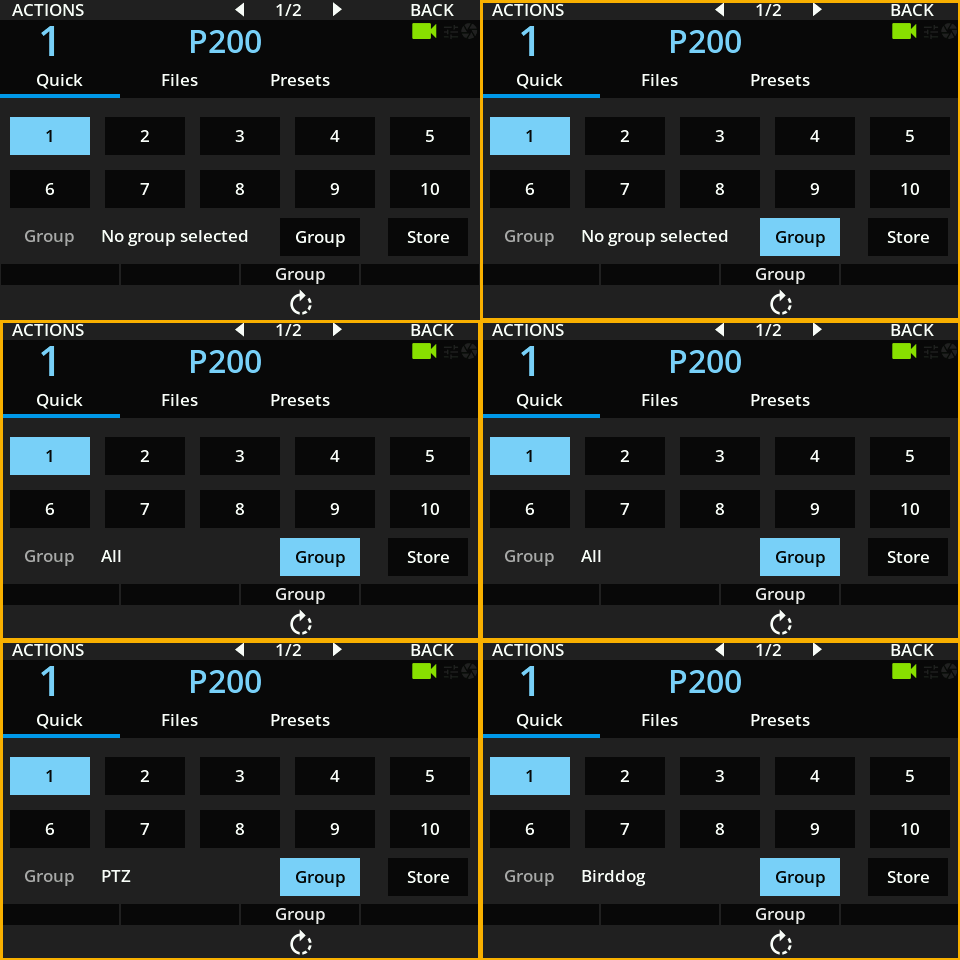
Once the group button is engaged, all actions are performed on the selected group rather than the selected camera. A yellow border on the RCP display shows that you are in group mode.
Files
MENU > SCENE > S. FILES > Files lets you store and load scene files with more options:
- See scene file names
- Rename scene files
- Change the source/destination camera
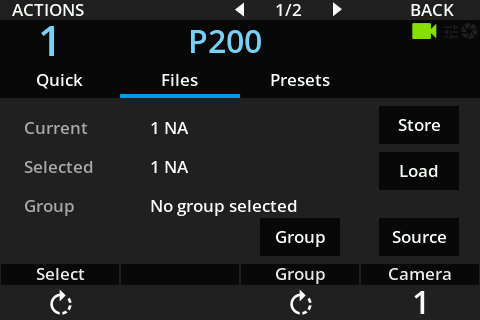
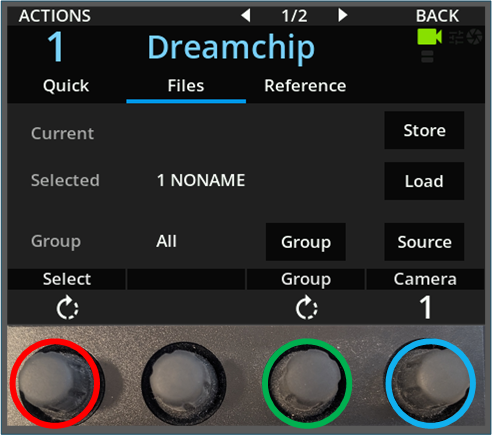
| Button/Encoder | Description |
|---|---|
| Current | The scene file currently loaded for this camera |
| Selected | The scene file slot you can Store to or Load from |
| Store | Saves the camera configuration into a scene file |
| Load | Loads a scene file onto the camera |
| Source | The camera to load from. Used when transferring a scene file from one camera to another |
| Select (encoder) | Changes the Selected scene file (highlighted in red) |
| Group (encoder) | Changes the selected camera group (highlighted in green) |
| Camera (encoder) | Changes the source camera number (highlighted in blue) |
Labels show the slot number followed by a description. For example, 1 N/A means slot 1 with no scene file stored.
Store/Save
- Use the first encoder to set Selected to the target slot (for example, 1). An empty slot is labeled
NA. - Click Store to save all painting parameters to that slot.
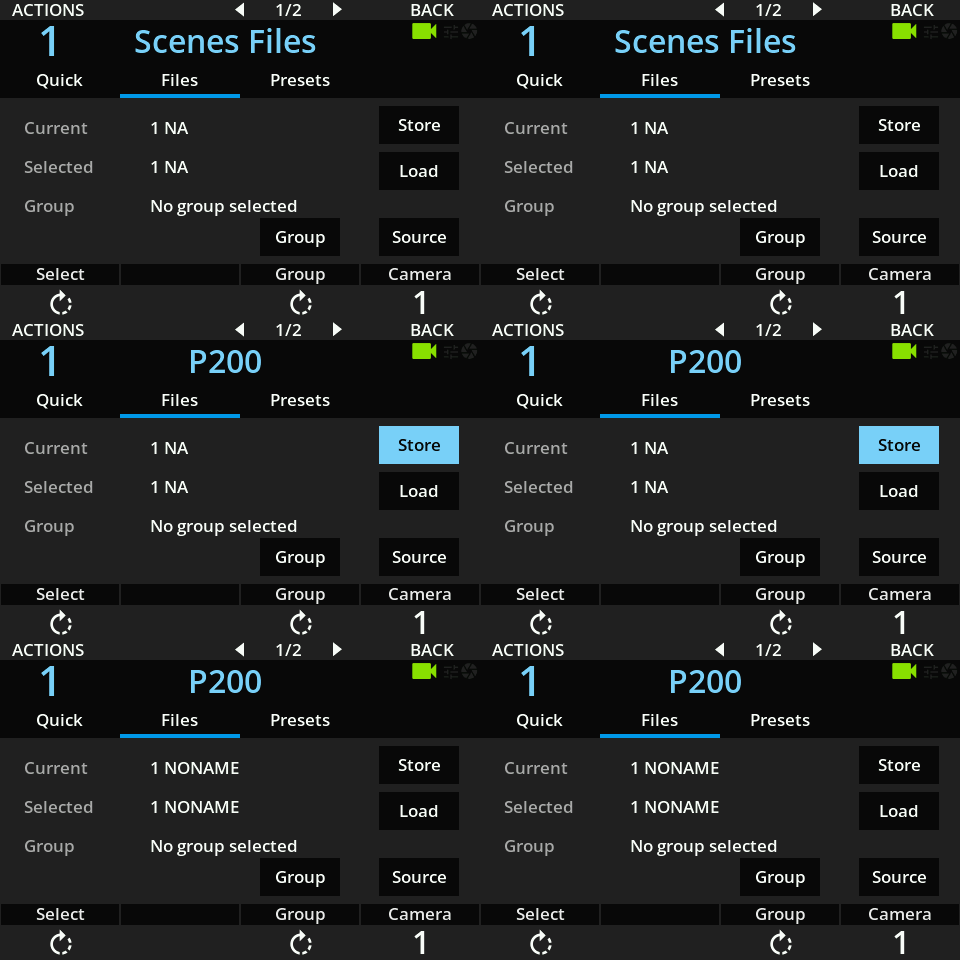
You can change another setting and then save it to another slot.
Load a Scene File
- Use the first encoder to set Selected to the slot you want to load.
- Click Load. Current changes to that slot.
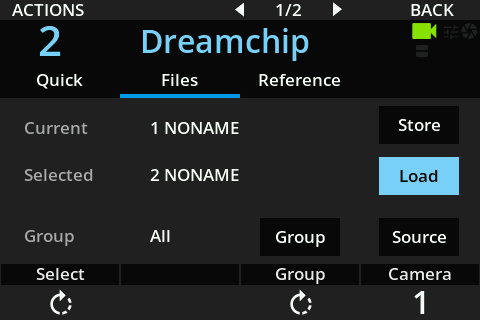
Copying Scene Files to Another Camera
Use the Source button and the Camera encoder.
:::caution There are two camera numbers
- Top left: the camera the RCP is currently controlling
- Bottom right: the camera that is the scene file source :::
- With the Camera encoder, select the camera that has the scene file (for example, camera 1).
- Using the left/right arrows or the switcher, navigate to the camera you want to copy to (for example, camera 2). The source camera stays at 1.
- Click Source. It should remain highlighted.
- Click Load.
Camera 2 slot 1 now has the scene file from camera 1 slot 1.
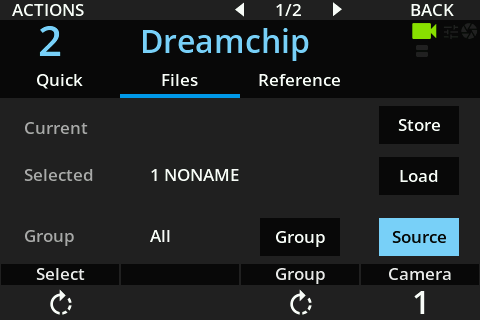
Files Actions
- Remote: saves/loads on the remote device (on the RIO when using REMI from a RIO)
- Sync Camera: forces a refresh of the values from the camera (useful for RF/wireless)
- Clear: deletes the selected slot file
- Rename: renames the selected slot file
To rename, select the slot, click ACTIONS → Rename, and confirm with ✔.
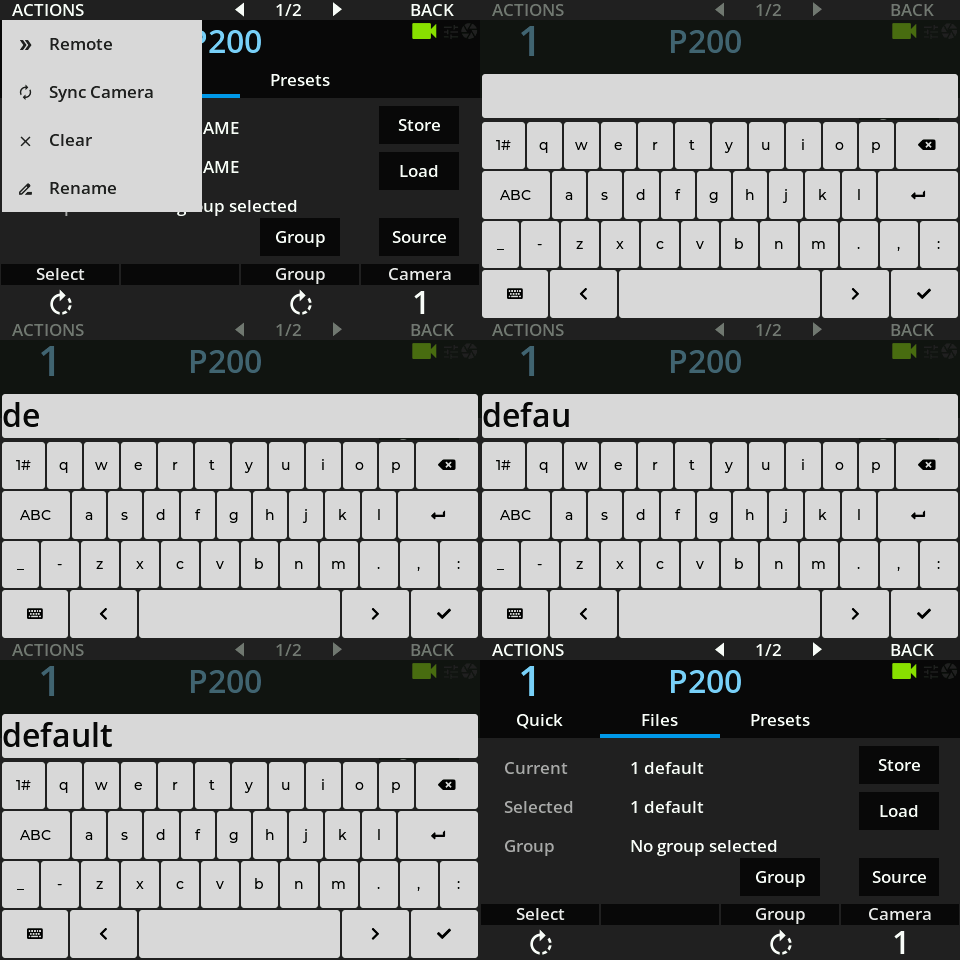
Viewing Scene Files from a Computer
Scene files are saved on the RCP as actual files. You can see your Cyanview devices in your computer's file browser (on a Mac, under Network in Finder).
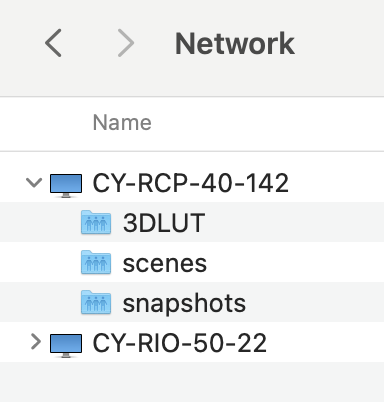
Each device exposes three directories:
3DLUT: stores 3D LUTs (some cameras and LUT boxes)scenes: stores scene filessnapshots: stores configuration snapshots
Files in scenes are named CAM-{CAM_NUMBER}.{SCENE_SLOT}.{SCENE_NAME}.scene.
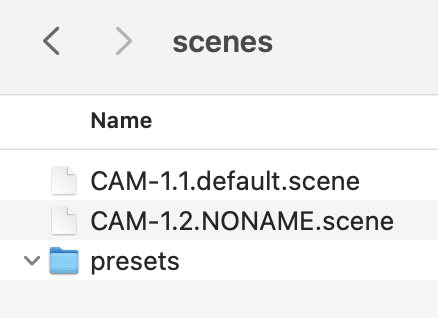
You can open .scene files in a text editor. They contain a list of parameters like this (excerpt):
lens/iris=16.0
exp=20.0
model=P200
master_gain=1 1.0 400.0
lens/iris_fstop=16
scene_filter=1F
number=1
On the computer you can:
- rename a file by changing the
SCENE_NAMEpart of the filename - copy a file and change
SCENE_SLOT - copy a file and change
CAM_NUMBER(to use it for another camera) - edit the text and enter a value manually (for example
lens/iris_fstop=4)
Group
The same logic as on the quick scene files page: with the group engaged, every action is performed on the group instead of the camera.
Presets
A preset is a read-only scene file that can't be deleted or renamed from the RCP (only from a computer).
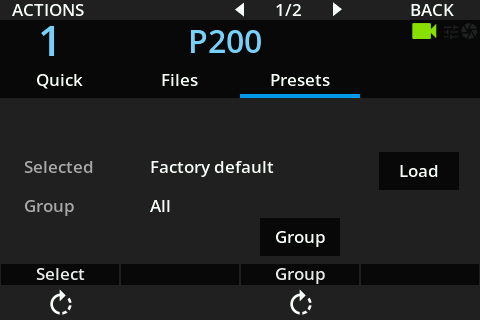
By default only one preset is available: Factory default. It resets the camera to the default values (in the Cyanview world).
To add your own presets:
- On the computer, open the
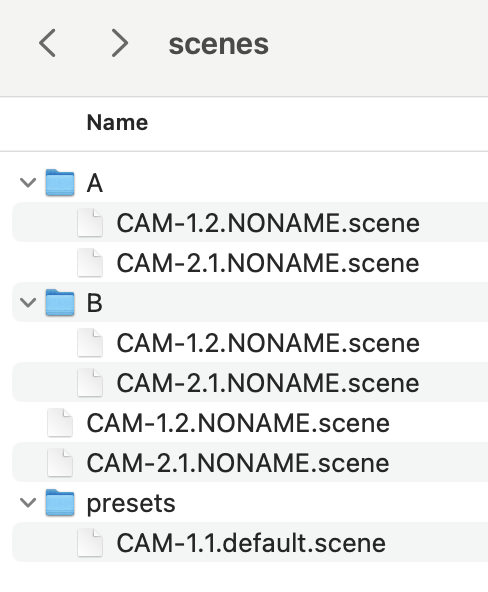
scenesdirectory and pick the scene file you want to turn into a preset (for exampleCAM-1.1.default.scene). - Copy (or drag and drop) it into the
presetsdirectory. - It is now available as a preset for camera 1.
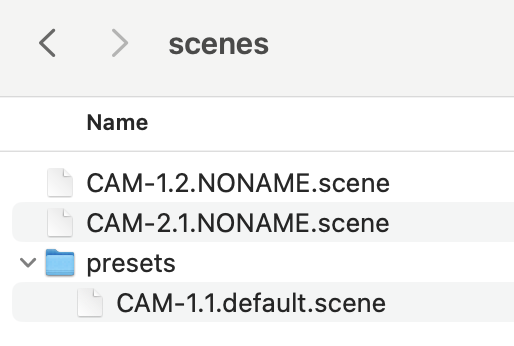
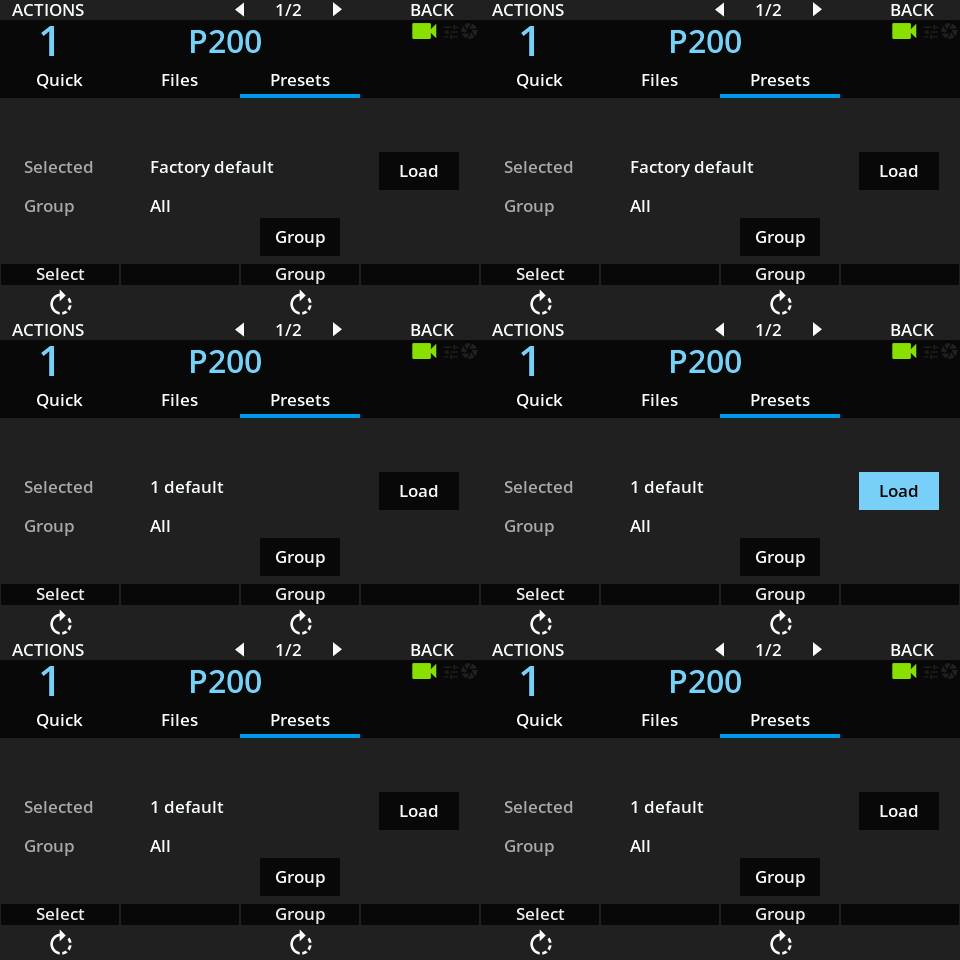
You can create presets for different cameras by changing the filename: CAM-{CAM_NUMBER}.{SCENE_SLOT}.{SCENE_NAME}.scene.
Loading a preset works exactly like loading a scene file.
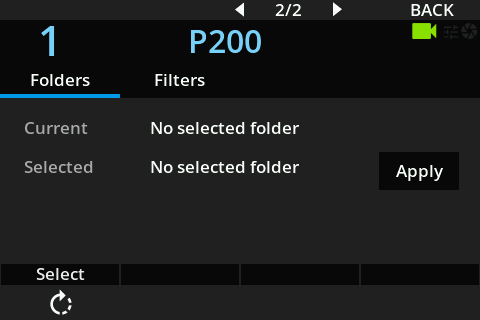
Folders
Folders let you organize scene files in subdirectories. By default, all scene files are stored in the root directory.
For example, you can create folders such as A and B on the computer, one per event, each holding its own scene files.
To switch folders (on the RCP):
- Change the base folder with the 4th encoder.
- Select the folder (for example
B). - Click Apply to confirm.
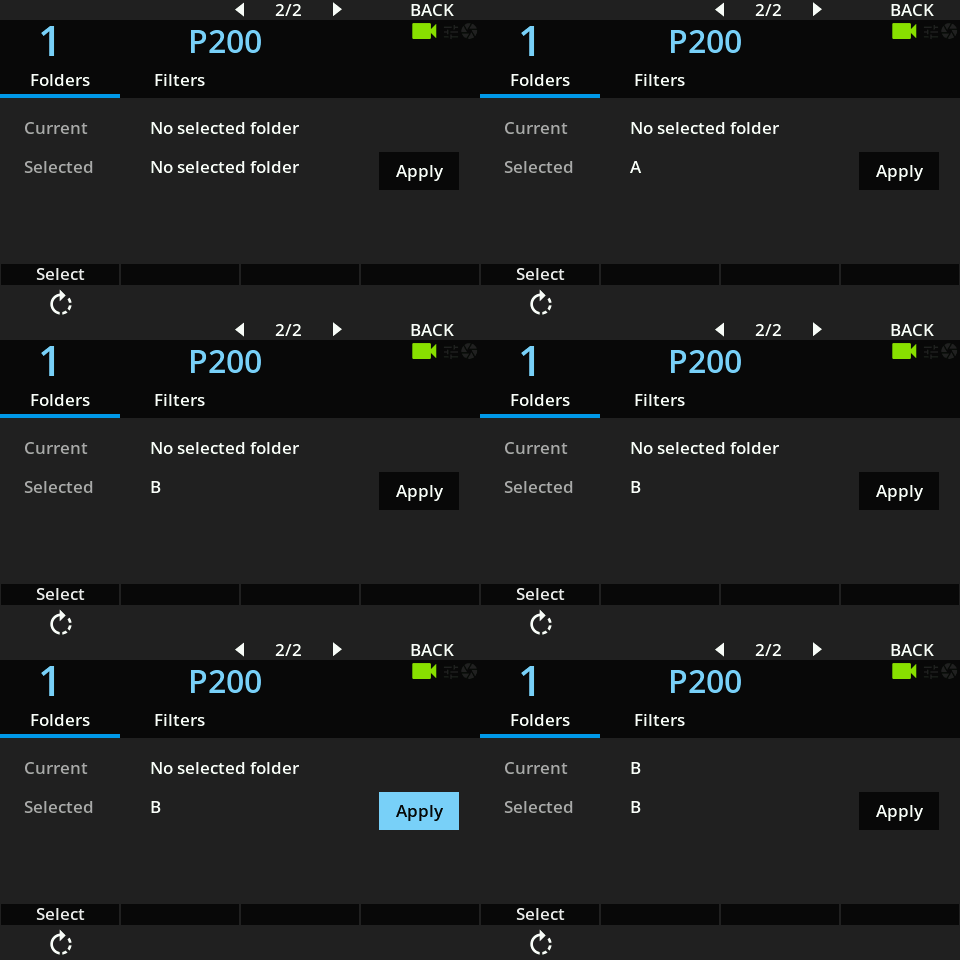
On the computer, current is a symbolic link to the folder selected on the RCP (here, B). Changing files in B or in current changes the same files under the hood. From then on, every load/save action is performed in this subdirectory.
To go back to the root folder, select No selected folder.
Filters
Filters select which parameters are applied when a scene file is loaded.
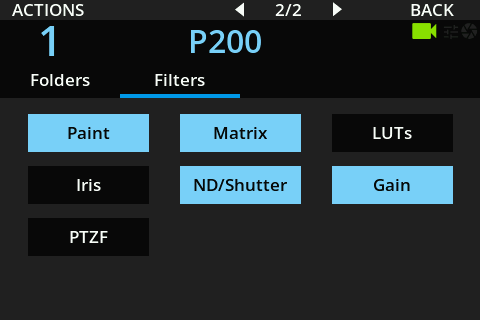
| Item | Contents |
|---|---|
| Paint | All paint parameters (white balance, black balance, etc.) |
| Matrix | All matrix parameters (matrix, multi matrix, etc.) |
| LUTs | LUTs |
| Iris | Iris |
| ND/Shutter | ND / shutter |
| Gain | Gain |
| PTZF | Pan, tilt, zoom, focus |
Saving always saves everything; this selection only affects loading.
ACTIONS > Reset Selection restores the default selection (Paint, Matrix, ND/Shutter, Gain).