VP4 Connection
Source
This content is based on Cyanview's official manuals. Always check the official page for the latest information and precise specifications.
https://support.cyanview.com/docs/Manuals/VP4Manual
https://support.cyanview.com/docs/Manuals/VP4Manual
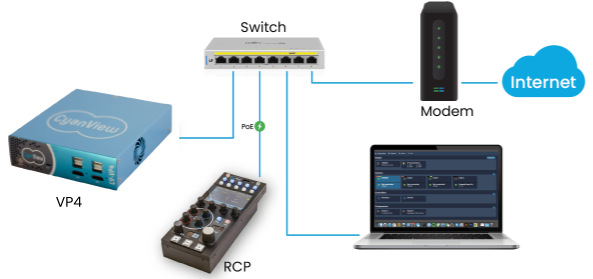
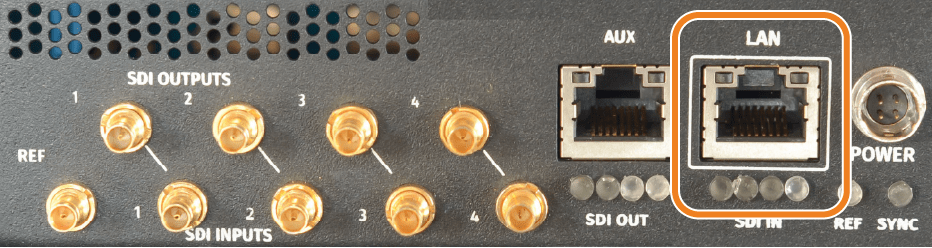
Step 1: Network Setup
Connect the RCP, the VP4's LAN port, and a computer to the same switch. For software updates, connect the switch to your internet access.
Step 2: Video Connection
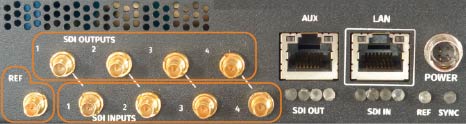
- Connector: DIN 1.0/2.3
- Video standards: 720p/1080i HD-SDI, or 1080p 3G-SDI (50/59/60fps)
- Reference: Supports Black Burst and Tri-Level
Step 3: Power On the VP4
Press and hold the power button to turn the VP4 on or off. The startup state is shown by the LEDs on the front panel.
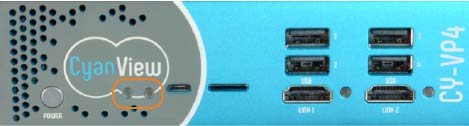
- 1st LED: Lights up green when the unit is powered
- 2nd LED: Lights up green once the unit has booted and is operational